Why I Keep Coming Back to This Chocolate Mousse Cake
Alright, so let me tell you – the first time I made this chocolate mousse cake, I was convinced the kitchen (and possibly my outfit) would never quite recover. There was cocoa powder all over the bench, a spatula stuck to the dog’s nose, and that anxious moment when you peek in the fridge every ten minutes like it’ll help things set faster. But boy, those three layers? Absolute bliss. Every time I make it now, I still remember how wild that first attempt was. At least now I only get a little chocolate on my shirt. Mostly.

Why You’ll Love This (And When I Make It)
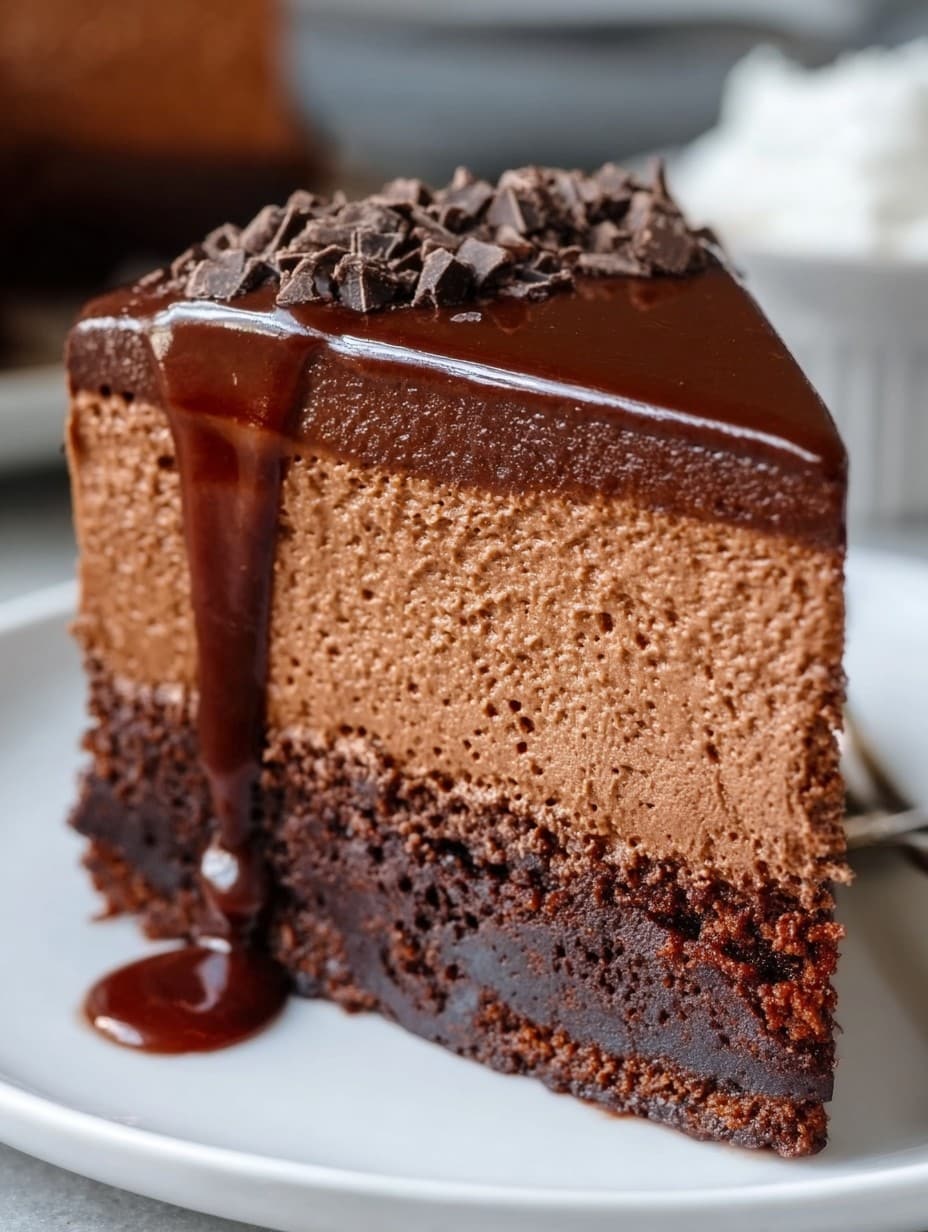
I whip up this cake for birthdays (especially my cousin’s – she’s a total chocolate fiend) or, honestly, whenever someone’s had a rough week and we need a pick-me-up. My family goes a bit bonkers for it because you get that rich soft cake at the bottom, then silky mousse, then a dreamy whipped topping. For real, I had a friend once tell me it was “almost too decadent to eat” (she didn’t let that stop her, of course). And let’s be honest, sometimes I make it just so I can eat the leftover mousse out of the bowl – perks of being the cook, right?
What You’ll Need (Plus My Substitution Rambles)
- For the Cake Base:
- 3/4 cup (90g) plain flour (if you only have self-raising, skip the extra baking powder – trust me, I’ve done it in a rush!)
- 1/4 cup (30g) Dutch cocoa powder (my grandmother swore by the pricier brands, but supermarket stuff is fine if that’s what’s in the pantry)
- 1/2 cup (100g) sugar
- 1/2 tsp baking powder
- Pinch of salt (I never measure, just a quick shake)
- 1/2 cup (120ml) milk (sometimes I just use oat milk when I’m running low)
- 1/4 cup (60ml) neutral oil or melted butter
- 1 large egg
- 1 tsp vanilla
- For the Chocolate Mousse:
- 200g dark chocolate (I’ve used everything from 50% to 70% cacao, depends what’s lying around)
- 3 eggs, separated
- 1/4 cup (50g) sugar
- 1 cup (240ml) heavy cream (sometimes single cream if that’s what you’ve got, just don’t overwhip)
- Pinch of salt
- For the Whipped Cream Layer:
- 1 cup (240ml) heavy cream
- 2 tbsp sugar (or honestly, just a heaped spoon if you’re eyeballing it)
- 1 tsp vanilla extract
- Optional: chocolate shavings or berries for the top – or both if you’re feeling extra fancy
The Directions (With a Few Tangents)
- First things first, preheat your oven to 350°F (180°C), and line an 8-inch (20cm) springform pan with baking paper. If yours is a bit wonky – mine is – patch the edges, no shame.
- Cake Base: Whisk together your dry cake ingredients in a bowl (I tend to make a mess at this stage, flour up the nose included). In another bowl, mix the wet stuff until smooth. Pour wet into dry, stir till combined – don’t overthink it, just until you see no more streaks. Spread into the pan. Bake about 15 minutes, or until it springs back if you give it a poke. Cool in the tin completely; go walk the dog or binge a show – it’ll take a minute.
- Mousse Layer: Melt your chocolate gently, either over a saucepan of simmering water (fancy) or just ping it in the microwave in 20-second sprints, stirring each time. Let it cool a smidge so it doesn’t scramble your eggs (learned THAT the hard way).
In one bowl, whip the cream to those soft peaks, then set aside. In another bowl, whisk egg yolks with sugar till pale and a bit frothy (elbow grease time). Stir in cooled, melted chocolate. In a separate bowl (yes, so many bowls, sorry), whip up the egg whites with a pinch of salt until stiff. Fold cream into chocolate mix, then gently fold in the egg whites in two batches. If it looks streaky, that’s fine. Pour mousse onto cooled cake. Refrigerate for at least 2 hours; overnight if you can be bothered waiting (I’m rarely that patient). - Whipped Cream Layer: About an hour before serving, whip cream, sugar, and vanilla together until thick, like clouds but, y’know, edible. Slather over set mousse, not worrying if it looks a bit rustic (mine always does). Decorate with anything you fancy – I usually go with a blizzard of dark chocolate shavings and maybe a stray berry if it’s leftover from breakfast.
Things I’ve Learned Along the Way (a.k.a. Notes)
- If you forget to cool the chocolate enough before mixing, you get weird lumpy bits. Still tasty, but not quite the look I was going for.
- Try not to eat too much mousse before it goes on the cake – or just own it and call it kitchen quality control.
- The cake base freezes well, so sometimes I make two at once, just for a lazy future dessert. Or just…because.
Experimenting: Variations That Actually Work (And One That Didn’t)
- I once swapped the cake base for brownies. Turns out, you need a really sturdy brownie; mine ended up kind of…gloppy. Wouldn’t recommend unless you like cake chaos.
- I’ve used white chocolate in the mousse – it’s super sweet, but my niece loved it (kids, right?)
- For an adults-only twist, a tablespoon of espresso powder or a glug of Irish cream goes great in the mousse layer.
Do You Really Need Fancy Equipment? Probably Not!
A stand mixer is nice, but I usually just grab a big bowl and a hand mixer (once, I used a regular whisk and pure stubbornness, so don’t let gear stop you). Springform pans do help, but if you only have a regular tin, just line it really well and serve it straight form the tin. Who’s judging?
How to Store This Cake (But It Might Not Last)
Keep it in the fridge, covered loosely with plastic or foil. It’ll stay lovely for 2-3 days…but honestly, in my house, it never lasts more than a day! If you do manage leftovers, it tastes even more chocolatey the next day. Maybe don’t freeze the whole thing unless you like weird ice crystals in your mousse.
How We Serve It (Family Quirks Included)
We go big – fat slices, a few extra berries on top, and sometimes a scoop of vanilla ice cream on the side (especially if someone’s had a particularly rough Monday). There’s always arguing over who gets the biggest slice, so I try to make sure every bit has all three layers. And yes, candles if it’s someone’s birthday (even when it isn’t, because why not?).
Pro Tips (Mostly Learned the Hard Way)
- I once tried to rush the mousse setting time – big mistake, it all slid off when I cut it. Just let it chill, even if it’s annoying waiting.
- Certainly don’t overwhip the cream topping, unless you want butter. Actually, I tend to underdo it a little, just to be safe.
- Double check your pan is actually clasped tight. Been there, done that, cake on the counter.
FAQ – Real Questions I Get from My Friends
- Can I make this ahead of time?
- Sure can – actually, it tastes even better the next day because everything has time to meld together. That is, if you can keep people from sneaking slices.
- Do I have to use dark chocolate?
- You don’t, but milk chocolate makes the mousse pretty sweet. The dark gives a nice balance. But hey, live a little!
- Can I skip the cake base?
- Technically yes – just double up the mousse for a flourless dessert. It’ll be super rich, though.
- What if my mousse doesn’t set?
- If the fridge is cold enough, it’ll be fine. If not – call it a parfait and hand out spoons. (Actually, that’s not a bad idea for summer – mousse sundae anyone?)
- Wait, are the eggs raw?
- Yep, classic mousse has raw eggs. Use super fresh ones, or do the whole safe pasteurized egg thing if you prefer. I’ve never had a problem, but do what makes you comfortable.
So there you have it – my not-so-perfectly scientific, yet totally dreamy, chocolate mousse cake. If you try it out, let me know if yours turned out less wonky than mine (or if you got chocolate on your dog, too).
Ingredients
- 1 cup all-purpose flour
- 1/2 cup unsweetened cocoa powder
- 1 cup granulated sugar
- 1/2 cup unsalted butter (softened)
- 4 large eggs (separated)
- 1 teaspoon vanilla extract
- 1/2 cup whole milk
- 1 1/2 cups heavy cream
- 8 oz semi-sweet chocolate (chopped)
- 1 packet unflavored gelatin (2 1/2 teaspoons)
- 1/4 cup water
- 1/2 cup powdered sugar
- 1/2 cup dark chocolate chips (for ganache)
- 1/4 cup heavy cream (for ganache)
Instructions
-
1Preheat the oven to 350°F (175°C). Grease and line an 8-inch round cake pan. In a bowl, whisk together flour, cocoa powder, and sugar.
-
2In a separate bowl, cream butter and 2 egg yolks until fluffy. Stir in vanilla extract and milk. Gradually add dry ingredients, mixing until combined. Fold in stiffly beaten egg whites. Pour batter into the prepared pan and bake for 25-30 minutes. Let cool completely.
-
3Prepare the chocolate mousse: Sprinkle gelatin over 1/4 cup water and let bloom for 5 minutes. Melt chocolate in a double boiler. Whip 1 1/2 cups heavy cream to soft peaks with powdered sugar. Stir bloomed gelatin into melted chocolate, then gently fold chocolate into whipped cream to make the mousse.
-
4Spread the chocolate mousse evenly over the cooled cake base. Refrigerate for at least 2 hours or until set.
-
5To make the ganache, heat 1/4 cup heavy cream until just simmering and pour over dark chocolate chips. Let stand for 1 minute, then stir until smooth. Pour ganache over the mousse layer and refrigerate until fully set, about 1 hour.
-
6Remove cake from pan, slice, and serve chilled. Enjoy the three decadent layers of chocolate bliss.
Approximate Information for One Serving
Nutrition Disclaimers
Number of total servings shown is approximate. Actual number of servings will depend on your preferred portion sizes.
Nutritional values shown are general guidelines and reflect information for 1 serving using the ingredients listed, not including any optional ingredients. Actual macros may vary slightly depending on specific brands and types of ingredients used.
To determine the weight of one serving, prepare the recipe as instructed. Weigh the finished recipe, then divide the weight of the finished recipe (not including the weight of the container the food is in) by the desired number of servings. Result will be the weight of one serving.
Did you make this recipe?
Please consider Pinning it!!




