Alright, Here’s the Christmas Cookie That’s Got it All (and Then Some)
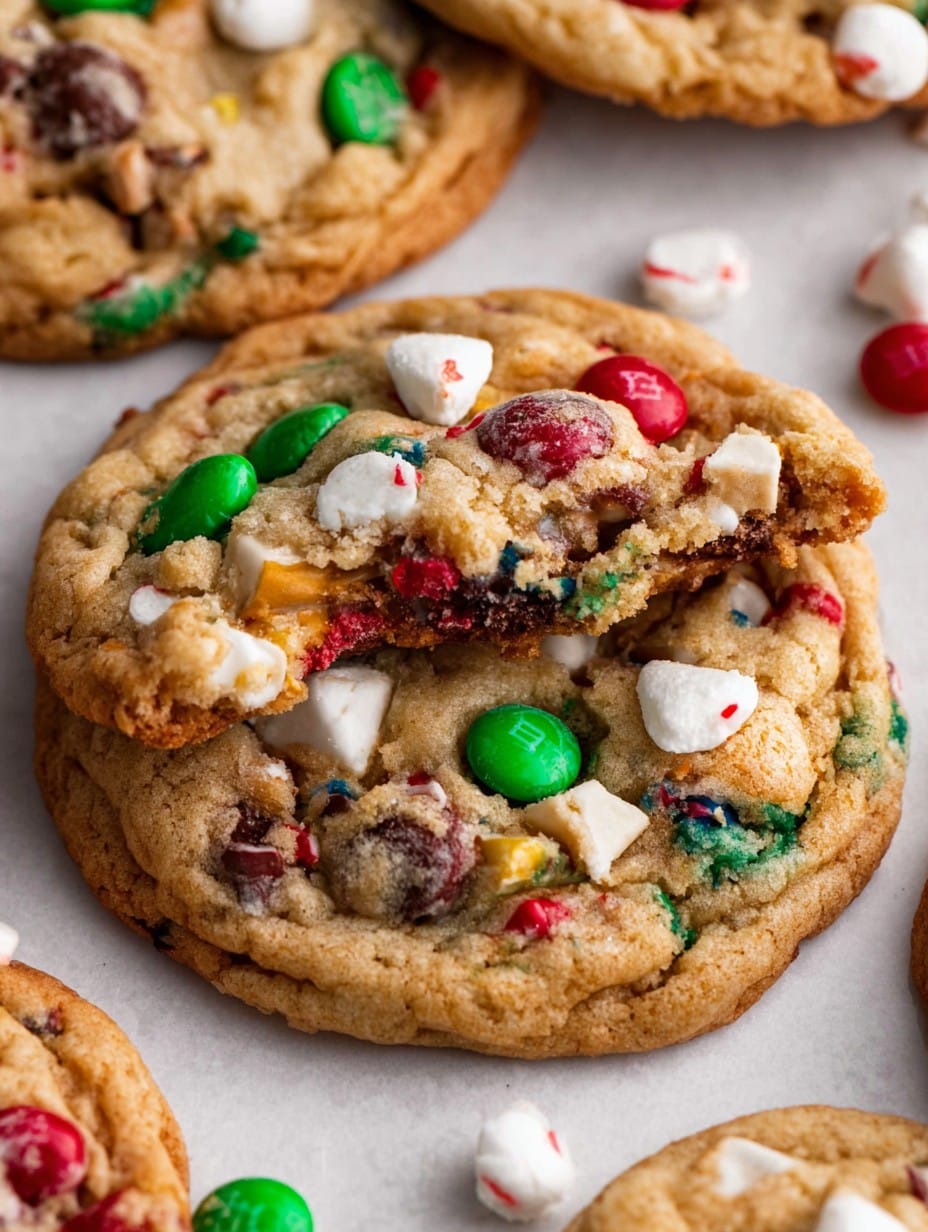
Hey! So, Christmas baking season rolls around and my kitchen looks like Santa’s elves threw a party and left half-open bags of everything in their wake. That’s honestly how these Christmas Kitchen Sink Cookies started. I was tired (okay, a little lazy) and didn’t want to measure out fancy ingredients for yet another picture-perfect treat. So I chucked in whatever was lurking in the pantry. Turns out, my family went bonkers for them. I even got a thumbs up from my neighbor, who usually makes Martha Stewart look like an amateur. True story: last year I tried making a triple batch during a holiday movie marathon, only to discover I was out of butter three-quarters in. I used margarine—don’t judge me. They still vanished! So, let’s make a mess and some memories, yeah?
Why I Make These Every Year (and You Might, Too!)
I make this whenever I want to get rid of the odds and ends in my baking drawer—white chocolate chips, leftover toffee bits, M&Ms from trick-or-treating that survived my snacking (barely), you name it. My kids go nuts (sometimes literally) for these Cookies because they find something different in each bite. Sometimes I’ll think: “I bet I used too many pretzels,” but they always tell me no, not possible, more crunch! The dough is forgiving, like an old friend who doesn’t mind if you’re a little behind on Christmas cards.
All the Bits and Bobbles: Ingredients You’ll Need
- 1 cup (225g) unsalted butter, softened (once I used salted butter and, honestly, nobody noticed)
- 1 cup packed brown sugar (light or dark, or half-and-half if you’re scraping the bottom of the bag)
- 1/2 cup granulated sugar
- 2 large eggs (room temp is best, but I’ve used cold in a pinch…shh)
- 1 tablespoon vanilla extract (my grandmother swore by the real stuff, but I think the fake is fine if that’s what you’ve got)
- 2 1/3 cups (about 290g) all-purpose flour
- 1 teaspoon baking soda
- 1 teaspoon sea salt (skip if you used salted butter, or don’t—up to you)
- 1 cup semi-sweet chocolate chips (swapped with dark chocolate more than once, no regrets)
- 1/2 cup white chocolate chips
- 1/2 cup holiday sprinkles (the more garish the better, in my opinion)
- 1/2 cup chopped pretzels or potato chips (crushed a bit, but not pulverized)
- 1/2 cup red and green M&Ms (or, honestly, any color—nobody ever complained)
- 1/3 cup toffee bits (sometimes I leave these out, because I ate them all… oops)
- Optional: handful of chopped nuts, coconut, peanut butter chips—live a little
Let’s Make a (Delicious) Mess: Step-By-Step Directions
- Preheat your oven to 350°F (175°C) and line a couple of baking sheets with parchment. Or, if you forgot to buy parchment (I always do), just grease ‘em lightly. Works fine.
- Cream butter and both sugars in a big bowl. I use a mixer, but a strong arm and a wooden spoon will do. When it’s nice and fluffy, add in the eggs and vanilla. Beat until it looks like, well, cookie dough. This is usually where I sneak a taste (don’t tell my mom).
- In another bowl, mix flour, baking soda, and salt. Carefully add it to your wet mixture bit by bit. If your kitchen looks like you brought in a snowstorm, you’re doing it right.
- Here comes the fun – dump in all the chocolates, sprinkles, pretzels, M&Ms, and whatever else you’ve got. Stir gently. It’ll feel chunky and maybe a little weird, but that’s exactly how it should be.
- Scoop out mounds – about 2 tablespoons each? I just use my favorite beat-up soup spoon. Space them out a bit, they’ll spread.
- Bake for 9-11 minutes. You want golden edges and soft, just-set middles. Don’t overbake—unless crunchy cookies are your thing (no judgment). Pull them out and let them sit on the tray for a minute or two before moving to a wire rack. Or your mouth, if you’re impatient like me.
Things I’ve Learned (the Hard Way)
- If your dough feels too sticky, pop it in the fridge for 30 mins. Or don’t—the cookies will still taste good, just a bit more spread out.
- I once thought more baking soda = puffier cookies. Nope. Just weird aftertaste. Stick with the amount above!
- Don’t stress about mix-ins. I’ve used broken bits form the bottom of the chip bag… actually, not the worst idea I ever had.
Mix Things Up: Wild Experiments and Odd Outcomes
- I tried candy canes once. It melted into a sad, sticky puddle. (Pass on that.)
- Mini marshmallows? Toasty and gooey but kind of make the cookies fall apart. Maybe save those for s’mores.
- Dried cranberries and white chocolate are surprisingly posh—try it if you want to impress your in-laws. Or yourself.
Tools You Might Need (and What to Do If You Don’t Have Them)
- Electric mixer (hand or stand, but I sometimes just use a bakers’ muscle and a wooden spoon!)
- Parchment paper or reusable silicone mats. Or go old school and butter your pans, it’ll work.
- Wire rack is handy but, on second thought, I’ve cooled cookies on a chopping board in a pinch.
- If you’re after uniform cookies and don’t own a cookie scoop, two normal spoons do the trick.
How Long Will These Last? (Not Long, Probably)
Technically, they keep in an airtight container at room temp for 3-4 days. But honestly, in my house, there’s barely a crumb left by the next morning. They freeze surprisingly well, though—just wrap ‘em up snug or use a container. Or eat straight from the freezer (no judgment, again).
How We Eat ‘Em: Serving Suggestions
There’s this thing we do every Christmas Eve: leave a plate for Santa, which inevitably means I’m sneaking a warm one with a glass of milk before bed. Try them with cocoa, or—controversial opinion—a strong cup of black coffee. Perfect for after-school snacks, if they last that long.
Things I’d Do Differently (Pro Tips, Learned the Slightly Painful Way)
- I rushed the creaming step once when my toddler was climbing the cabinets. Result? Flat as pancakes. Take time here if you can.
- If you want the cookies extra chewy, pull them out when the centers look underdone—that’s the sweet spot.
- I overloaded the dough with pretzels once and it turned a bit salty. Tasty, but my kids said “What happened to the chocolate?!”
FAQ: Your (Real) Questions Answered
- Can I double this recipe? Sure thing! (Just use a really big bowl. Or two—trust me, it sneaks up on you.)
- Can I make these ahead? Yuppers. I sometimes make the dough at night and let it chill in the fridge. Just brings out the flavor more, I reckon.
- What about gluten-free? Haven’t tried it, but some pals say this mix from King Arthur works a treat. Or check this blog for more detailed guidance.
- Can I freeze the dough? Oh, absolutely. Roll it into balls and freeze on a tray; toss them in a bag once solid. Just bake them a couple of extra minutes when you need a cookie fix. Or two.
- Wait, are kids allowed to eat raw dough? Official answer is no, but… let’s just say I still sneak a teensy taste. Old habits die hard.
And before I forget: if you’re changing it up, or want to talk cookies, drop me a note. Or just pop by with a plate—door’s always open, especially in the cold. Happy baking, mate!

Ingredients
- 1 cup unsalted butter, room temperature
- 1 cup brown sugar, packed
- 1/2 cup granulated sugar
- 2 large eggs
- 2 teaspoons vanilla extract
- 2 1/4 cups all-purpose flour
- 1 teaspoon baking soda
- 1/2 teaspoon salt
- 1 cup semi-sweet chocolate chips
- 1/2 cup white chocolate chips
- 3/4 cup crushed pretzels
- 1/2 cup dried cranberries
- 1/2 cup red and green M&Ms
- 1/2 cup chopped pecans (optional)
Instructions
-
1Preheat oven to 350°F (175°C) and line two baking sheets with parchment paper.
-
2In a large mixing bowl, cream together the butter, brown sugar, and granulated sugar until light and fluffy.
-
3Beat in the eggs one at a time, then add vanilla extract and mix until well combined.
-
4In a separate bowl, whisk together flour, baking soda, and salt. Gradually add dry ingredients to the wet ingredients, mixing until just combined.
-
5Stir in chocolate chips, white chocolate chips, pretzel pieces, dried cranberries, M&Ms, and chopped pecans (if using) until evenly distributed.
-
6Scoop heaping tablespoons of dough onto prepared baking sheets. Bake for 13–15 minutes or until edges are golden. Cool on sheets for 5 minutes, then transfer to wire racks to cool completely.
Approximate Information for One Serving
Nutrition Disclaimers
Number of total servings shown is approximate. Actual number of servings will depend on your preferred portion sizes.
Nutritional values shown are general guidelines and reflect information for 1 serving using the ingredients listed, not including any optional ingredients. Actual macros may vary slightly depending on specific brands and types of ingredients used.
To determine the weight of one serving, prepare the recipe as instructed. Weigh the finished recipe, then divide the weight of the finished recipe (not including the weight of the container the food is in) by the desired number of servings. Result will be the weight of one serving.
Did you make this recipe?
Please consider Pinning it!!




