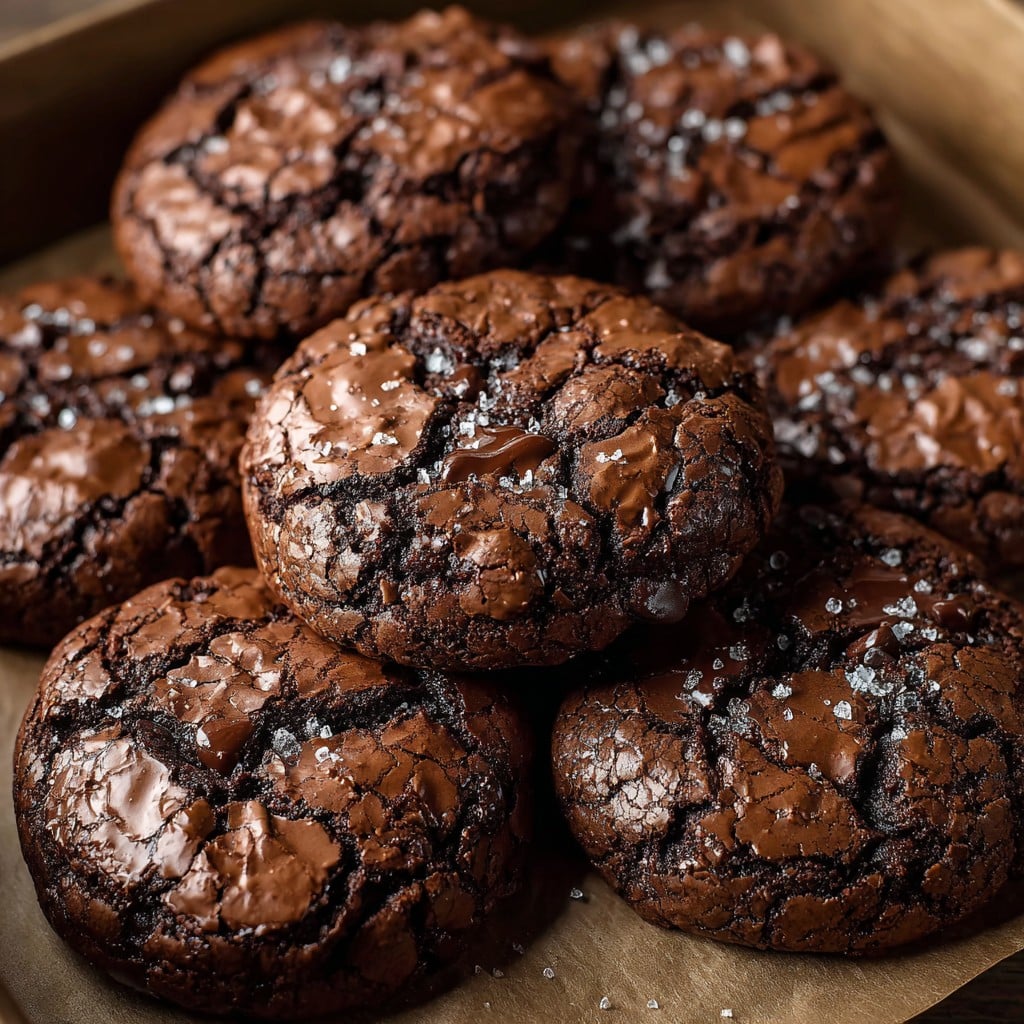
Let’s Be Real—Why Make Cookies From Brownie Mix?
So here’s the thing. Last Sunday, I’m standing in my kitchen, craving cookies, and all I had on hand was a random box of brownie mix shoved way at the back of the cupboard—it was practically winking at me. You know that kind of day? Anyway, instead of trekking to the shop (it was raining buckets), I decided to wing it. Mixed things up, probably made a bit of a mess, and—surprise—the cookies were a hit. My neighbor wandered by, snagged a couple (cheeky!), and then texted me for the recipe before I’d even finished stacking the cooling rack.
Honestly, these cookies are so forgiving. You don’t need to be Mary Berry. Perfect for when you want something chocolatey but you don’t want to, you know, try that hard. (Or you’ve got limited supplies and enthusiasm.)
Why You’ll Probably Fall For These
I make these whenever I want homemade cookies but can’t face faffing around with five million ingredients. My family goes absolutely wild for these cookies—and honestly, any time I bring them out for game night, they vanish faster than ice cream in August. If someone says, “just one more,” be suspicious. (Sometimes I hide a few for myself.) Oh, and if I’m feeling particularly wiped? I’ll use a box of gluten-free brownie mix or just whatever is marked down at Aldi. I used to try to chill the dough, then realized it honestly makes little difference here—the cookies are gooey either way.
What You’ll Need (But Feel Free to Improvise!)
- 1 box of brownie mix (about 18–20 oz; I sometimes just use whatever box looks loneliest in my cupboard. My gran swore by Ghirardelli, but really, Betty Crocker or store brand all do the trick.)
- 2 large eggs (In a pinch, I’ve subbed in flax eggs—came out a bit softer but still yum!)
- 1/3 cup vegetable oil or melted butter (Butter makes things richer, but let’s be honest, I only use it when I’m not feeling lazy.)
- 1/2 cup chocolate chips (totally optional, but I throw in a “handful”—which, for me, is whatever fits in my palm without spilling everywhere)
- 1 tsp vanilla extract (or, if you’re feeling fancy, a splash of strong coffee kicks the flavor up a notch)
Optional but fun: A sprinkle of flaky salt, because why not make things posh?
So… How Do You Actually Make Them?
- First, preheat your oven to 350°F (or 175°C for those who, unlike me, haven’t given up converting). Line a baking sheet with parchment paper or just grease it a bit—either way, works fine. (I once used foil and, erm, regreted it. Don’t do that.)
- In a medium bowl, toss in the brownie mix. I occasionally sift, but honestly? It only matters if yours is super lumpy.
- Crack in your eggs, pour in oil (or melted butter), and that splash of vanilla. Stir it all together with a wooden spoon or spatula—it’ll look thick, like brownie dough that gave up trying to be runny. Don’t sweat if it’s sticky—sometimes, I even use my hands for the last bit (great fun for kids, too, just, um, wash up after).
- Add chocolate chips (and anything else you fancy—walnuts, peanut butter chips, dried cherries?). This is usually where I sneak a taste, because, well, it’s basically tradition at this point.
- Scoop out heaping tablespoons (or use a little ice cream scoop if you’re posh, but two spoons does the trick). Plop them on your tray, leaving a bit of space—mine sometimes spread, sometimes don’t, depends on the mood I guess.
- Bake for 9–11 minutes. Don’t wait for them to look done—they set up as they cool (if in doubt, I check one and, more often than not, eat the evidence). If they look a bit gooey in the middle, that’s normal.
- Let them cool for 5–10 minutes (or, if you’re like me, burn your tongue because patience is a myth). They’ll firm up as they chill.
What I Wish I’d Known (Notes Form The Trenches)
- If you use extra-large eggs, the dough runs thinner and the cookies spread (found that out the messy way). Stick to large eggs—or adjust with a bit of extra mix if needed.
- Sometimes, the cookies end up a bit hard the next day, but a 10-second zap in the microwave brings them back to gooey life.
- If you want them super fudgey, underbake just a tad. Overbake? Well, they’re still edible. Just dunk them in coffee or milk like a civilized person.
Variations I’ve Messed Up (and a Few That Worked)
- Peanut butter swirl: Dropped blobs of PB on top. Gorgeous, but also, sometimes gets a bit messy when baking—maybe press ’em down a bit first?
- Chopped walnuts or pecans: Good for crunch; my family rebels if I put in too many, though.
- Espresso powder: I thought “ooh, trendy!”—but went overboard. A pinch is plenty unless you want cookies that taste like pure caffeine.
- On second thought, stuffing with caramel? Can be great, but the caramel explodes if it’s too runny. Go slow, or just use a Rolo (yup, really).
No Fancy Kit? Don’t Fret (Equipment)
If you’ve got a mixing bowl and a couple of spoons, you’re grand. I used to think cookie scoops were essential, but actually, two spoons or even (clean) hands work fine. Parchment paper helps with sticking, but if you’re out, a buttered tray or even a silicone mat does the trick.
How Long Do These Cookies Really Last?
Supposedly, you can store them in an airtight tin for up to four days. In reality, in my house, it’s basically one day before they’re gone. If by some miracle you have leftovers, they freeze well (stack between baking paper). Don’t forget to snag one for yourself, or trust me, you’ll open the tin and find nothing but crumbs.
But How Should You Serve Them?
I love them warm with a scoop of vanilla ice cream—that’s my little Saturday treat. My niece swears by dunking them straight in hot chocolate. Also, I once crumbled them over yogurt for breakfast, which felt slightly rebellious but worth it. If I’m feeling generous, I make little ice-cream sandwiches—no one’s sad about that.
What I’ve Learned The Hard Way (Pro Tips)
- Do not overbake. I once left them in for “just one more minute” and they set like bricks. Set a timer, even if you have to borrow your kid’s.
- The dough is thick—don’t panic. Knead it a bit if needed, just promise me you’ll avoid adding water. Tried it once, just… don’t.
- Parchment paper is your friend. Get the pre-cut kind if you’re chronically low on patience, like me. If you forget, just use more oil for greasing, and sneak a peek at Gemma’s backup ideas.
Questions I Actually Get About These (FAQ Time!)
- Can I use any brownie mix? Yup, honestly, any standard box mix. I’ve even tried gluten-free and vegan with minor tweaks; it still worked. If yours is oddly sized, just scale eggs/oil up or down a smidge.
- Can I make them ahead? For sure! The flavor’s even better the next day (I think, anyway). But, they soften up over time; a few seconds in the microwave and they’re as good as new.
- Help! My cookies are too flat. Probably too much oil or jumbo eggs (been there, done that). Next time, reduce a spoon or two of oil or add a touch of flour—even a big pinch. Or just roll with it; ugly cookies still taste great.
- What brands work best? I used Ghirardelli and Betty Crocker mostly. But really, Sally’s got a good round up if you love to deep dive.
- Can I halve the batch? Absolutely. But… why would you want to?
And hey, if this leads you down a box mix cookie rabbit hole, check out Taste of Home’s wild hacks for more ideas. Next time I might try swirling jam on top—you never know till you try!
Anyway—that’s my ramble on cookies from brownie mix. Give it a whirl, improvise, and save yourself (at least) one for later. If you have a go, let me know what worked and what, erm, exploded. Happy baking, mate!

Ingredients
- 1 box (18-20 oz) brownie mix
- 2 large eggs
- 1/3 cup vegetable oil
- 2 tablespoons water
- 1/2 cup semi-sweet chocolate chips
- 1/2 cup chopped walnuts (optional)
- 1 teaspoon vanilla extract
- 1/4 teaspoon salt
Instructions
-
1Preheat oven to 350°F (175°C) and line two baking sheets with parchment paper.
-
2In a large bowl, combine the brownie mix, eggs, vegetable oil, water, and vanilla extract.
-
3Mix until a thick dough forms, then stir in chocolate chips, chopped walnuts, and salt.
-
4Scoop tablespoon-sized amounts of dough onto prepared baking sheets, spacing each about 2 inches apart.
-
5Bake for 10-12 minutes, or until the edges are set but centers are still soft.
-
6Allow cookies to cool on the baking sheet for 5 minutes before transferring to a wire rack to cool completely.
Approximate Information for One Serving
Nutrition Disclaimers
Number of total servings shown is approximate. Actual number of servings will depend on your preferred portion sizes.
Nutritional values shown are general guidelines and reflect information for 1 serving using the ingredients listed, not including any optional ingredients. Actual macros may vary slightly depending on specific brands and types of ingredients used.
To determine the weight of one serving, prepare the recipe as instructed. Weigh the finished recipe, then divide the weight of the finished recipe (not including the weight of the container the food is in) by the desired number of servings. Result will be the weight of one serving.
Did you make this recipe?
Please consider Pinning it!!




