Let’s Talk About Deviled Strawberries (And My Fiasco With a Piping Bag)
Okay, so the first time I brought a plate of Deviled Strawberries to my book club, I had no idea they’d disappear faster than I could say, “Wait, I forgot the napkins!” I mean, I’m not exactly the queen of fancy desserts—once, I tried to pipe the filling with a sandwich bag and ended up with what looked suspiciously like squashed toothpaste. Still tasted great, though, so there’s that.

Anyway, this treat is dead simple, looks a little bit like you tried harder than you actually did, and no one expects strawberries to be filled like eggs. (It’s always good for a laugh when someone expects egg and gets sweet cream.) Trust me, even my neighbor who once called my cookies “interesting” asks for these every summer BBQ.
Why I Keep Coming Back to This Recipe
I make Deviled Strawberries when time gets away from me (which, let’s be honest, happens more than I like to admit). My family goes crazy for the creamy, cheesecake-ish filling, and if we’re having a lazy Sunday, I’ll whip up a batch and disappear for a bit—always come back to strawberry-stained fingers, like magic.
What keeps me coming back is how customizable this is. The first time I tried, I was out of cream cheese. Used Greek yogurt instead. Honestly, it was okay, but a bit too tangy for my taste. The filling, though, can be fiddly if you’re impatient. I once tried to fill the berries before it chilled enough—lesson learned; patience actually is a virtue (but late-night cravings are real!).
What You’ll Need (And What You Can Swap)
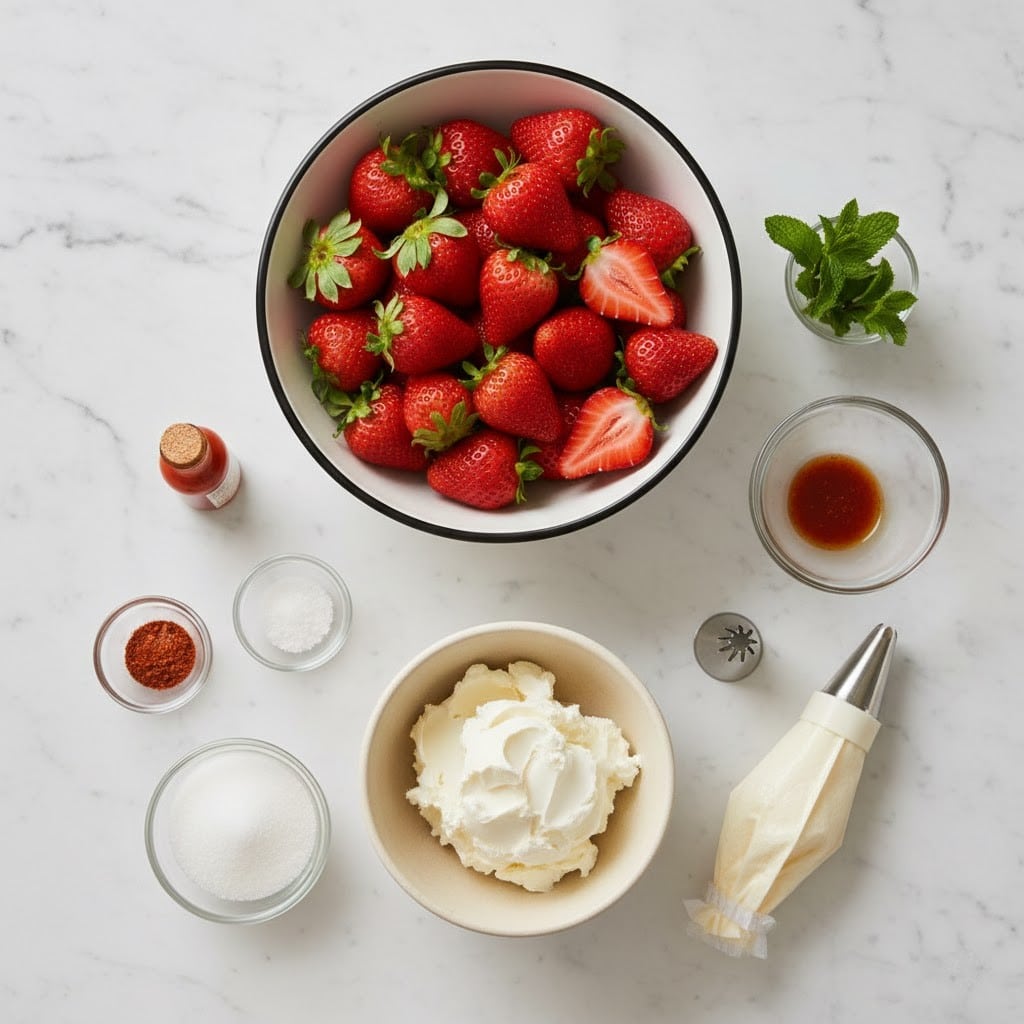
- Strawberries – about a pound, give or take. The bigger, the better. I’ve even used smaller ones; just messier to fill. Fresh are best, but I tried some out-of-season ones once—eh, not the same but works in a pinch.
- 115g (4 oz) cream cheese, softened. My grandmother swore by Philly, but shop’s own brand is grand, too. (Neufchâtel works if you’re feeling fancy.)
- 3 tbsp powdered sugar. I use a bit less sometimes if the strawberries are super sweet, or swap with honey—but it gets runnier.
- 1 tsp vanilla extract. I’ve also tossed in almond extract and actually…yeah, it’s good but go easy or it’ll taste like straight marzipan.
- 1/4 cup heavy cream. I use canned whipped topping in a pinch; it’s less lush but honestly, no one seemed to mind but me.
- Optional: Graham cracker crumbs for sprinkling. Maria cookies or digestives work too. Once I tried crushed ginger snaps—bit weird, won’t do that again.
So, How Do You Actually Make These?
- Wash your strawberries and cut off just the tiniest tip from the bottom so they stand up (otherwise, they topple over like little red bowling pins!). Hull the tops and use a small spoon, or—if you’re like me and can’t find your melon baller—your pinky finger to slightly hollow the inside. Don’t dig too far or, well, you’ll have a strawberry hat, not a cup.
- In a bowl, beat cream cheese until it’s fluffy. Add powdered sugar and vanilla; keep whisking until you can’t see any lumps. Stir in the heavy cream, little by little, until the mixture is smooth and pipe-able (or spoon-able, because sometimes I just scoop it… shh).
- If you’ve got time, chill the filling for 15-30 minutes. Makes it way easier to handle. Or, if you’re running late, just go for it; it might ooze a bit, that’s life.
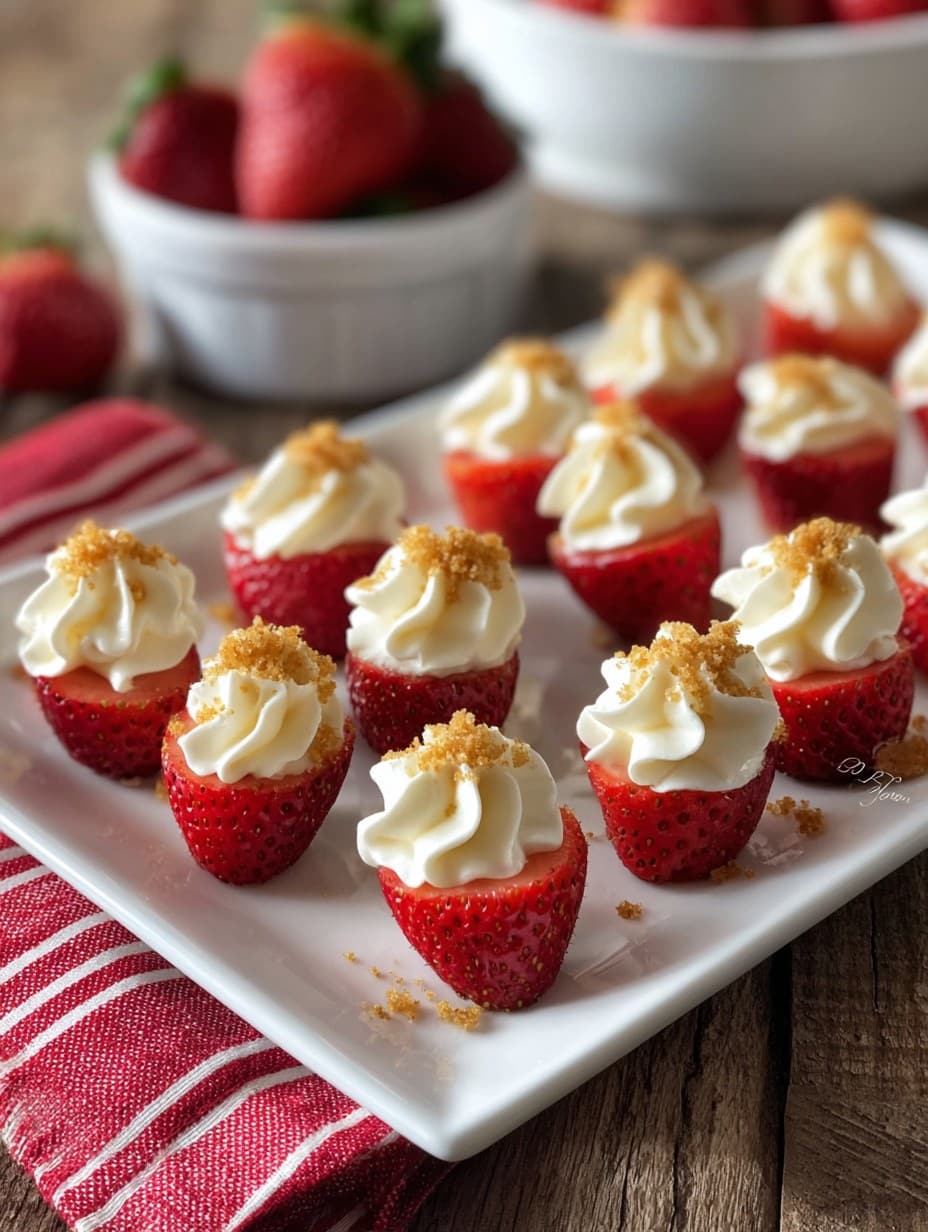
- Spoon or pipe the filling into the hulled strawberries. This is where I usually sneak a taste, which somehow always requires two or three checks. If it looks messy, just call it “rustic” and don’t worry. Sprinkle with graham cracker crumbs or whatever you’ve got lying around that crunches.
Here’s What I Learned (the Hard Way)
- If the cream cheese isn’t really, truly softened, your filling’s gonna be lumpy and honestly, your arm will get tired.
- Using a zip-top bag as a piping bag? Brilliant, just don’t cut the hole too big or it’s a strawberry volcano situation.
- Sneaking in a tiny pinch of lemon zest makes the filling pop! But if you overdo it, suddenly it’s more like a lemon tart. Good—but not what you expected.
Stuff I’ve Tried Changing (With Honest Results)
- Chocolate shavings on top – Yep, amazing, do it.
- Coconut cream instead of heavy cream – Tastes fab, but the texture goes a tad runny, so maybe chill it extra.
- Frozen strawberries – Just no. Too mushy, too sad.
- Squeeze of honey instead of sugar – It’s alright but gets slippery, filling starts running off (like my patience sometimes).
What If You Don’t Have All the Right Tools?
No fancy piping tips? Use a spoon, your fingers, or even a chopstick to sort of smoosh the filling in there. Once I used the end of a teaspoon. Actually, sometimes I think it looks cuter that way—more homemade, less bake-off.
Keeping Your Deviled Strawberries Fresh (But Will They Last?)
They’ll hang out happily in the fridge for up to a day, sometimes two, tightly covered. Honestly, though, in my house they don’t survive the night. If you do somehow have leftovers, just note that they’ll start leaking juice after awhile. Still tasty, just a bit, well, damp.
How I Like to Serve Them (and My Odd Tradition)
These make the cutest dessert for brunch—set them out in a circle for “strawberry roulette” (my cousin calls it that, though there are no losers, except maybe Uncle Joe when he grabs the last one and everyone glares). Perfect for parties, or sometimes I pile a few in a bowl just for myself as a treat after dinner…I mean, why not?
Things I Learned by Messing Up
- Don’t rush the chilling. I once tried to fill hot-from-washing strawberries and—yeah, filling everywhere but in the berry. Slow down, let both parts cool off a bit first.
- Over-mixing the cream cheese makes it too airy, almost mousse-like. Nice, but doesn’t stay put as well. So I just mix until smooth, then quit while I’m ahead.
FAQ: Real Questions From Friends (and My Mum)
- Can I make these ahead of time?
Yep, but I think they’re best eaten the day you make ’em. If you absolutely need to prep, do the filling and berries separate, then fill just before serving (though sometimes I get lazy and do it all at once anyway). - What if my strawberries are too small?
No worries! Just pipe a little less filling, or eat two at once, that’s what I do. Sometimes I purposely buy the smaller berries so there’s more to go round. - My filling is runny—help?
Hmm, sounds like maybe too much cream went in or it’s not cold enough yet. Stick it in the fridge for a bit. Or just go with it—no one ever cared when I brought a plate of slightly slouchy strawberries to a potluck! - What else can I top these with?
If you think of something crunchy or sweet, it’ll probably work. Crushed Oreos, blitzed up nuts, toffee bits—I’ve even tried a dusting of cinnamon sugar, which hit the spot. Don’t get too wild, though…once tried rainbow sprinkles, no one was keen except the kids! - Is this a dessert or an appetizer?
Ha! I call it dessert, but apparently if you’re at a party, it’s appetizer. ‘Round here, we just eat them whenever—they somehow feel right at brunch…or midnight.
So there you go—Deviled Strawberries, my answer to lazy fancy (and the only way to use up that stray tub of cream cheese when you’re fresh out of bagels). If you try them, let me know how it goes, or what weird combos you come up with. And if you make a mess? Join the club. That’s half the fun.
Ingredients
- 1 lb fresh strawberries
- 4 oz cream cheese, softened
- 1/4 cup powdered sugar
- 1/2 tsp vanilla extract
- 1/2 cup whipped cream
- 2 tbsp graham cracker crumbs
- 1 tbsp melted butter
- Pinch of salt
Instructions
-
1Wash strawberries, remove stems, and slice them in half lengthwise. Gently scoop out a small portion from each half to create a cavity.
-
2In a mixing bowl, beat together softened cream cheese, powdered sugar, and vanilla extract until smooth and creamy.
-
3Fold whipped cream gently into the cream cheese mixture until fully incorporated.
-
4Spoon or pipe the cream filling into the hollowed center of each strawberry half.
-
5Mix graham cracker crumbs with melted butter and a pinch of salt. Sprinkle the crumbs on top of the filled strawberries.
-
6Chill for at least 10 minutes before serving. Enjoy!
Approximate Information for One Serving
Nutrition Disclaimers
Number of total servings shown is approximate. Actual number of servings will depend on your preferred portion sizes.
Nutritional values shown are general guidelines and reflect information for 1 serving using the ingredients listed, not including any optional ingredients. Actual macros may vary slightly depending on specific brands and types of ingredients used.
To determine the weight of one serving, prepare the recipe as instructed. Weigh the finished recipe, then divide the weight of the finished recipe (not including the weight of the container the food is in) by the desired number of servings. Result will be the weight of one serving.
Did you make this recipe?
Please consider Pinning it!!




