Alright, Let Me Tell You About This Corn Dip
If I had a dollar for every time someone asked for this recipe at a party, I’d probably have enough to buy a lifetime supply of tortilla chips (though knowing my household, we’d still run out). Creamy Corn Dip – Easy Party Favorite is basically the only thing I can whip up last minute that still gets gobbled faster than you can say “pass the dip.” I remember one summer BBQ where my uncle ate almost half the bowl himself, swore he hated corn, and then asked for seconds. Classic. There’s just something about it—maybe it’s the creamy, cheesy mess, or maybe it’s the way it totally doesn’t matter if you measure perfectly.
Why I Keep Making This Corn Dip
I make this when I don’t feel like fussing, but still want everyone to think I planned ahead (let’s be real, most of my best dishes are happy accidents). My family goes crazy for this because it’s cheesy and just a tiny bit spicy but not enough to make you sweat. Sometimes I throw it together at midnight for game night, and it still disappears by morning. I used to stress about getting the “right” cheese, but honestly, after trying about four types, the only one my kids noticed was the time I forgot cheese altogether. So, yes, it just works.
What’s Actually In This Dip?
- 2 cans sweet corn (drained) – I sometimes use frozen when the pantry’s bare, and my grandma always swore by Green Giant, but any brand will do
- 1 cup sour cream – Greek yogurt works if you’re feeling healthy-ish
- 1 cup mayonnaise – If you’re out, half mayo and half cream cheese is pretty great, too
- 1 1/2 cups shredded cheddar – Pepper jack is fun if you want a kick, or honestly whatever’s lurking in your cheese drawer
- 1 small can diced green chilies (4 oz) – Go for jalapeños if you like living dangerously
- 1/2 cup chopped green onions (or chives, or even plain old onion powder in a pinch)
- Salt and black pepper, to taste (I just do a few pinches and call it good)
- Optional: 1/2 tsp smoked paprika or chili powder (adds a nice whoosh of flavor, but you won’t miss it if you skip it)
How I Actually Make It (Not Always by the Book)
- Dump the corn, sour cream, mayo, cheddar, chilies, and green onions into a big mixing bowl. Some folks like to be neat, but I’m more of a “just get it all in there” type.
- Stir it up with a wooden spoon. If it looks a bit strange at this point (it always does), don’t panic. That’s normal.
- Taste a little—this is where I usually sneak a bite, maybe two. Adjust the salt, pepper, and paprika if you’re using it.
- Spoon everything into a baking dish (an 8×8 works, but so does a pie plate or whatever’s clean). Or just serve it cold if you’re in a rush (yeah, I’ve done this more than once).
- If baking, toss it in a 350°F oven for about 25 minutes, until it’s bubbly and the cheese is golden at the edges. Set a timer, but honestly, I just wait until it smells amazing.
- Let it cool a bit before serving, unless you enjoy burning the roof of your mouth (I never wait long enough…)
What I’ve Learned by Making This (Too Many Times)
- Adding extra cheese on top is always a good idea—unless you forget and then no one notices, so don’t beat yourself up.
- I tried low-fat mayo once, but it tasted like sadness. Full-fat is best, but hey, do what you gotta do.
- If you overbake it and it looks a little dry, just stir in a splash of milk or more sour cream. No one will know.
Some Twists (and a Fail)
I once mixed in crispy bacon bits—huge hit. Black beans are good if you want to pretend it’s healthy. Tried adding pineapple once. Won’t do that again. I know some people like cilantro, but my youngest says it tastes like soap, so I keep it on the side. Oh, and if you’re dairy-free, I did try swapping in a coconut-based yogurt, but the flavor was, well, divisive.
What You’ll Need (or Not)
- Big mixing bowl
- Wooden spoon or spatula (I’ve used a potato masher in a pinch, not recommended)
- Baking dish; 8×8 is perfect but whatever you have will do—I’ve even used a pie tin
- Oven—or just a fridge if you aren’t baking it
Honestly, I made this at my friend’s house once with only a salad bowl and a fork. So, you’ll be fine.

How To Store (If There’s Any Left)
Keep leftovers in an airtight container in the fridge; it’s fine for 2-3 days, though honestly, in my house it never lasts more than a day. I think it actually tastes better the next day, but that’s just me. Don’t freeze it—the texture gets weird, trust me.
How We Serve It (And Fight Over the Last Scoop)
We usually serve with tortilla chips, but sometimes I go wild and use Ritz crackers or slices of bell pepper if I’m feeling fancy. My cousin claims it’s perfect on top of baked potatoes—she might be onto something. At family parties, someone inevitably ends up eating it straight with a spoon, which is probably fine but don’t tell my grandma.
Pro Tips (Learned the Hard Way)
- Don’t rush the bake time; I once tried turning the oven hotter to go faster and ended up with a burnt top and cold middle. Patience (ugh).
- Let it cool for at least five minutes, or you’ll regret it—hot dairy is like lava.
- Actually, I find it works better if you stir everything together really well so you don’t end up with mayo pockets (I used to just dump and bake, and wondered why it was… odd).
FAQ (People Actually Asked Me These!)
- Can I make this ahead of time? Absolutely, just mix everything and keep it in the fridge. Bake when you’re ready, or serve it cold if you’re pressed for time (been there).
- Is this spicy? Not really, unless you use jalapeños or add extra chili powder. My kiddo eats it no problem.
- Can I double it? Oh yes. Just use a bigger pan—actually, sometimes I just make two smaller ones because my oven’s tiny.
- What if I don’t have green chilies? No worries, just skip them or sub in some salsa. Or even a spoonful of diced pickles… but that’s probably just me.
- Vegetarian? Yup, unless you add bacon. Then… not so much!
And if you want to see some fun dip-serving ideas, I love these party dip roundups from Serious Eats. Oh! And if you’re curious about what cheese melts best, Sally’s Baking Addiction has a chart that’s surprisingly helpful (learned a thing or two myself).
Alright, I’m off to sneak a scoop from the fridge. Just don’t tell the kids. Enjoy your creamy corn dip, and let me know if you find a way to make it last more than a day—seriously, how?
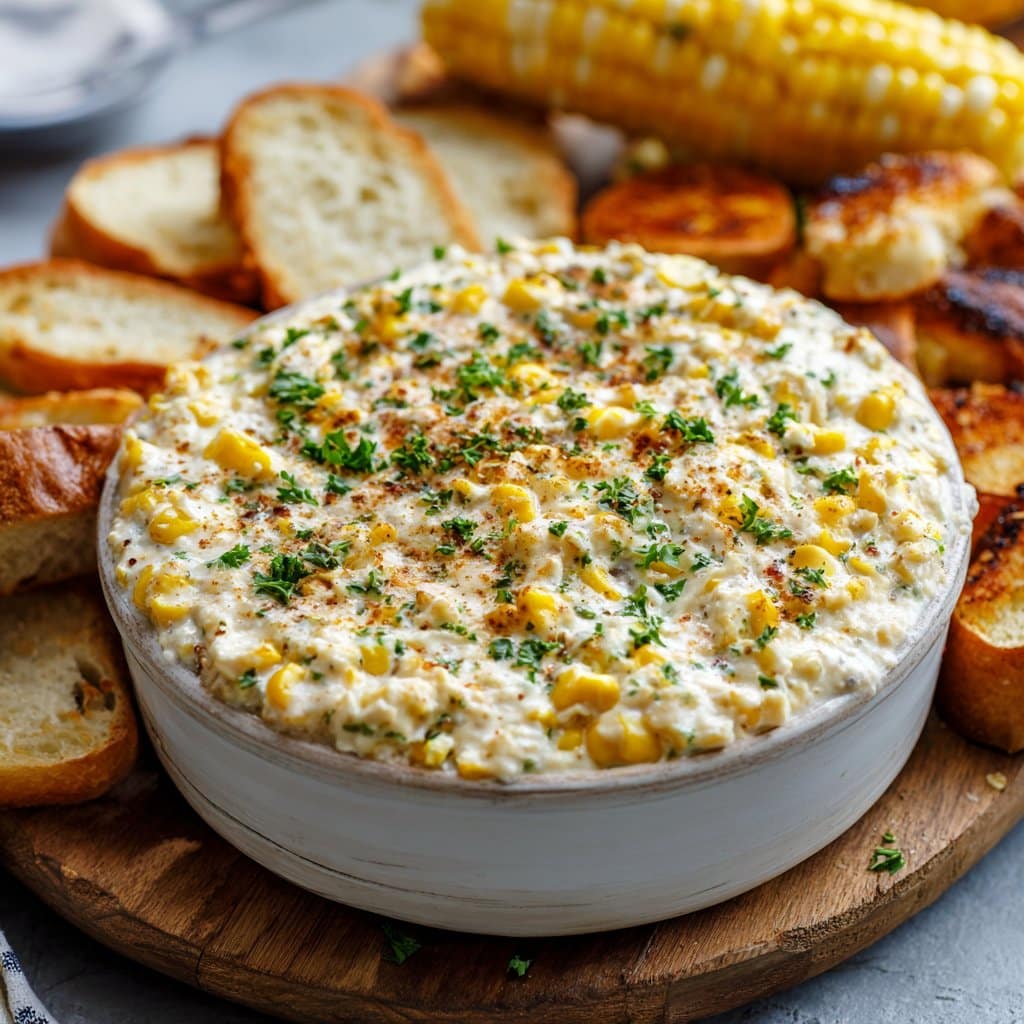
Ingredients
- 2 cups canned sweet corn, drained
- 1 cup shredded cheddar cheese
- 1/2 cup cream cheese, softened
- 1/2 cup sour cream
- 1/4 cup chopped green onions
- 1/4 cup diced red bell pepper
- 1/2 teaspoon garlic powder
- 1/4 teaspoon cayenne pepper (optional)
- Salt and black pepper to taste
Instructions
-
1Preheat the oven to 350°F (175°C).
-
2In a large mixing bowl, combine the cream cheese, sour cream, garlic powder, cayenne pepper, salt, and black pepper. Mix until smooth.
-
3Stir in the sweet corn, cheddar cheese, green onions, and red bell pepper until well combined.
-
4Transfer the mixture to a baking dish and spread evenly.
-
5Bake for 20 minutes, or until the dip is hot and bubbly. Serve warm with tortilla chips or fresh vegetables.
Approximate Information for One Serving
Nutrition Disclaimers
Number of total servings shown is approximate. Actual number of servings will depend on your preferred portion sizes.
Nutritional values shown are general guidelines and reflect information for 1 serving using the ingredients listed, not including any optional ingredients. Actual macros may vary slightly depending on specific brands and types of ingredients used.
To determine the weight of one serving, prepare the recipe as instructed. Weigh the finished recipe, then divide the weight of the finished recipe (not including the weight of the container the food is in) by the desired number of servings. Result will be the weight of one serving.
Did you make this recipe?
Please consider Pinning it!!




