Let Me Tell You How These Cookies Became a Thing
So, the first time I baked these Easy 4th of July Sugar Cookies, I forgot the red sprinkles. They looked sort of like rainclouds instead of fireworks—classic me. My cousin still teases me (“Happy cloudy Independence Day!”). But honestly? These cookies, whether they’re spot-on festive or a little goofy, just scream summer to me. Plus, half the time they’re gone before I can even snap a picture. If you’ve ever tried getting kids to wait for cookies to cool, you know it’s like herding cats. Sometimes I even sneak one while they’re still a smidge warm. Highly recommend.

Why You (and Maybe Your Neighbor) Will Love This
I make these when I actually want to enjoy the 4th of July instead of sweating over a complicated dessert (last year I tried a layer cake and let’s just say the dog ate better than we did). My family goes wild for the soft centers and, okay, the oodles of sprinkles. They’re basically tradition now; even my grumpy uncle can’t resist grabbing one—he calls them “patriotic puffs,” which is better than what he calls my potato salad. Oh, and when I’m feeling extra lazy, I use store-bought frosting and act like it’s all homemade. Works a charm. (Don’t tell Aunt Marie.)
What You’ll Need (a.k.a. The Ingredient Parade)
- 2 3/4 cups all-purpose flour (sometimes I swap in a cup of cake flour if I want a super tender crumb, but regular flour is just fine)
- 1 teaspoon baking soda
- 1/2 teaspoon baking powder
- 1/2 teaspoon salt (I’ve accidentally forgotten this before and, yikes… don’t.)
- 1 cup unsalted butter, softened (though honestly, salted butter’s okay too—just cut back the salt a skosh)
- 1 1/2 cups granulated sugar (I’ve seen some folks use half brown sugar. Not my jam, but hey—your call.)
- 1 large egg
- 2 teaspoons vanilla extract (the real stuff is best, but if it’s the cheap kind, no one’ll know unless they’re Julia Child reincarnated)
- 1-2 tablespoons milk, as needed
- Red, white, and blue sprinkles (lots!)
- Optional: 1/2 teaspoon almond extract (my grandma swore by this but if you aren’t a fan just skip it)
How To Whip Up These 4th of July Sugar Cookies
- Mixing the dry stuff: In a medium bowl, toss together your flour, baking soda, baking powder, and salt. I usually do this with a fork; who needs a sifter?
- Creaming the butter and sugar: Use a hand mixer (or good old-fashioned elbow grease) to beat the softened butter and sugar together in a big bowl until pale and fluffy. This is the step I like to zone out and think about fireworks—or my next snack.
- Add eggs and flavor: Toss in the egg, vanilla, and if you’re feeling bold, a dash of almond extract. Beat until smooth. If it looks a bit weird—almost curdled—don’t stress, it’ll sort itself out once the flour goes in.
- Add the dry mix: Pour the dry ingredients in, mix on low (flour in your hair is a real risk), and add 1-2 tablespoons of milk just until the dough comes together and feels smooth but not sticky. This is where I usually sneak a pinch to taste. For science.
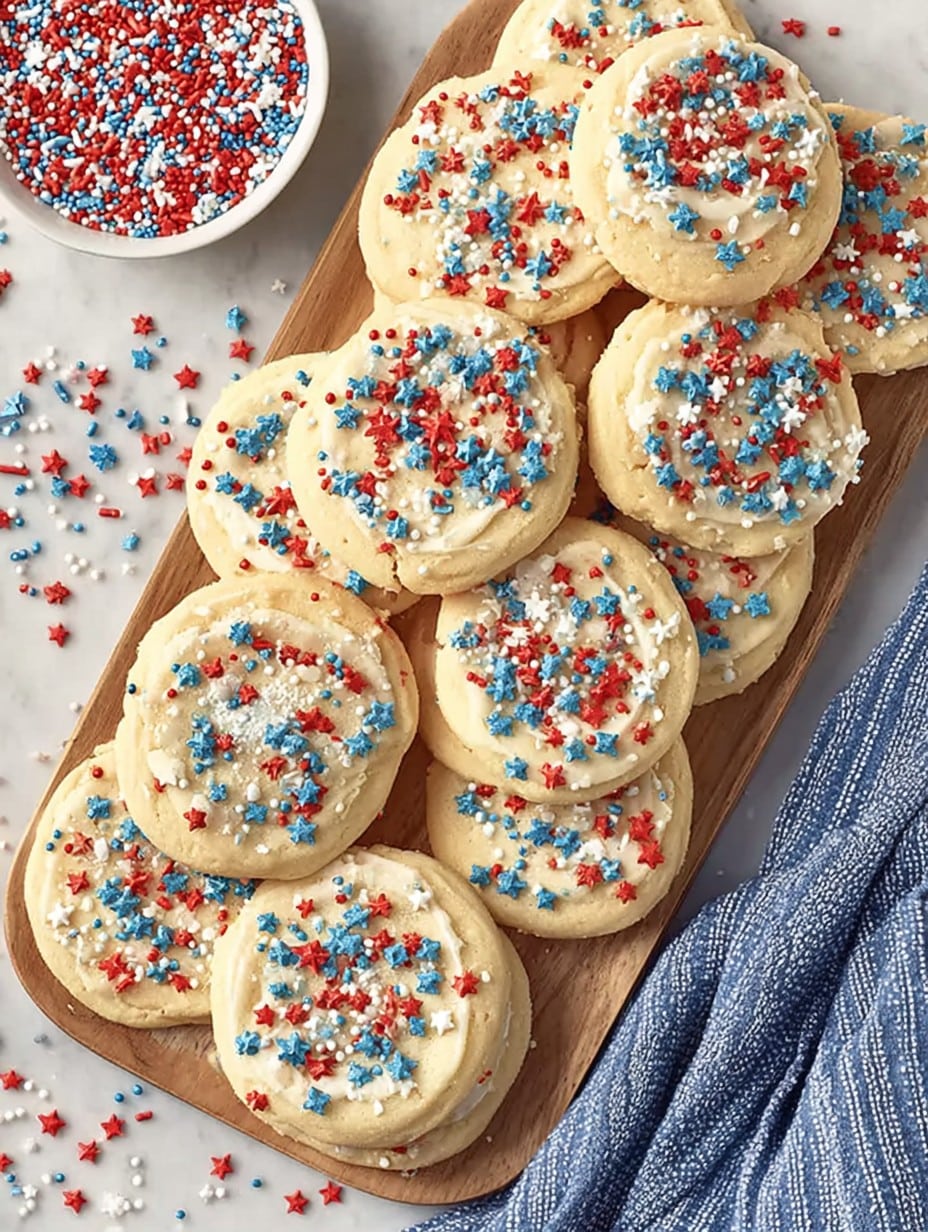
- Scoop and decorate: Preheat your oven to 350°F (175°C). Line two baking sheets with parchment (or just grease ’em if you’re out). Roll tablespoon-sized balls of dough, plop them onto the sheets spaced about 2 inches apart, and THOROUGHLY sprinkle with red, white, and blue magic. If you’re feeling fancy, gently press the sprinkles in so they hang on for dear life.
- Bake: About 9–11 minutes. You want the edges just set, centers a bit soft. Promise they’ll finish setting up as they cool—resist the urge to overbake (I’ve learned the hard way, trust me).
- Cool (or don’t): Let them sit on the tray a few minutes before moving them to a wire rack. Or, just eat one warm—great with milk, not so awesome for avoiding sticky fingers.
A Few Notes I’ve Learned the Hard (and Crumby) Way
- If the dough is really sticky, chill it for 15–20 minutes in the fridge. Not too long or it’ll get weirdly hard to scoop.
- Butter straight from the fridge does NOT work. Tried it. Never again.
- The sprinkles honestly taste best when baked on, not added after. I tried both. Science!
- On second thought, a little almond extract goes a long way; don’t double it unless you really love that flavor.
Some Fun Twists I’ve Tried (Some Worked, Some… Not)
- Swapped vanilla for lemon zest once—tasted more like spring, but still good. My nephew hated it though.
- Mixed mini chocolate chips in once. Not really “festive,” but oh boy, tasty.
- Tried adding shredded coconut just for fun. That batch was kinda weird; wouldn’t recommend unless you like chewing your cookies twice.
- Once I rolled the dough in red sugar only: they looked kinda spooky. Would probably work for Halloween!
What If I Don’t Have a…?
- Electric mixer: No biggie. Use a wooden spoon and some muscle, just expect a mini workout. Not a bad arm day, actually.
- Parchment paper: Grease the pan really well and just expect a bit more browning at the bottom. I’ve done it, it’s fine.
Storing These Beauties (Theoretically)
Pop them in an airtight container, and in theory they’ll last up to 4–5 days. In my house, they rarely make it through the next morning—especially if the kids spot them. I think they taste even better the next day, when the flavors settle in and get cozy with each other.
How We Serve ‘Em (Or: My Uncle’s Strange Tradition)
I like to pile them up on a big platter and serve alongside a bowl of fresh strawberries. My sister dips hers in cold brew coffee (I’m still not sure about that one). My uncle always insists on singing a very off-key version of “The Star-Spangled Banner” before snagging three cookies. Oh well—makes for good memories!
Pro Tips That Are Basically Warnings
- Don’t rush the creaming step. I tried it once when I was late for the parade and my cookies turned out flat and sad
- Measure the flour fairly loosely. Packing it in makes dry cookies (which are good for hockey pucks, not eating)
- If your dough feels super tight, add a splash of milk; if it’s wet, chill it briefly
- Test one single cookie first if you want to try a wild substitute—that prevents a whole batch of disasters
Real-Life FAQ (a.k.a. What Folks Actually Ask Me)
- Can I freeze these cookies? Yep! Freeze baked (or raw dough balls) in zip bags. Let them thaw at room temp, and they’re pretty much as good as new—maybe even better, somehow?
- Do I have to use sprinkles? Honestly, not really. Try sanding sugar, colored sugar, or even leave them plain for a more “classic” look. But, why not go all out?
- Can I double the recipe? Oh for sure; I actually recommend it if you’ve got a crowd. Just use a bigger bowl (I once tried with a regular-size bowl and half the dough ended up on the floor, whoops).
- Why did my cookies turn out dry? Usually it’s too much flour, or maybe left in the oven too long. I still eat them, though—waste not, want not!
- Is almond extract necessary? Not at all. Sometimes I skip it if I’m out. And nobody complains.
So there you go—my tried, slightly-triumphantly tested 4th of July sugar cookie recipe. If you’ve got your own wacky twist or a kitchen mishap to share, please do—makes me feel less alone with my parade of minor baking disasters!
Ingredients
- 2 3/4 cups all-purpose flour (sometimes I swap in a cup of cake flour if I want a super tender crumb, but regular flour is just fine)
- 1 teaspoon baking soda
- 1/2 teaspoon baking powder
- 1/2 teaspoon salt (I’ve accidentally forgotten this before and, yikes… don’t.)
- 1 cup unsalted butter, softened (though honestly, salted butter’s okay too—just cut back the salt a skosh)
- 1 1/2 cups granulated sugar (I’ve seen some folks use half brown sugar. Not my jam, but hey—your call.)
- 1 large egg
- 2 teaspoons vanilla extract (the real stuff is best, but if it’s the cheap kind, no one’ll know unless they’re Julia Child reincarnated)
- 1-2 tablespoons milk, as needed
- Red, white, and blue sprinkles (lots!)
- Optional: 1/2 teaspoon almond extract (my grandma swore by this but if you aren’t a fan just skip it)
Instructions
-
1Mixing the dry stuff: In a medium bowl, toss together your flour, baking soda, baking powder, and salt. I usually do this with a fork; who needs a sifter?
-
2Creaming the butter and sugar: Use a hand mixer (or good old-fashioned elbow grease) to beat the softened butter and sugar together in a big bowl until pale and fluffy. This is the step I like to zone out and think about fireworks—or my next snack.
-
3Add eggs and flavor: Toss in the egg, vanilla, and if you’re feeling bold, a dash of almond extract. Beat until smooth. If it looks a bit weird—almost curdled—don’t stress, it’ll sort itself out once the flour goes in.
-
4Add the dry mix: Pour the dry ingredients in, mix on low (flour in your hair is a real risk), and add 1-2 tablespoons of milk just until the dough comes together and feels smooth but not sticky. This is where I usually sneak a pinch to taste. For science.
-
5Scoop and decorate: Preheat your oven to 350°F (175°C). Line two baking sheets with parchment (or just grease ’em if you’re out). Roll tablespoon-sized balls of dough, plop them onto the sheets spaced about 2 inches apart, and THOROUGHLY sprinkle with red, white, and blue magic. If you’re feeling fancy, gently press the sprinkles in so they hang on for dear life.
-
6Bake: About 9–11 minutes. You want the edges just set, centers a bit soft. Promise they’ll finish setting up as they cool—resist the urge to overbake (I’ve learned the hard way, trust me).
-
7Cool (or don’t): Let them sit on the tray a few minutes before moving them to a wire rack. Or, just eat one warm—great with milk, not so awesome for avoiding sticky fingers.
Approximate Information for One Serving
Nutrition Disclaimers
Number of total servings shown is approximate. Actual number of servings will depend on your preferred portion sizes.
Nutritional values shown are general guidelines and reflect information for 1 serving using the ingredients listed, not including any optional ingredients. Actual macros may vary slightly depending on specific brands and types of ingredients used.
To determine the weight of one serving, prepare the recipe as instructed. Weigh the finished recipe, then divide the weight of the finished recipe (not including the weight of the container the food is in) by the desired number of servings. Result will be the weight of one serving.
Did you make this recipe?
Please consider Pinning it!




