Let Me Tell You About My Quest for Perfect Gluten Free Rice Krispies Treats
Okay, so I’ll just say it: Rice Krispies Treats basically taste like childhood in snack form. But when I had to cut out gluten (thanks, random stomach issues), I thought these were lost to me forever. I remember one day, craving a gooey, melty square, I tried to make them with some off-brand puffed rice, and—no joke—they turned out like bird food blocks. Not my finest culinary hour. Anyway, after a bit of trial, error, and a handful of sticky fingers, I landed on this version, and I swear it tastes like the real deal. Plus, my nephew calls them ‘squishy squares’ and will sneak extra when he thinks I’m not watching. Typical.
Why I Keep Making These (And Why You’ll Probably Love Them Too)
I make these whenever my sweet tooth won’t shut up and I want something quick. My family goes mad for them, especially if I add extra marshmallows (sometimes I do, sometimes I get distracted and just eat some straight out of the bag—oops). Also, you don’t need any fancy gadgets. Just a saucepan, a spatula, and outrageously low expectations for a clean kitchen. Some days, I use these to bribe people to help with laundry; honestly, it works better than money.
Here’s What You Need (and What You Can Swap)
- 4 cups gluten free puffed rice cereal (I usually grab Nature’s Path, but my gran always insisted on Kellogg’s brown rice cereal. I can’t say I noticed a massive difference, but you do you!)
- 1/4 cup (half a stick) unsalted butter (Salted’s fine in a pinch—just watch the finale sprinkle)
- 10 oz bag mini marshmallows (You can use big ones, just chop them up, or even those vegan ones, though they melt a bit funny)
- Optional: Splash of vanilla (when I remember), handful of chocolate chips (only if I’m feeling extra fancy), or a pinch of sea salt on top (my sister thinks it’s the best part)
Let’s Get Gooey: How I Make ‘Em
- Grab a 9×9 inch pan and either grease it or line it with parchment. (If you forget, you’ll regret it. Trust me, I’ve done the chisel-and-pray maneuver a few times.)
- In a biggish saucepan, melt the butter on low heat. (Don’t wander off for ‘just a sec’—burnt butter isn’t the vibe unless you like things tasting half toasty, half weird.)
- Toss in all your marshmallows. Stir until melted and super gooey (this is where I sneak a taste with the back of a spoon—it’s hot, so be careful). If you’re adding vanilla, now’s the time.
- Kill the heat. Dump in the puffed rice. Stir, stir, stir! It’ll seem like there’s too much cereal at first, but it works itself out. Don’t panic if it looks kind of lumpy or odd right now.
- Scoop the whole sticky mess into your pan. I usually wet my hands and press it down gently so I don’t end up with half the treats glued to my palms. (Or use a spatula; up to you.)
- If you’re adding a sprinkle of sea salt or chocolate chips, now’s your moment. Press ‘em in a bit so they stick.
Let it cool for about 30 minutes. Or, honestly, until you can’t wait any longer. - Slice into squares. Try to share, but no judgement if you don’t.
Notes from My (Messy) Kitchen
- Puffed rice gets stale quick, so if you want that classic snap, use a fresh bag. (I tried the bottom-of-the-box stuff once—tasted like sad cardboard, lesson learned!)
- Actually, I find it works better if you don’t squish them down too hard; they’re softer that way.
- Too much butter and they get greasy, too little and they’re crumbly. Stick to the Goldilocks zone.
Weird Variations I’ve Tried (Some Winners, Some Not)
- Once I melted peanut butter in with the marshmallows. It was amazing—unless you hate peanuts, in which case, don’t.
- I tried drizzling melted white chocolate on top, but it just made a mess and everyone ended up with sticky fingers. Kids loved it, adults were less charmed.
- I saw someone online swap half the marshmallows for honey. I tried it. It tasted… healthy. Not for me, but maybe you’re braver.
Equipment (But Don’t Stress If You Don’t Have Everything)
- Large saucepan
- Heatproof spatula or big spoon (if all you’ve got is a wooden spoon with a crack, it still works—just mind the splinters)
- 9×9 inch pan (or honestly, any baking dish that’s not huge. I once used a loaf tin; just made tall treats!)
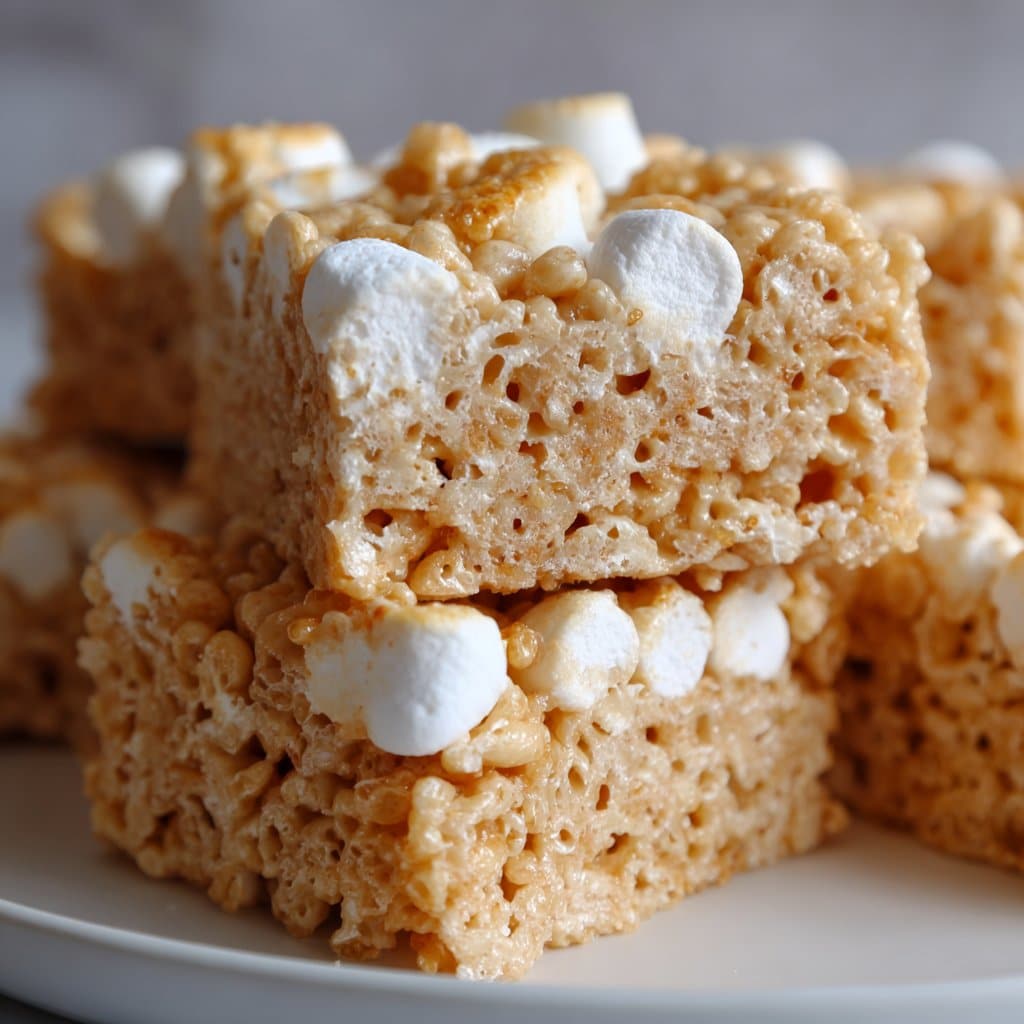
How I Store Them (But They Rarely Last That Long)
Keep ‘em in an airtight container on the counter for 2–3 days (though honestly, in my house they’re gone by the next morning). If you want to stretch it, fridge is fine, but they get a bit hard. I tried freezing them once, but they went weird and rubbery—so maybe not.
Serving? Here’s How We Roll
I’ll serve these up at family movie night, or pop them in lunchboxes if I’m feeling generous. Sometimes I cut them into funny shapes with cookie cutters for birthdays (makes me look like I put in way more effort than I did). And at Christmas, we sometimes dip an edge in dark chocolate and add sprinkles—because, well, why not?
What I’ve Learned the Hard Way (aka Pro Tips)
- I once tried to rush the marshmallow melting on high heat—ended up with rock-hard treats and a pan I had to soak for two days. Low and slow is the best way, trust me.
- Don’t be stingy with the parchment paper. It makes cleanup about a million times easier. I mean, unless you enjoy scraping marshmallow glue off your pans.
- Actually, I think these are even better the next day, if you can manage to hide a few squares from everyone else.
FAQ: Real Questions I’ve Gotten (and My Honest Answers)
- Can I use regular Rice Krispies? If you’re not avoiding gluten, go for it! But the classic Kellogg’s ones aren’t gluten free in some countries, so check the box first. UK readers, you folks have it easy, I think.
- What if I only have jumbo marshmallows? Chop ‘em up smaller or just let them take a bit longer to melt. It’s a bit more effort, but works fine.
- How do I keep them soft? Store them airtight, and don’t overcook the marshmallow-butter mix. That’s key—otherwise, you’ll end up with a jaw workout.
- Can I make these vegan? Actually, yes! Use vegan marshmallows (like Dandies) and a plant-based butter. Melt time’s a little longer, but the taste is pretty close.
- Why are mine so sticky? Sometimes humidity, sometimes too much marshmallow. Or maybe you just live somewhere tropical—lucky you! Try a sprinkle of cornstarch over the knife when cutting.
For another gluten free treat, I sometimes poke around Minimalist Baker—loads of good ideas there. Or, if you want to geek out about gluten free cereals, check out Celiac.org (they have charts and everything).
If you try this, let me know how it goes! Or if you find a weird new twist, I’m all ears (unless it’s anchovies—please, no).

Ingredients
- 6 cups gluten-free crispy rice cereal
- 1 package (10 oz) gluten-free mini marshmallows
- 3 tablespoons unsalted butter
- 1 teaspoon pure vanilla extract
- 1/4 teaspoon salt
- 1/2 cup mini chocolate chips (optional)
- 1/4 cup rainbow sprinkles (optional)
- Nonstick cooking spray or parchment paper
Instructions
-
1Grease a 9×13-inch baking dish with nonstick cooking spray or line it with parchment paper.
-
2In a large saucepan, melt the butter over low heat. Add the marshmallows and stir constantly until completely melted and smooth.
-
3Remove the saucepan from heat. Stir in the vanilla extract and salt until well combined.
-
4Quickly add the gluten-free crispy rice cereal to the melted marshmallow mixture. Stir gently until all the cereal is evenly coated.
-
5If using, fold in mini chocolate chips and rainbow sprinkles. Immediately transfer the mixture to the prepared baking dish and press evenly using a spatula or wax paper.
-
6Let the treats cool for at least 30 minutes. Cut into squares and serve.
Approximate Information for One Serving
Nutrition Disclaimers
Number of total servings shown is approximate. Actual number of servings will depend on your preferred portion sizes.
Nutritional values shown are general guidelines and reflect information for 1 serving using the ingredients listed, not including any optional ingredients. Actual macros may vary slightly depending on specific brands and types of ingredients used.
To determine the weight of one serving, prepare the recipe as instructed. Weigh the finished recipe, then divide the weight of the finished recipe (not including the weight of the container the food is in) by the desired number of servings. Result will be the weight of one serving.
Did you make this recipe?
Please consider Pinning it!!




