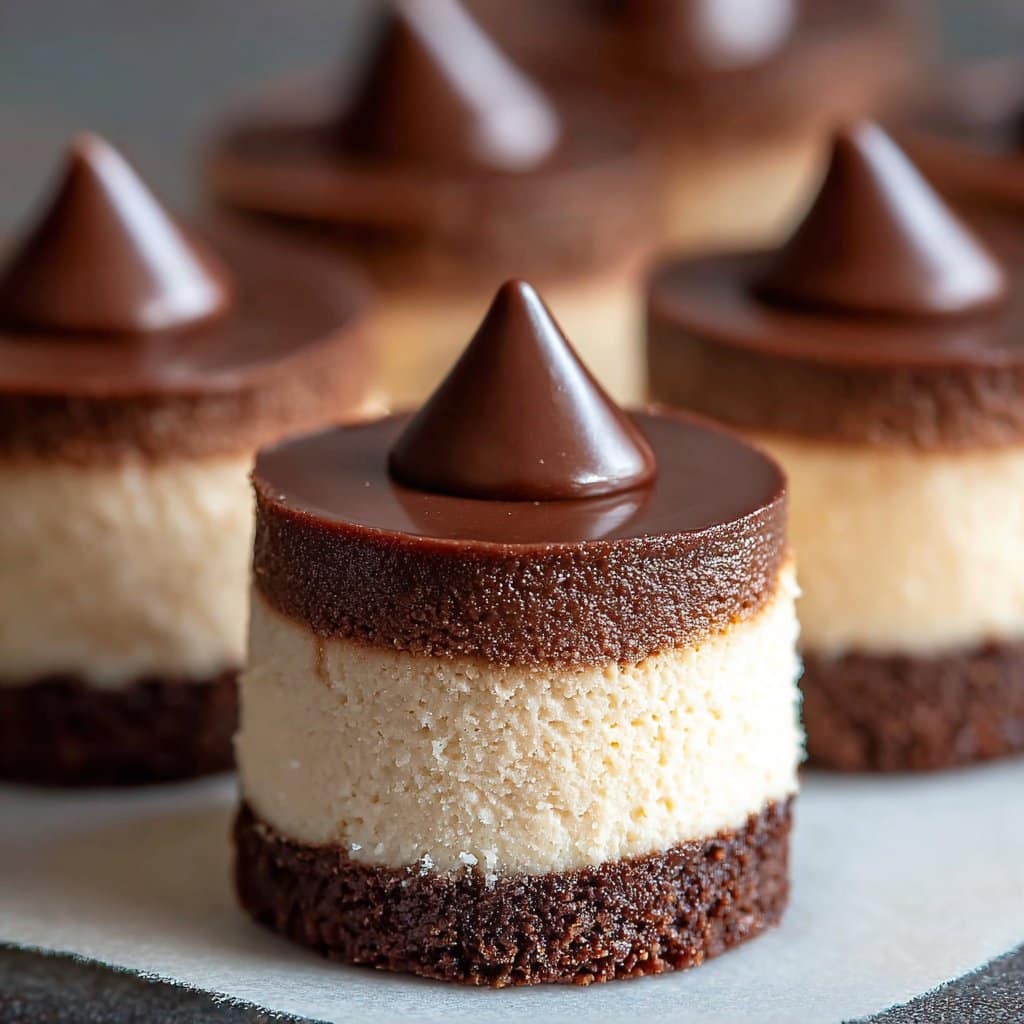
Let’s Talk About These Mini Chocolate Cheesecake Bites
Okay, so you know those days when you just need something chocolatey, creamy, and bite-sized, preferably before anyone else in the house realizes you’re baking? That’s when I make these mini chocolate cheesecake bites. Actually, my first attempt at these was for my little cousin’s birthday (he’s now taller than me, so that feels wild). I nearly burned the crust because I got distracted watching old Bake Off episodes, but they still got devoured before I could even take a proper photo. Anyway, these have become my “I forgot about the bake sale” superpower. Plus, you don’t even need a fancy mixer—unless you fancy arm day.
Why You’ll Love This (Or At Least, Why I Do)
I make these for family movie nights, when my friend’s kids come over (they’ll eat anything with chocolate), or when I just want a proper treat without having to share a whole cake. My partner claims he doesn’t even like cheesecake, but somehow these vanish from the fridge every time. Maybe it’s the chocolate, or maybe it’s because they’re so easy to pop in your mouth (sometimes two at a time, not naming names). And if you’re like me and sometimes find cheesecake a bit too rich, mini bites are perfect. Also, no need for a water bath—who has time for that faff?
What You’ll Need (And What You Can Swap)
- 150g chocolate cookie crumbs (or just bash up some digestive biscuits—my gran was all about Hobnobs, but Oreos work too)
- 3 tbsp unsalted butter, melted (I’ve used salted in a pinch; it’s a bit of a gamble but fine)
- 200g cream cheese, room temp (I’ve used the cheap supermarket stuff and, honestly, no one noticed)
- 80g caster sugar (or regular granulated, if that’s all you’ve got; brown sugar makes it caramelly, which is nice)
- 1 large egg
- 120g good dark chocolate, melted and cooled (or milk chocolate if you like it sweeter—sometimes I mix both if I’m indecisive)
- 1 tsp vanilla extract (the fake stuff works, but real vanilla is better if you have it)
- Pinch of salt (sometimes I forget this and it’s…fine?)
- Optional: mini chocolate chips, berries, or chopped nuts for topping
How I Actually Make Them (Don’t Stress It)
- First off, heat your oven to 160°C (320°F). Line a mini muffin tin with, well, mini muffin liners. Or just grease the tray and hope for the best—I’ve done both.
- Mix the crushed cookies with your melted butter until it looks like damp sand. (This is where I usually eat a spoonful. No regrets.) Press about a teaspoon of this mixture into each liner—just smush it down with your fingers or the back of a spoon.
- Bake these bases for 5-7 minutes. They’ll look basically the same as before, but maybe a bit firmer. Let them cool while you get on with the filling.
- Beat the cream cheese with the sugar until it’s smooth and lump-free—unless you’re using a fork, in which case, it’ll take a bit of elbow grease but it works. Add the egg, vanilla, and a pinch of salt. Stir until fully combined (don’t overbeat, though; it gets weirdly runny).
- Fold in your melted chocolate. Sometimes it looks a bit streaky, but don’t panic—it’ll taste great. Spoon the mixture over each base, filling nearly to the top.
- Bake for about 12-15 minutes until the tops are just set; they shouldn’t wobble much when you give the tin a little shake. They might crack a bit; it’s all good.
- Let them cool in the tin for 10 min (I always try to sneak one out early and regret it; they’re so soft!). Then pop them onto a rack to cool completely. Chill for at least an hour. Or, if you’re me, 15 minutes because patience is not my superpower.
- Top with chocolate chips, berries, or just leave them plain. Sometimes I drizzle melted chocolate on top if I’m feeling fancy, or need to hide a crack.
Stuff I’ve Learned That Might Help
- If you overbake them, they get oddly dry in the middle—learned that the hard way after leaving them in while answering the door to a neighbor (she wanted to borrow sugar, not knowing I already used it all!).
- Letting them cool before chilling is key; otherwise, they sweat and get soggy bottoms (which Mary Berry would not approve of).
- Actually, I think these taste even better the next day, if you can wait that long.
How I’ve Switched These Up (And When I Shouldn’t Have)
- Once made them with white chocolate and lemon zest—delicious, but a bit sweet for my taste. Maybe add less sugar if you try that.
- Tried topping with salted caramel sauce (shop-bought; I’m not a wizard)—highly recommend.
- Was tempted to try a peanut butter swirl, but it just kinda sank to the bottom. Looked a mess. Maybe someone else has cracked that code.
What You Need to Make Life Easier (But Don’t Panic)
- Mini muffin tin—if you’ve not got one, a regular muffin tray works, you’ll just get bigger cheesecakes. (Or use a silicone ice cube tray, but getting them out is wild.)
- Mixing bowl
- Electric mixer (or a fork and patience—good for getting out some stress!)
- Microwave or small pan for melting chocolate

Keeping Them Fresh (Theoretically)
Store in an airtight container in the fridge—they’ll keep 3-4 days, but honestly in my house, they never last a day unless I hide them behind the kale. You can freeze them (just layer parchment in between), but they’re best fresh.
How I Like to Serve (And Some Quirks)
My family loves them straight from the fridge, but if it’s a proper occasion, I’ll top them with a swirl of whipped cream and a raspberry. Sometimes we eat them with coffee after dinner, or just as a random snack at 10pm while watching reruns of old sitcoms.
Stuff I Wish I’d Known (So You Don’t Have To Learn the Hard Way)
- Don’t rush the chilling step. I did once and tried to serve them warm. Just…don’t.
- Don’t try to halve the recipe unless you like washing your measuring spoons mid-bake—does anyone?
- Actually, cleaning up the chocolate bowl with a bit of warm milk makes a nice accidental hot chocolate (bonus tip!).
Real Questions I’ve Actually Gotten
- Can I make these gluten-free? Yep, just use gluten-free cookies for the base. I’ve done it for my friend’s mum and she couldn’t tell.
- Can I use milk chocolate? Sure! It’s sweeter, but some people love that (kids, mainly).
- Do I have to use mini tins? Well, I recommend it, but regular tins work—just bake them a smidge longer and expect fewer, bigger bites.
- Why did mine sink in the middle? Happens to me sometimes if I over mix or open the oven early. Doesn’t affect taste though!
- Got a video? I don’t, but Sally’s Baking Addiction has a great one if you want a visual.
- Where do you get good chocolate? I like to grab mine from Lindt when it’s on sale, but honestly, supermarket own-brand is grand.
There you go—my mini chocolate cheesecake bites, warts and all (not literally, it’s just an expression). If you make them, let me know how it goes, or just drop a comment if you found a way to make the peanut butter swirl work. Happy baking!
Ingredients
- 12 chocolate sandwich cookies (such as Oreos), finely crushed
- 2 tablespoons unsalted butter, melted
- 8 ounces cream cheese, softened
- 1/4 cup granulated sugar
- 1 large egg
- 1/2 teaspoon vanilla extract
- 1/2 cup semi-sweet chocolate chips, melted and slightly cooled
- 1 tablespoon all-purpose flour
- Pinch of salt
Instructions
-
1Preheat the oven to 325°F (163°C). Line a mini muffin tin with paper liners.
-
2In a small bowl, mix the crushed chocolate cookies with melted butter until combined. Press about 1 teaspoon of the mixture into the bottom of each liner to form the crust.
-
3In a medium bowl, beat the cream cheese and sugar together until smooth. Add the egg and vanilla extract, mixing until just combined.
-
4Stir in the melted chocolate chips, flour, and salt until the batter is smooth and well blended.
-
5Spoon the cheesecake batter evenly over the crusts in the mini muffin tin, filling each about 3/4 full.
-
6Bake for 16-18 minutes, or until the centers are set. Cool completely, then refrigerate for at least 1 hour before serving.
Approximate Information for One Serving
Nutrition Disclaimers
Number of total servings shown is approximate. Actual number of servings will depend on your preferred portion sizes.
Nutritional values shown are general guidelines and reflect information for 1 serving using the ingredients listed, not including any optional ingredients. Actual macros may vary slightly depending on specific brands and types of ingredients used.
To determine the weight of one serving, prepare the recipe as instructed. Weigh the finished recipe, then divide the weight of the finished recipe (not including the weight of the container the food is in) by the desired number of servings. Result will be the weight of one serving.
Did you make this recipe?
Please consider Pinning it!!




