These Chicken Thighs Are Basically My Weeknight Secret Weapon
You know when you stumble across a recipe that just works, and suddenly it’s in your dinner rotation at least every other week? That’s what these perfect crispy chicken thighs are for me. The first time I made them, I was honestly just trying to avoid a boring chicken dinner (again). But after one bite, my husband looked at me and said, “Did you really make this?”—which I choose to take as a compliment. Now, the kids start sniffing around the kitchen as soon as they hear that sizzle, and to be honest, so do I.
Oh, and quick warning: you might want to crack a window, because when that chicken hits the pan, things get a little smoky. Maybe that’s part of the magic, who knows?
Why You’ll Love This (or, Why I Keep Making It Even When I’m Tired)
- I make this when I want something quick but not boring, especially after a long day—let’s be real, almost every Monday.
- My family goes crazy for this because the skin gets crispy (like, snack-level crispy) and yet the meat stays juicy. No one trusts dry chicken around here, not after my infamous “Chicken Sahara” incident.
- You barely need any fancy stuff. I mean, you don’t need to find obscure spices or chase down a special thermometer (though, honestly, meat thermometers are handy if you’re a worrier like me).
- I used to burn the skin or undercook the meat—until I figured out one easy tweak. More about that below, promise.
What You’ll Need: Ingredients & a Few Swaps
- 4 bone-in, skin-on chicken thighs (about 1.5 lbs) – I’ve used boneless in a pinch, but it’s just not the same crunch.
- 1 tbsp olive oil – or honestly, I sometimes use avocado oil if that’s what’s nearest.
- Salt and pepper – I go heavy on the salt, but you do you. My grandmother always insisted on sea salt, but table salt does the trick too.
- 1 tsp smoked paprika – Or regular paprika. I’ve even thrown in a bit of cayenne when I’m feeling reckless.
- 1 tsp garlic powder – Or onion powder, if you’re out of garlic. Sometimes I just mince fresh garlic and chuck it in with the oil.
- Optional: Some fresh rosemary or thyme, or a sprinkle of Italian seasoning if you want to get fancy.
Let’s Make Perfect Crispy Chicken Thighs
- Preheat your oven to 425°F (220°C). I always forget to do this until I’m halfway through prepping, so… maybe set a reminder?
- Pat those thighs dry. Like, really dry. Grab some paper towels and pretend you’re an overzealous hairdresser. This is the secret to that shatteringly good skin.
- Season all over (including under the skin if you feel like channeling your inner chef) with salt, pepper, paprika, and garlic powder. Don’t stress if you get some stuck under your fingernails—it washes out.
- Heat a large ovenproof skillet (I use cast iron, but any oven-safe pan does the trick) over medium-high heat. Splash in the oil and swirl it around.
- Arrange the chicken thighs skin-down in the pan. They should sizzle, but not pop like a firework. If they do, maybe turn the heat down a notch.
- Cook skin-side down without fussing for 8–10 minutes. This is where I usually sneak a taste of whatever side I’m making—just don’t move the chicken. Let it get nice and golden, almost mahogany, and a bit crisp at the edges. (If they look a little weird or bubbly, that’s fine. Trust the process.)
- Flip the thighs over and transfer the whole pan to the oven. Roast for another 13–18 minutes until juices run clear—check around the bone if you’re nervous, or use a meat thermometer (aim for 165°F). If you don’t have one, just give it a little poke. Honestly, you’ll know.
- Let rest for 5 minutes before diving in. The skin stays crisp, and the juices don’t run everywhere. Though, sometimes I’m too hungry and just go for it anyway.
Notes: Stuff I Learned the Hard Way
- If you crowd the pan, the skin steams instead of crisping. Who knew? I do now. Give those thighs room to breathe.
- I tried skipping the oven step once when I was in a hurry; don’t do it—skin gets soggy, and the meat’s not as tender.
- If you see a little pink near the bone but the juices are clear, that’s totally normal for thighs. I panicked the first time and cooked them to the point of no return. Didn’t need to.
Variations: Things I’ve Tried (and Sometimes Regretted)
- Spicy Korean-style: Add gochujang and a splash of soy sauce to the seasoning. So good, but watch your white t-shirts!
- Lemon-herb: Zest a lemon over the thighs before roasting and toss in fresh thyme. Very springy. Actually, I find it works better if you add the lemon right at the end.
- Honey-mustard: Brushing with honey and mustard before crisping the skin just made a sticky mess. Next time, I’d do it after baking, like a glaze.
What If I Don’t Have a Cast Iron Skillet?
Honestly, I’ve made this with a regular old frying pan plus a baking tray. Sear in the pan, then transfer the chicken to a sheet and pop it in the oven. Works fine. My cast iron is my favorite, but I’m not hauling it out if I’m just cooking for one.
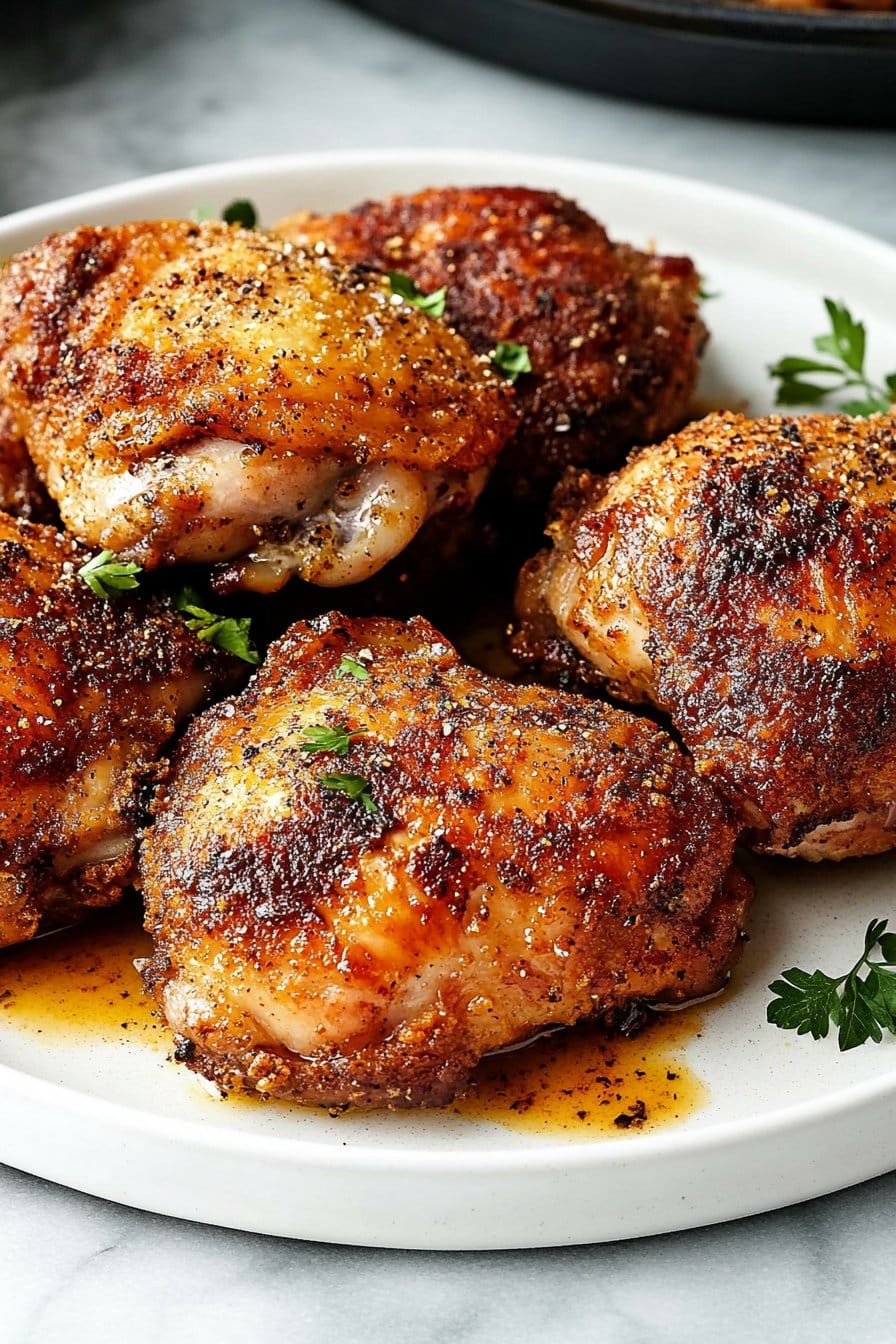
Storing Leftovers (If You Have Any… Ha!)
Let cool, then toss leftovers in a container in the fridge for up to 3 days. Though honestly, in my house, it never lasts more than a day! I think it tastes better the next day—sometimes I eat cold thigh pieces right from the fridge, which is probably a little odd, but there it is.
How I Like to Serve It
I usually serve these with mashed potatoes (buttery is best) and a big salad, or sometimes roasted veggies if I’m pretending to be healthy. My kids dip theirs in ketchup, but I swear by a squirt of lemon and a pinch more salt, just the way my uncle did at family BBQs. For a twist, try spooning over some salsa verde—absolutely zingy.
If I Were You, Here’s What I’d Remember (Pro Tips)
- I once tried rushing the skin-crisping step and regretted it—patience is flavor, don’t crowd the pan.
- Season under the skin for bonus flavor. Not strictly necessary, but you’ll notice the difference.
- If you’re worried about sticking, don’t. The fat renders out and things unstick themselves (kind of like life, eventually).
Your Questions, Answered (I Get These All the Time)
- Can I use boneless thighs? Sure, but you lose some juiciness and, well, the skin tends to shrink up into a weird little hat. Still tasty though.
- What if my chicken splatters everywhere? Oh, mine does too. Use a splatter guard or just clean up after—sometimes I just embrace it.
- Is it still crispy if I reheat it? Kind of! The oven helps, but, like, not as good as fresh. Try the broiler for a minute or two if you’re determined.
- Where do you get your seasoning ideas? I love browsing Bon Appétit’s recipes for inspiration when I’m stuck in a rut, or sometimes I just riff on whatever’s in my spice drawer.
Oh—almost forgot, if you want to really nerd out about chicken temperatures or food safety, this chart is actually super handy (even if you’re not a worrier like me).
Anyway, let me know how it goes! I’m always curious if your thighs come out crispier than mine (and sometimes a little jealous).
Ingredients
- 4 bone-in, skin-on chicken thighs
- 1 tablespoon olive oil
- 1 teaspoon kosher salt
- 1/2 teaspoon black pepper
- 1 teaspoon garlic powder
- 1 teaspoon smoked paprika
- 1/2 teaspoon dried thyme
- 1/2 teaspoon onion powder
Instructions
-
1Preheat your oven to 425°F (220°C). Pat the chicken thighs dry with paper towels to ensure the skin gets crispy.
-
2In a small bowl, mix together the salt, black pepper, garlic powder, smoked paprika, dried thyme, and onion powder.
-
3Rub the chicken thighs all over with olive oil, then season evenly with the spice mixture.
-
4Place the chicken thighs skin-side down in a cold, oven-safe skillet. Turn the heat to medium and cook for 7-10 minutes, until the skin is golden and crispy.
-
5Flip the chicken thighs, then transfer the skillet to the preheated oven. Roast for 20-25 minutes, or until the chicken is cooked through and reaches an internal temperature of 165°F (74°C).
-
6Remove from the oven and let rest for 5 minutes before serving. Enjoy your perfect crispy chicken thighs!
Approximate Information for One Serving
Nutrition Disclaimers
Number of total servings shown is approximate. Actual number of servings will depend on your preferred portion sizes.
Nutritional values shown are general guidelines and reflect information for 1 serving using the ingredients listed, not including any optional ingredients. Actual macros may vary slightly depending on specific brands and types of ingredients used.
To determine the weight of one serving, prepare the recipe as instructed. Weigh the finished recipe, then divide the weight of the finished recipe (not including the weight of the container the food is in) by the desired number of servings. Result will be the weight of one serving.
Did you make this recipe?
Please consider Pinning it!!




