If Autumn Had a Scent, It’d Be These Cookies
Alright, so let me set the scene: It’s a drizzly Saturday afternoon, the kind where the cat’s determined to sleep in the one sunbeam left, and I’m puttering around in the kitchen with a cup of tea that, honestly, keeps going cold. That’s usually when I get the urge to make these pumpkin cookies with simple icing. The smell alone is like a Yankee Candle decided to go edible (in the best way). I started baking these for a fall bake sale ages ago, but now, it’s just my go-to whenever I’m craving something soft, sweet, and perfectly spiced. Plus, there’s always that one batch I slightly over-bake and, you know what, even those crunchy ones get demolished.
Why You’ll Love Making These (Or, Why I Always Do)
I make these whenever I need to bribe my nephews into raking the leaves, or when I just want to use up that half-can of pumpkin hanging out in the fridge (you ever notice how pumpkin puree seems to multiply?). My family goes absolutely wild for these, especially when I do the icing a bit thick. I will say, icing cookies used to make me a little nutty – it’d drip everywhere, and the dog once licked an entire tray clean. But now, I just line the counter with newspaper and call it “rustic.”
What You’ll Need (And a Few Substitutions That Saved Me)
- 1 cup pumpkin puree (Honestly, Libby’s is classic, but I’ve used store-brand and it’s fine. Sometimes I buy the big can and freeze the leftovers in little baggies.)
- 1 cup sugar (Granulated, but I’ve swapped in brown sugar for extra depth. My gran used to say it was “cheating,” but she also used margarine, so take that how you will.)
- 1/2 cup butter, melted (Or a big scoop of coconut oil if you’re out. It does change the flavor a smidge, but not in a bad way.)
- 1 egg
- 2 cups all-purpose flour (Don’t stress if it’s not exact. I eyeball it after the first cup, honestly.)
- 1 teaspoon baking powder
- 1/2 teaspoon baking soda
- Pinch of salt
- 2 teaspoons pumpkin pie spice (Or mix a little cinnamon, nutmeg, and ginger if you don’t keep the blend around.)
- 1 teaspoon vanilla extract
- Optional: a handful of chopped walnuts or a sprinkle of chocolate chips. I’m a purist, but my cousin adds both. Chaos, really.
How I Actually Make These Pumpkin Cookies (Warts and All)
- Preheat your oven to 350°F. Or, if you have one of those finicky old ovens like mine, just “about hot enough” works. Line a baking sheet with parchment, or don’t. They come off fine either way, just maybe a little more golden underneath.
- Whisk together the pumpkin, sugar, melted butter, egg, and vanilla. This is where I usually sneak a taste. (Not supposed to eat raw egg and all that, but hey, living dangerously.)
- Mix your flour, baking powder, baking soda, salt, and pumpkin pie spice in a separate bowl. Sometimes I skip the separate bowl and just dump it all in – it’s never ruined anything, but you might get a little clump here and there.
- Combine the wet and dry – don’t overthink it. It’ll look a bit thicker than cake batter, but not as dry as scone dough. Don’t worry if it looks a little weird; it always does at this stage.
- Spoon blobs (technical term!) onto your tray. I usually do heaping tablespoons, but a cookie scoop is nice if you’ve got one. Or just use two spoons and be quick about it before the batter tries to escape.
- Bake for 11-14 minutes. The edges should look just set, and the tops might crack a bit. I once underbaked them and they were almost like pumpkin clouds – not bad, just not quite cookies.
- Let cool, at least a little. I have burned my tongue more times than I can count.
The Icing Bit (Which Is Actually Simple, Promise)
- 1 cup powdered sugar (I’ve blitzed regular sugar in the blender in a pinch)
- 2-3 tablespoons milk (Dairy or, honestly, oat milk works too)
- 1/2 teaspoon vanilla
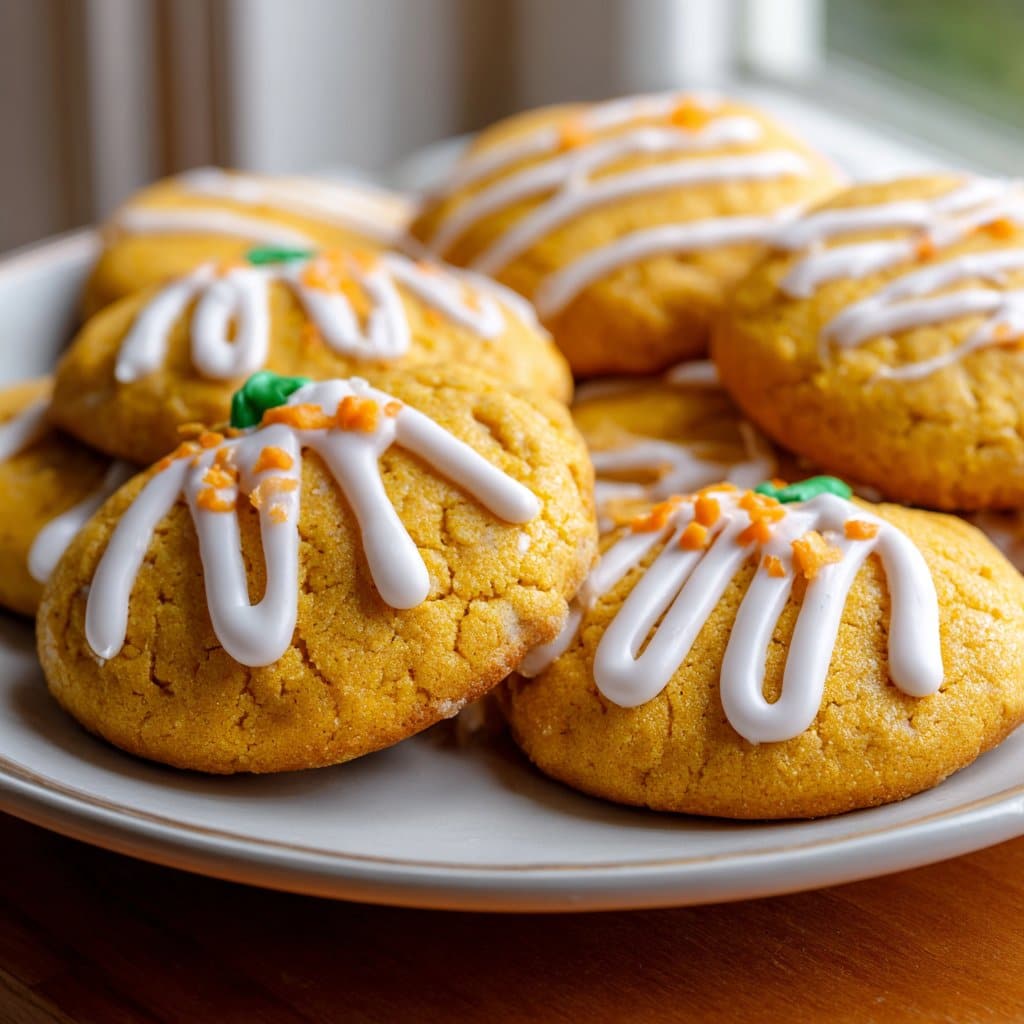
Mix together ‘til it’s pourable but thick enough to cling to the cookies. Drizzle over cooled cookies with a spoon – or, if you’re feeling fancy (I rarely am), use a piping bag. Actually, I sometimes just dip the tops in the bowl. Less washing up.
Things I Learned the Hard Way (Notes)
- If you make the icing too runny, just add more sugar. I always think “oh, it’ll thicken as it sits” – it never does.
- The cookies stay soft for days, but the icing will get a bit crusty (in a good way) after about an hour.
- Parchment paper helps with cleanup, but if you forget, just soak the tray for a bit. Nothing’s truly stuck forever.
If You Want to Shake Things Up (Variations I’ve Actually Tried)
- Adding mini chocolate chips: Big hit with kids, a bit sweet for me.
- Swapping some flour for oat flour: Gives a nuttier flavor, but the cookies get a bit more dense – not bad, just different.
- I tried adding dried cranberries once. Honestly, wouldn’t do that again. Too chewy. But, you do you!
What If I Don’t Have All the Gear?
All you really need is a bowl, a spoon or whisk, and a baking tray. I say “cookie scoop” like it’s essential, but a tablespoon works just fine. Heck, I’ve formed these with my hands in a pinch – just a little sticky. If you don’t have parchment, a greased pan does the trick.
How Do I Store These? (If You Have Any Left)
Once the icing sets, I just pile them into an old biscuit tin or any airtight container. They stay soft for 3-4 days, maybe longer, but honestly, in my house they vanish after about 24 hours. If you want to keep them longer, toss them in the freezer – they thaw pretty quick.
Serving Time! (And What I Always Do)
I like them best with milky tea, but my partner dunks them in coffee (sacrilege, but he’s convinced it’s the way forward). Sometimes I serve these after a big pot of soup as dessert, especially if we’ve got friends round. My aunt insists on a scoop of vanilla ice cream on the side. Actually, that’s pretty decadent, now that I think about it.
Some Lessons From My Kitchen (Pro Tips, If You Could Call Them That)
- I once tried to ice them when they were still warm – don’t. The icing just slides right off. Wait til they’re properly cool (I know, it’s hard).
- Don’t overmix the dough. I got a bit too enthusiastic once and the cookies came out a bit tough, like little pumpkins you could play hockey with.
- Actually, I find it works better if you let the cookies cool right on the tray for about five minutes before moving them. They’re less likely to fall apart (learned that the crumbly way).
Bits and Bobs (FAQ, Real Questions I’ve Gotten)
- Can I use fresh pumpkin? Absolutely – just roast and mash it well. But, see, canned is just so easy and less watery. If you want to see the process, Simply Recipes has a pretty straightforward guide.
- Can I make these vegan? Yeah, swap the egg for a flax egg and use coconut oil or a plant butter. I’ve done it – they’re a little more delicate, but tasty! If you’re curious about flax eggs, the Minimalist Baker explains it well.
- Why are my cookies flat? Could be your baking soda’s old or the dough’s too warm. Or maybe you just like ‘em that way? Some people do!
- Can I double the recipe? For sure, just use a bigger bowl. I find it’s easier to do two separate batches, though, unless you’ve got arms like a rugby player.
- Can I skip the icing? Yep, but I think they’re a bit naked without it. Up to you, obviously.
And here’s a bit of a tangent: The last time I made these, I forgot to set a timer and got totally sucked into a podcast about haunted libraries (wild, right?), so half the tray got a little overdone. Still got eaten, though. That’s the beauty of these – they’re pretty forgiving. Hope you enjoy them as much as we do at my place!

Ingredients
- 1 cup canned pumpkin puree
- 1 cup granulated sugar
- 1/2 cup unsalted butter, softened
- 1 large egg
- 2 cups all-purpose flour
- 1 teaspoon baking powder
- 1 teaspoon ground cinnamon
- 1/2 teaspoon baking soda
- 1/4 teaspoon salt
- 1 cup powdered sugar (for icing)
- 2 tablespoons milk (for icing)
- 1/2 teaspoon vanilla extract (for icing)
Instructions
-
1Preheat the oven to 350°F (175°C) and line a baking sheet with parchment paper.
-
2In a large bowl, cream together the softened butter and granulated sugar until light and fluffy. Beat in the egg and pumpkin puree until well combined.
-
3In a separate bowl, whisk together the flour, baking powder, baking soda, cinnamon, and salt. Gradually add the dry ingredients to the wet mixture, mixing until just combined.
-
4Drop tablespoonfuls of dough onto the prepared baking sheet, spacing them about 2 inches apart. Bake for 12-15 minutes, or until the cookies are set and lightly golden.
-
5While the cookies cool, prepare the icing by whisking together powdered sugar, milk, and vanilla extract until smooth. Drizzle the icing over cooled cookies and let set before serving.
Approximate Information for One Serving
Nutrition Disclaimers
Number of total servings shown is approximate. Actual number of servings will depend on your preferred portion sizes.
Nutritional values shown are general guidelines and reflect information for 1 serving using the ingredients listed, not including any optional ingredients. Actual macros may vary slightly depending on specific brands and types of ingredients used.
To determine the weight of one serving, prepare the recipe as instructed. Weigh the finished recipe, then divide the weight of the finished recipe (not including the weight of the container the food is in) by the desired number of servings. Result will be the weight of one serving.
Did you make this recipe?
Please consider Pinning it!!




