Red Velvet Cake Pops for Valentine’s Day: Story Time
Alright, let me just say—there’s nothing that says “Happy Valentine’s Day” (or “I ate too much chocolate already but here I go again”) quite like red velvet cake pops. I first made them one chilly February ages ago for a friend’s Galentine’s bash; I was running late, my kitchen looked like a red food coloring explosion, but everyone went absolutely feral for them. Seriously, these things vanished faster than a plate of fries at a game night. I guess, cake on a stick just hits different! Also—if you’ve ever gotten more cake on yourself than in the bowl, you’re in good company.

Why You’ll Love These (Honestly, I Keep Making ‘Em)
I make these cake pops when my family’s begging for something cute but I don’t feel like fussing with an entire layer cake. My partner claims they taste even better because they’re in “bite-sized perfection.” (He might just like anything with sprinkles, but hey.) My daughter loves stabbing the sticks in—usually some end up lopsided but they’re still cute. Plus, if you’ve ever tried to frost a whole cake and it looked like a child’s art project, these are way more forgiving. Pro-tip: don’t even try to stay totally clean, red velvet is notorious for sneaky stains—embrace it.
Ingredients (And a Few Cheats When I Can’t Be Bothered)
- 1 box red velvet cake mix (I’ve used Duncan Hines, but whatever’s on sale works)
- 3 eggs (or 2 eggs and a splash of buttermilk if you’re feeling fancy, but honestly regular milk in a pinch is just fine)
- 1/2 cup vegetable oil (sometimes I use melted butter for extra flavor, but that’s a messier clean-up)
- 1 cup water (or strong coffee for a deeper taste—my grandmother side-eyes me for this, but it’s good!)
- 1 tub cream cheese frosting (Store brand is fine. My best friend swears homemade is better, but I can’t tell the diff by the time it’s mixed up)
- Candy melts or chocolate chips (I usually grab white, pink, or red. Regular chocolate works but is messier. Almond bark in a pinch—learned that one the hard way!)
- Sprinkles, crushed nuts, shredded coconut, or whatever you fancy for decor (I secretly love those crunchy sugar hearts)
- Lollipop sticks or clean popsicle sticks (I have, in a rush, used wooden skewers…they work but look weirdly intense)
How To: The (Slightly Messy) Cake Pop Process
- Bake the red velvet cake as the box says. Just throw everything in, mix, and bake—or beat until just combined (I know it’s technically supposed to be perfect but who has the time?). Let it cool. Seriously, let it cool—otherwise, you’ll scorch your fingers.
- Once it’s cool, crumble the cake into a big bowl. Kids love this part—mine always eat half when I’m not looking. Then, add a hefty dollop of cream cheese frosting (start with half the tub). Mix it all up by hand; don’t even bother with a spoon. You want it to be squishy but not soggy—like play dough.
- Roll the mix into ping pong-sized balls. If it crumbles, add a tiny bit more frosting. If it gets too sticky, just pop it in the fridge for a bit. Here’s where I sneak a taste (no shame).
- Stick a lollipop stick into each ball. Pro move: dip the end of the stick into a little melted chocolate first and then shove it in the cake ball—that helps keep it from falling off later. Stick all the pops in the freezer for about 20-30 minutes; not forever, just till they’re firm.
- Melt your candy melts or chocolate in the microwave: zap for 30 seconds, stir, then repeat. Don’t overheat or it’ll get all weird and clumpy… actually, I’ve salvaged a seized bowl with a bit of coconut oil. Doesn’t always work but worth the try.
- Now, dip each cold cake pop into the melted chocolate. My first time, I globbed it on—don’t; dip and swirl gently so it covers evenly. Tap off excess (careful, too much whacking and the cake might plummet off the stick—ask me how I know).
- Decorate right away with sprinkles or whatever you love before the shell hardens.
- Stick them upright in a block of styrofoam or even an egg carton with holes poked in. Let them set until dry. (I once used a colander—kinda wobbly, but got the job done!)
Notes from The Trenches
- If the cake balls are falling apart, you probably need a smidge more frosting but don’t overdo—learned that one after an oozy disaster.
- Don’t freeze them too long or the coating can crack. Apparently, physics hates pretty things.
- On second thought, if you run out of lollipop sticks, just set out cake balls in mini paper cups and call them truffles. Nobody complains—they just eat.
Tried a Few Variations… Some Wonky, Some Winners
- Swapped the cream cheese frosting for Nutella. It’s tasty, but a bit oily—definitely eat with napkins handy.
- Tried dunking in dark chocolate—tastes amazing, but overpowers the red velvet, in my opinion. Maybe that’s just personal taste.
- I once tried using white chocolate chips to melt for the coating—turned out kinda lumpy unless I added extra oil. Candy melts are less fussy, honestly.
- One year, I stuffed a tiny raspberry in the center. Seemed genius, but it made the pops wet and weird the next day. Don’t recommend… unless you eat them right away.
If You Don’t Have the “Proper” Equipment…
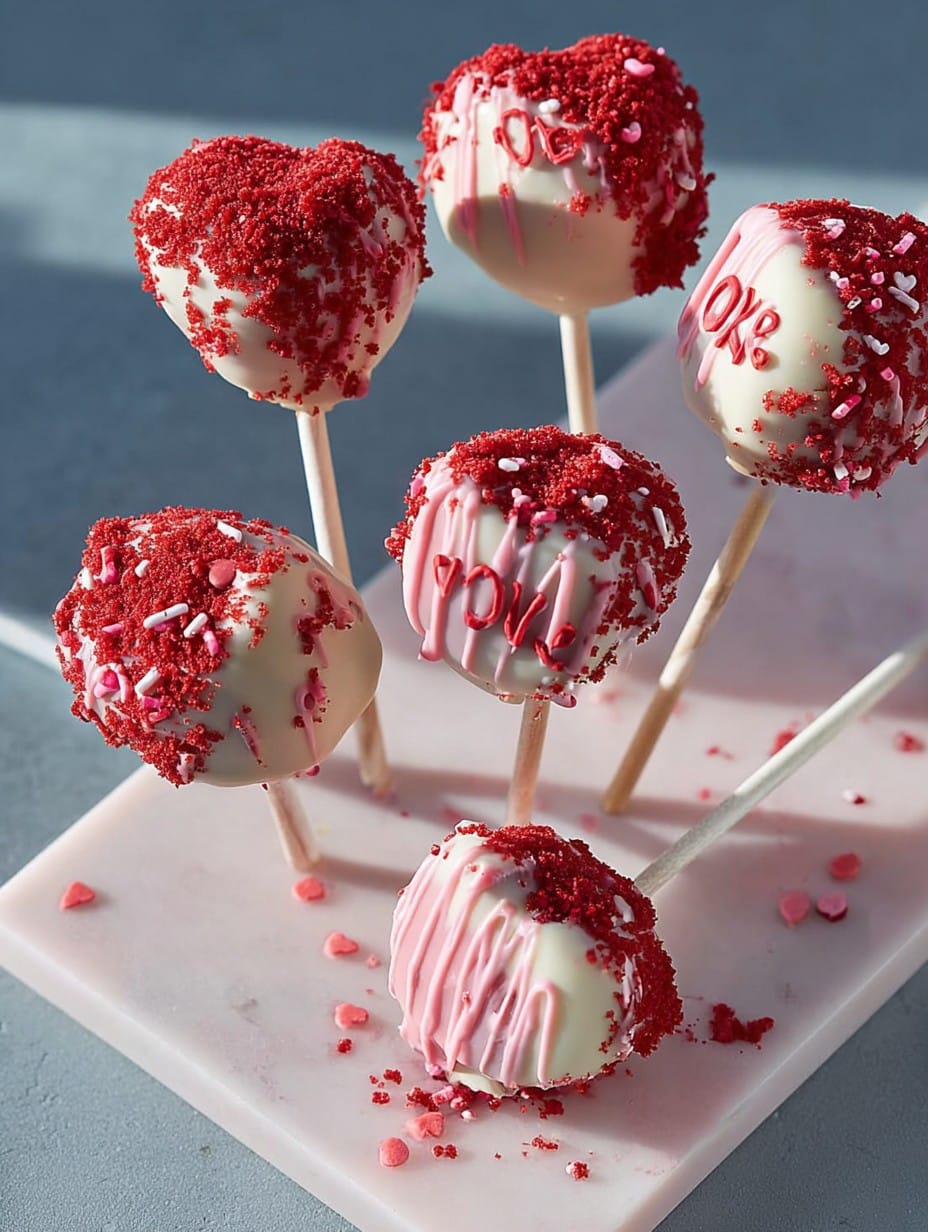
I’m supposed to tell you to use a cake pop stand, but truth be told, I just poke holes in a leftover egg carton and stick them in. Or even a head of lettuce (yes, really)—if you’re short on gadgets, use what you have. If you don’t have a mixer, just use your hands as muscle.
Storage: But Will You Even Have Leftovers?
Technically, you can keep these in an airtight container in the fridge for about 3 days. I think they taste even better chilled the next day. That said, and I’m being honest, in my house they’re usually gone before you even think about leftovers. If you want to make ahead, just freeze the undecorated balls, then dip when you’re ready—easy peasy.
How Do I Serve These? (The Fun Bit)
We usually set them upright in a big mug, bouquet-style—it looks adorable. For more formal vibes (rare here), I stagger them on a colored platter with extra sprinkles on the tray. My cousin likes sticking little name tags in for a party, but honestly, I just eat mine standing by the fridge when nobody’s looking.
What I’ve Learned (or…Pro Tips Disguised as Regrets)
- I once tried to skip the chill time. Don’t; warm cake balls = disaster. They slid right off the sticks into the chocolate and I had to eat the evidence.
- If you use too much frosting, the balls get dense and heavy. Better to err on the crumbly side and tweak as you go.
- Oh, and don’t wear white—red velvet knows no mercy.
Answering Actual Questions I’ve Gotten
- Can I use homemade red velvet cake? Of course! But honestly, out of the box is easier and nobody’s ever noticed except my grandma.
- Does it have to be cream cheese frosting? Nope—plain vanilla works, or even buttercream. I’ve done chocolate too, but it’s a wild flavor ride.
- Can I make these gluten-free? You betcha; just grab a gluten-free cake mix. The texture is a bit different but, honestly, most people just want the candy coating anyway.
- The chocolate coating keeps cracking—help?! That’s usually because the cake balls were too cold or the chocolate too hot. Let things chill out, literally and figuratively.
- How many can I make? I usually get about 24 pops, give or take depending on the size (sometimes I just make ’em bigger because…why not?)
- I don’t have candy melts—what can I do? Well, I once used regular chocolate chips with a dab of coconut oil; not perfect, but it works in a pinch.
And there you have it. Red Velvet Cake Pops for Valentine’s Day—messy, cheerful, always a good laugh. If you’ve got a tip I didn’t think of, let me know—maybe next time I’ll try it and regret it for you!
Ingredients
- 1 box red velvet cake mix (about 15 oz)
- 3 large eggs
- 1/2 cup vegetable oil
- 1 cup water
- 3/4 cup cream cheese frosting
- 12 oz white chocolate or candy melts
- 1/4 cup heart-shaped sprinkles
- 20 lollipop sticks
Instructions
-
1Preheat oven to 350°F (175°C). Prepare red velvet cake mix according to package instructions using eggs, oil, and water.
-
2Pour the batter into a greased baking pan and bake for 25-30 minutes or until a toothpick inserted comes out clean. Let cake cool completely.
-
3Crumble the cooled cake into a large bowl. Add cream cheese frosting and mix until it forms a moist, dough-like consistency.
-
4Roll the mixture into 1-inch balls and place on a baking sheet lined with parchment paper. Insert a lollipop stick into each ball. Freeze for at least 20 minutes.
-
5Melt white chocolate or candy melts according to package directions. Dip each cake pop into the melted chocolate, gently tapping off excess. Immediately decorate with heart-shaped sprinkles.
-
6Place cake pops upright in a stand or styrofoam block to set. Serve and enjoy!
Approximate Information for One Serving
Nutrition Disclaimers
Number of total servings shown is approximate. Actual number of servings will depend on your preferred portion sizes.
Nutritional values shown are general guidelines and reflect information for 1 serving using the ingredients listed, not including any optional ingredients. Actual macros may vary slightly depending on specific brands and types of ingredients used.
To determine the weight of one serving, prepare the recipe as instructed. Weigh the finished recipe, then divide the weight of the finished recipe (not including the weight of the container the food is in) by the desired number of servings. Result will be the weight of one serving.
Did you make this recipe?
Please consider Pinning it!!




