Let Me Tell You About Rhubarb Oat Bars (And a Digression)
Ever had one of those days where you want something homemade, but not, like, complicated? That’s totally how these rhubarb oat bars landed in my kitchen. I remember the first time I made them—I’d just come back from a neighbour’s garden with a big old bunch of rhubarb, the kind that looks a bit like red-and-green celery. (I was actually going for a cup of tea but left with an armful of produce—classic.) My mum used to make something similar, but she always added way too much sugar, so I’ve fiddled with the recipe over the years. Oh, and, full disclosure, I once baked these while watching a football match, so if the edges are a bit crunchy, maybe blame Arsenal.
Why You’ll Love This (Trust Me, People Go Mad For Them)
I make this whenever I spot rhubarb on sale or when the garden’s producing more than I can possibly use. My family goes bananas for these bars (well, not literally bananas—though, hmm, maybe that’s an idea for later). The mix of tart and sweet is chef’s kiss. Actually, I find it works better if you let them sit overnight—the flavors do their little dance. And, honestly, they’re way easier than pie. Plus, I used to hate wrestling with pastry. These bars? No rolling pins required! Just crumbly, oat-y goodness with a jammy rhubarb layer.
And if you have grumpy teens at home, these disappear before you can even say, “Save me one!”
What You’ll Need (And a Few Substitutions)
- 2 cups (about 250g) fresh rhubarb, chopped small (I’ve used frozen when I was in a pinch—just thaw and drain a bit)
- 3/4 cup granulated sugar (my grandmother insisted on caster sugar, but I honestly just grab whatever’s handy)
- 1 tablespoon cornstarch
- 1 tablespoon lemon juice (if you don’t have it, a splash of orange juice works, or just skip if your rhubarb is super tart anyway)
- 1 and 1/2 cups rolled oats (I’ve tried quick oats—worked fine, but you lose a bit of texture)
- 1 and 1/4 cups all-purpose flour (whole wheat in a pinch, but it gets a bit denser)
- 1/2 teaspoon baking soda
- 1/2 teaspoon salt
- 1/2 cup packed brown sugar (light or dark, whichever you like)
- 3/4 cup (170g) unsalted butter, slightly softened (I’ve melted it when lazy—results: a bit more rustic, but no one complained!)
- 1 teaspoon vanilla extract (optional, but it does add a nice background note)
How I Actually Make These (Warts and All)
- Preheat your oven to 180°C (350°F). Grease and line an 8×8 inch (20x20cm) square pan. If you only have a rectangular one, just go for it—the bars might be a bit thinner, but they’ll still taste grand.
- Prepare the rhubarb filling. Toss the rhubarb with granulated sugar, cornstarch, and lemon juice in a bowl. Let it sit while you get the rest sorted. It’ll look a bit gloopy—don’t panic, that’s normal.
- Make the crumble. In a big bowl, mix oats, flour, baking soda, salt, and brown sugar. Stir in the butter and vanilla. I usually get in there with my hands because it’s faster and I have zero patience for pastry cutters (but if you’ve got one, go wild!). The mixture should look a bit like damp sand, but chunkier.
- Assemble. Press about 2/3 of the crumble mix into the bottom of your pan. Go right up to the corners—I use the heel of my hand. Top with the rhubarb mixture, spreading it as best you can. It never looks perfect at this stage. Sprinkle the rest of the crumble on top. (This is where I usually sneak a taste—don’t judge.)
- Bake. Pop it in the oven for 35-40 minutes, or until the top looks golden and the edges are bubbling. If your oven runs hot (mine absolutely does), maybe check at the 30-minute mark.
- Cool. Here’s the tricky bit: let them cool completely before cutting, otherwise it’ll all fall apart. I never learn this step, but you should!
Things I Learned (Sometimes the Hard Way)
- If your rhubarb is extra watery, you can add another half tablespoon of cornstarch. Too much and it goes a bit, well, gluey though—so don’t overdo it.
- I once tried using coconut oil instead of butter. The bars tasted like a suntan lotion-flavored granola bar. Would not recommend.
- If you forget to line the pan, just run a knife around the edges and enjoy the crumbly bits.
Variations I’ve Tried (Some More Successful Than Others)
- Strawberries mixed into the rhubarb layer—amazing. Actually, any berry works.
- Hazelnuts in the crumble topping (nice, but I prefer pecans if I have them—hazelnuts were a bit too much for me, but my cousin loved it)
- I tried chocolate chips once. Nope, didn’t work (at least not for me), but maybe you’ll love it!
Stuff You’ll Need (Or What To Do If You Don’t Have It)
- 8×8 inch baking tin (if you’ve only got a rectangle—just use it, no biggie)
- Mixing bowls (I once used a saucepan because all my bowls were in the dishwasher—worked fine, just a bit cramped)
- Wooden spoon or rubber spatula—if you’re feeling fancy
- Baking paper for lining, or just grease the pan really well and cross your fingers
Keeping Them Fresh (If They Last That Long)
Store your rhubarb oat bars in an airtight container at room temperature. They’ll be good for 2-3 days, but honestly, in my house, they never last more than a day! If you want to stretch them out, pop them in the fridge—they get a bit firmer (I think the flavor’s even better the next day, but that’s just me).
How I Like To Serve Them (And the Family Does Too)
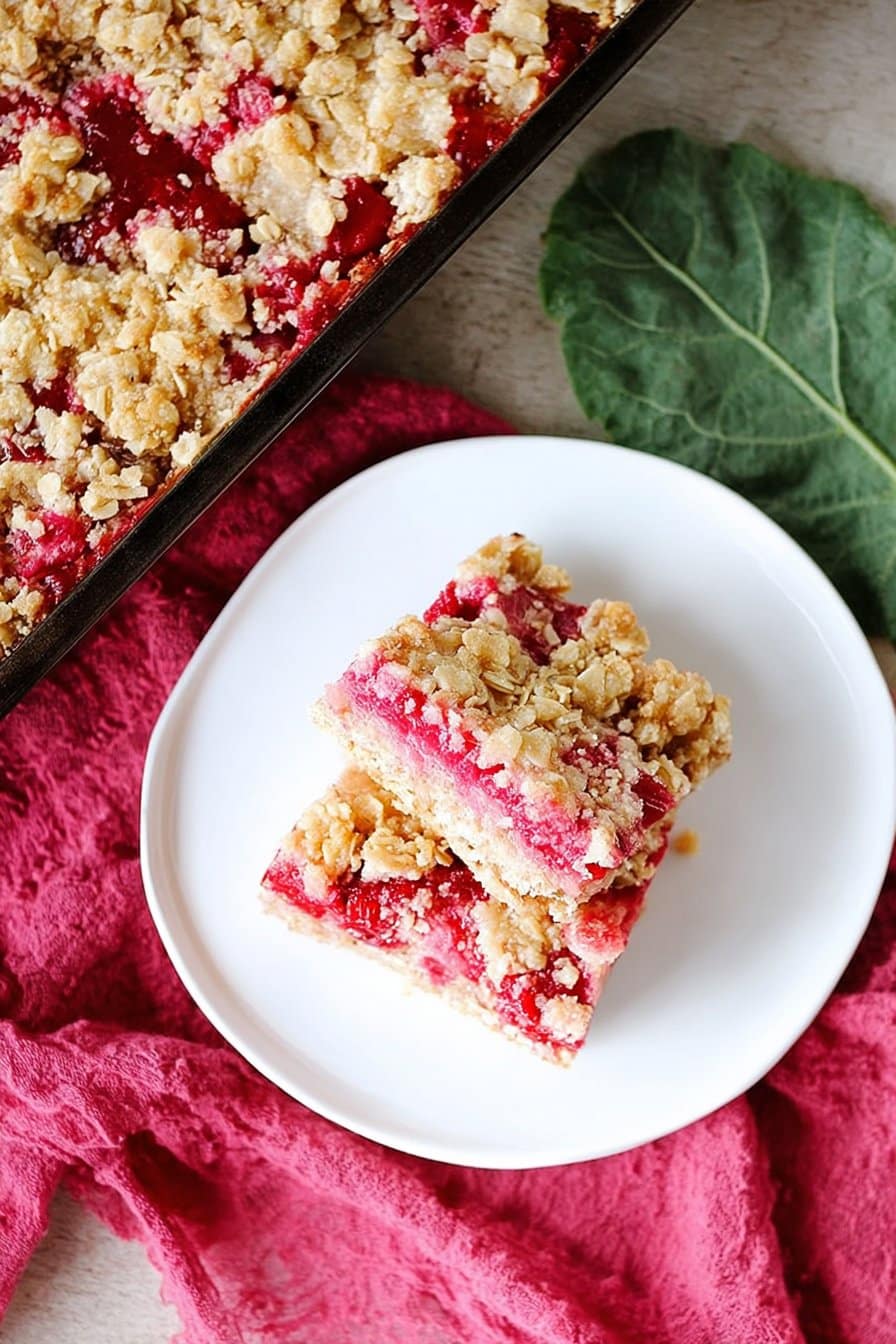
Cut them into generous squares and serve with a mug of milky tea—proper British style, or maybe a scoop of vanilla ice cream if you’re feeling indulgent. My uncle likes them with a drizzle of custard, which is a bit posh if you ask me. We once had them as a breakfast treat with Greek yoghurt, and that was surprisingly good!
Pro Tips (Learned the Hard Way… Oops!)
- I once tried to slice these while they were still warm. Big mistake—utter chaos. Let them cool, I promise it’s worth the wait.
- If you rush the crumble, it’s more like oat soup. Take a minute to really mix it until it clumps together a bit.
- Don’t stress if the rhubarb layer leaks to the sides—it makes for the yummiest chewy edges.
Questions I’ve Actually Gotten (And My Real Answers)
- Can I freeze these bars?
Yep, you can! I wrap them in clingfilm and freeze in a tub. They taste just as good—maybe slightly softer—after thawing. - Could I use gluten-free flour?
Probably, but I haven’t tried it myself. I’ve heard King Arthur Flour’s advice is solid for swaps. - What if I don’t have enough rhubarb?
No worries—just top up with strawberries or even apples. Or check out BBC Good Food’s rhubarb ideas for more ways to use up odds and ends. - Is it really okay to use frozen fruit?
Absolutely. I do it all the time when it’s out of season. Just let it thaw and drain a bit so it’s not watery. - Why won’t mine come out of the pan?
Probably forgot to line or grease it. Happens to the best of us (I once had to scrape them out with a spatula—still tasty, just a bit rustic!)
And there you have it—a rhubarb oat bars recipe you can make on a lazy Sunday, or when the rhubarb’s threatening to take over your fridge. Honestly, this is the kind of thing that gets better every time you bake it. And, on second thought, maybe don’t bake during a football match (unless you like surprises).
If you’re after more rhubarb inspiration, Smitten Kitchen’s rhubarb muffins are spot-on too. Happy baking, mate!
Ingredients
- 2 cups fresh rhubarb, chopped
- 1 cup granulated sugar
- 1 tablespoon cornstarch
- 1 1/2 cups old-fashioned rolled oats
- 1 1/4 cups all-purpose flour
- 3/4 cup brown sugar, packed
- 1/2 teaspoon ground cinnamon
- 3/4 cup unsalted butter, melted
- 1/4 teaspoon salt
Instructions
-
1Preheat the oven to 350°F (175°C). Line an 8×8-inch baking pan with parchment paper.
-
2In a saucepan, combine rhubarb, granulated sugar, and cornstarch. Cook over medium heat, stirring, until rhubarb is soft and mixture thickens, about 8-10 minutes. Set aside to cool slightly.
-
3In a large bowl, mix together oats, flour, brown sugar, cinnamon, and salt. Stir in melted butter until the mixture is crumbly.
-
4Press two-thirds of the oat mixture firmly into the bottom of the prepared pan to form the crust.
-
5Spread the rhubarb filling evenly over the crust. Sprinkle the remaining oat mixture over the top.
-
6Bake for 35-40 minutes, or until the top is golden brown. Allow to cool completely before cutting into bars.
Approximate Information for One Serving
Nutrition Disclaimers
Number of total servings shown is approximate. Actual number of servings will depend on your preferred portion sizes.
Nutritional values shown are general guidelines and reflect information for 1 serving using the ingredients listed, not including any optional ingredients. Actual macros may vary slightly depending on specific brands and types of ingredients used.
To determine the weight of one serving, prepare the recipe as instructed. Weigh the finished recipe, then divide the weight of the finished recipe (not including the weight of the container the food is in) by the desired number of servings. Result will be the weight of one serving.
Did you make this recipe?
Please consider Pinning it!!




