Let’s Talk Brownies—and the Dash that Started a Family Debate
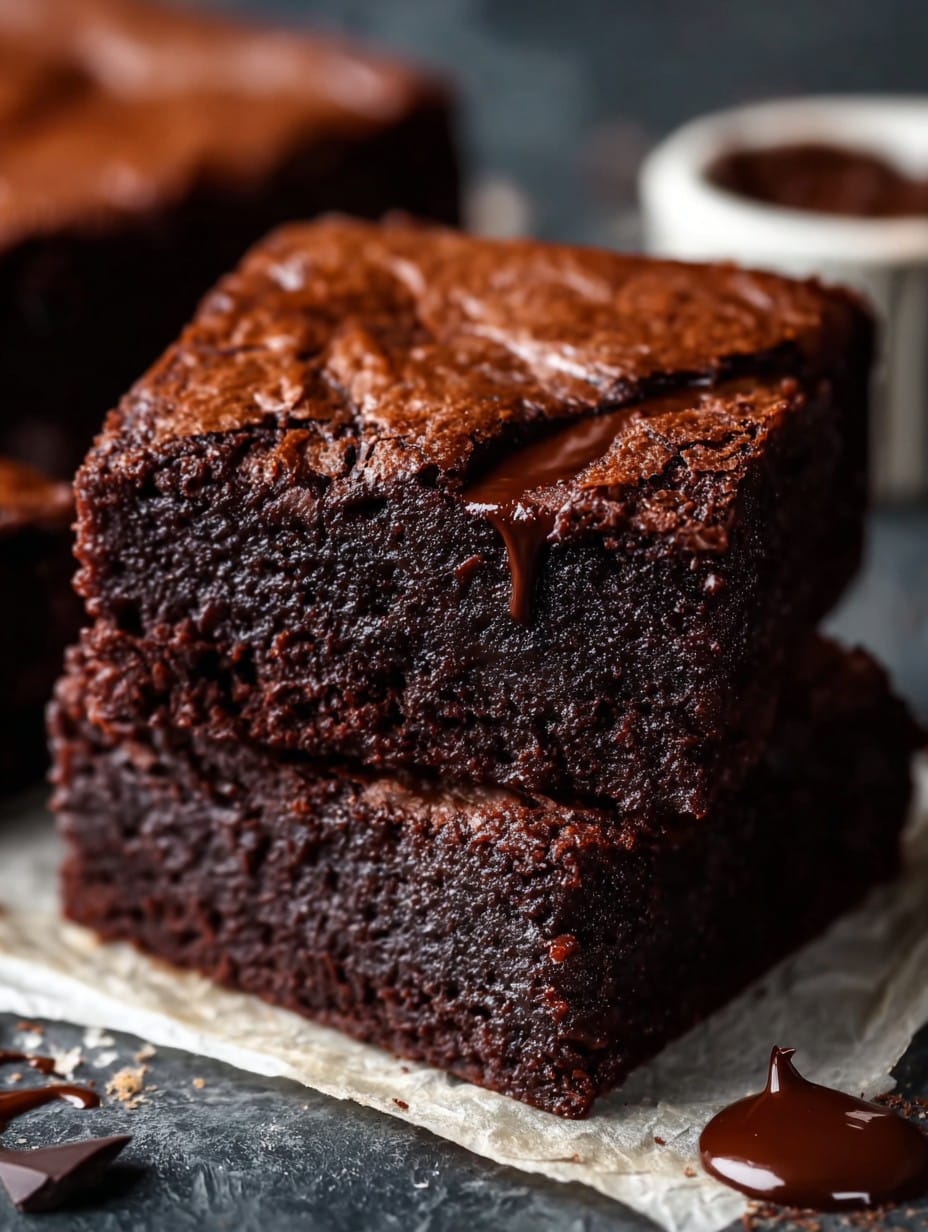
Okay, I have to come right out with it—brownies are my undoing. There’s just something about the first whiff of chocolatey heaven sneaking out the oven door. Years back, my sister and I got into this heated (honestly, one of us almost stormed out) argument about whether you add a glug of coffee to brownies—she said no, I said yes, then we both forgot about it because we’d licked the mixing bowl clean. So now, this is my recipe for Rich Chocolate Fudge Brownies with a special dash inside, and you can guess what it is. If you make them, please try not to eat half the batch before it cools. I fail at that every. single. time.

Why You’ll Love These (If You Like Chocolate, You’re Set)
I make this when the weather’s grey, when my mate pops round unexpectedly, or just to give myself a pep-up on those days when you stub your toe twice before breakfast. My family goes bananas for the deep, fudgy centre (hard to please this gang). And when my youngest discovered the hidden flavour, they called me the Baking Wizard
—not sure I deserve it but, hey, I’ll take it. If you’re on Team Chewy-Edged or Team Gooey-Middle, these play both sides. I’ve had my fair share of dry, crumbly attempts… actually, I find it works better if you don’t overthink the mixing bit. And don’t get me started on how easy it is to throw together with barely any faff. You’re welcome.
What You’ll Need (and a Few Swaps That Get the Job Done)
- 200g dark chocolate (I use 70% cocoa, but use milk chocolate if you fancy; my gran used chocolate chips from the corner shop—no complaints)
- 150g unsalted butter (salted works if that’s what’s on hand, just skip extra salt later)
- 250g sugar (granulated or brown; once used half-and-half ’cause I ran out—nobody noticed)
- 3 eggs, large (one time I used medium, meh, just baked it a bit less)
- 100g plain flour (gluten-free flour blend is actually grand, promise)
- 30g cocoa powder (Dutch-processed is posher, but any kind will do)
- 1/2 tsp salt (usually just eyeball this, not gonna lie)
- A special dash: 1 heaping tsp instant espresso powder (or a shot of cooled strong coffee—I’ve been known to use leftover morning brew; don’t judge!)
- Optional: handful of roughly chopped walnuts or pecans (just don’t let them bully the chocolate)
Alright, Here’s How I Throw It Together
- Preheat your oven to 180°C (about 350°F). Line a square brownie tin with baking paper—makes life easier at the end, trust me.
- Melt the butter and chocolate together in a saucepan over gentle heat. Stir it now and then, and try very hard not to sneak a spoonful. Fail, then keep stirring until smooth.
- Pull it off the heat; let it cool for about a song’s length (I’m not scientific—two minutes will do). Then, whisk in the sugar. It’ll look a bit grainy, that’s spot on.
- Add eggs all at once. I use a regular whisk for this, which feels a bit retro. Mix until thick and glossy. If it looks split, don’t panic—it’ll sort itself out after the next step.
- Sift in the flour, cocoa, and salt. (I say sift… but also, shaking it in from the bag works if you can’t be bothered.) Fold gently till just combined. Don’t overmix, or you’ll lose that fudgy magic.
- This is where the special dash comes in—add your espresso powder or coffee (lump it right in). Walnuts can slide in at this stage too.
- Scrape everything into your lined tin, smoothing the top with a spatula or the back of a spoon. It won’t look perfect; that’s sort of the point.
- Bake for 23–28 minutes, depending how well-done you like your brownies. Edges should pull away a bit, but don’t wait for a clean skewer/tester. If the centre jiggles a fraction, that’s your sign to take it out.
- Let cool in the tin (I say this, yet I’ve burned my tongue more than once—patience isn’t my virtue). Cut into squares—know that the middle ones sometimes vanish mysteriously.
Notes That Might Save Your Sanity
- If you forget to line the tin, scraping brownies out with a spoon can be your Plan B—messy, but delicious with ice cream.
- I used to worry about using fancy chocolate, but honestly the supermarket’s own label’s fine (the price tags on posh bars make me wince).
- Cool completely for neat squares, but if you eat ‘em gooey and hot from the oven, you’ll get no judgement from me.
Twists and Experiments (One Was a Total Dud!)
- Swirl in peanut butter on top before baking—kids call this “double trouble”.
- Big fan of frozen raspberries or a smidge of orange zest in the batter. Orangey-choco is divisive at my house though.
- Tried adding dried chilli flakes once. It was, how shall I put it, memorable. Wouldn’t repeat unless you like brownies biting back.
Equipment (But Don’t Panic if You’re Short a Tool)
You’ll need at least a medium saucepan, a square tin (8×8 inch is standard, but I once used a pie dish and just reduced the bake time). No whisk? Fork will do, though your arm might get a workout. Lost your spatula? I used the back of a cereal spoon in a pinch—it works, sort of.
Storing Them (Not That They Ever Really Last)
Pop the leftovers (if you have any) in an airtight container. They’ll keep 3 days at room temp, though honestly, in my house it never lasts more than a day! Refrigerate if you want them a bit firmer—some argue they taste better the next evening. I agree, when I manage to save a piece.
How We Serve ‘Em (And Why My Brother Puts Them on Ice Cream)
Best still slightly warm, with a scoop of vanilla ice cream or a cloud of whipped cream if you’re feeling posh. Or just straight from the tin, sneaky midnight style. For birthdays, I sometimes poke on a few candles—just roll with it.
Learned the Hard Way: My Brownie Pro Tips
- I once tried rushing the cool-down step and regretted it because everything turned into chocolate mush (delicious, though—not presentable).
- Don’t use baking powder—turns out you get cakey, not fudgey. Ask me how I know.
- Watch the oven in the last five minutes. Overbaking is a crime in my house. If in doubt, underbake.
FAQ (The Questions Friends Actually Asked Me)
- Can I leave out the espresso? Yep—just skip it! Funnily, it doesn’t make the brownies taste like coffee at all, just amps up the chocolate flavour. But skip it if you want.
- How do you get them so shiny up top? It’s the eggs and sugar combo. Whisk them really thoroughly after melting the chocolate and before flour—don’t skimp (I did once, and the crust was duller than my backyard in February).
- What’s the best chocolate to use? Honestly, whatever you like eating straight. Not a dark choc fan? Milk works. Even white in half the batch once—came out more like blondies, but nobody threw them away!
- Why didn’t my brownies set? Probably baked a smidge too short, or too much liquid. Give ’em time to firm up (I sometimes pop them in the fridge, but I got distracted once and wow, solid as a brick—learned my lesson).
- Can I freeze these? You bet! Wrap up tightly, freeze for up to a month. Thaw in the fridge or just eat frozen if you’re desperate (been there).
And on a totally unrelated note: every time I make these, my cat sits at the kitchen threshold and meows dramatically, as if I’ve never fed him chocolate (I haven’t, and you shouldn’t either, but the performance is Oscar worthy). Anyway, hope you enjoy these brownies—messy, gooey, family-approved, and just a little bit magic inside.
Ingredients
- 1 cup (225g) unsalted butter, melted
- 2 cups (400g) granulated sugar
- 4 large eggs
- 1 tablespoon pure vanilla extract
- 1 cup (120g) all-purpose flour
- 1 cup (90g) unsweetened cocoa powder
- 1/2 teaspoon salt
- 1 cup (175g) semi-sweet chocolate chips
- 1/2 teaspoon instant espresso powder (special dash)
- 1/2 teaspoon baking powder
Instructions
-
1Preheat your oven to 350°F (175°C). Line a 9×13 inch baking pan with parchment paper and lightly grease.
-
2In a large bowl, whisk together the melted butter and granulated sugar until combined and glossy.
-
3Add eggs one at a time, mixing well after each addition. Stir in vanilla extract and instant espresso powder.
-
4Sift together flour, cocoa powder, salt, and baking powder. Fold the dry ingredients gently into the wet mixture until just combined.
-
5Fold in semi-sweet chocolate chips, then spread the batter evenly in the prepared pan.
-
6Bake for 28-32 minutes, or until a toothpick inserted in the center comes out with moist crumbs. Cool completely before slicing and serving.
Approximate Information for One Serving
Nutrition Disclaimers
Number of total servings shown is approximate. Actual number of servings will depend on your preferred portion sizes.
Nutritional values shown are general guidelines and reflect information for 1 serving using the ingredients listed, not including any optional ingredients. Actual macros may vary slightly depending on specific brands and types of ingredients used.
To determine the weight of one serving, prepare the recipe as instructed. Weigh the finished recipe, then divide the weight of the finished recipe (not including the weight of the container the food is in) by the desired number of servings. Result will be the weight of one serving.
Did you make this recipe?
Please consider Pinning it!!




