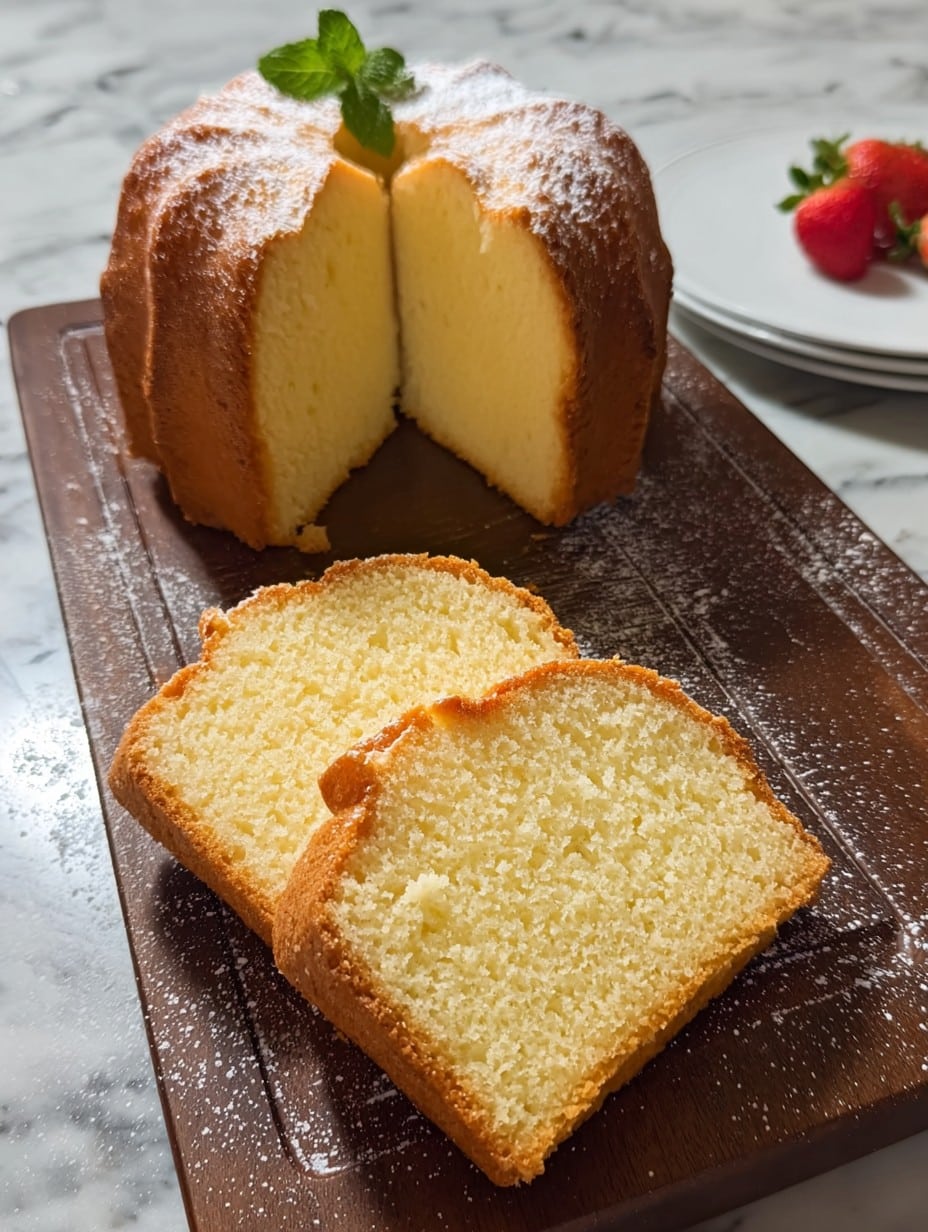
Let Me Tell You About This Vanilla Pound Cake
If you’ve ever found yourself craving something warm, buttery, and unapologetically classic, let me bend your ear about my vanilla pound cake. I still remember raiding my mum’s kitchen, impatiently peering through the oven door while the scent drifted everywhere. Truth be told, I couldn’t wait for it to cool (patience has never really been my thing). There was the one time I mistook salt for sugar—let’s never talk about that again. But honestly, this cake? It’s reliable, comforting, and forgiving (mostly). Anyway, enough rambling. You ready?

Why I Always Come Back to This Cake
I bake this when I want to bribe my teenage nephew into mowing the lawn, or when there’s an unexpected neighbor knocking (the one who always insists she doesn’t eat sweets and, mysteriously, never leaves cake behind). My family goes a little wild for it because it just screams home. Also, if you’ve ever felt like fancier cakes are too much fiddling—this pound cake gets it done. I used to get so frustrated with cakes sinking in the middle until I realized (after much trial) that this one just…doesn’t. Or, if it does, a dusting of icing sugar covers a multitude of sins.
What You’ll Need (and What You Can Get Away With)
- 1 cup (225g) unsalted butter, at room temp (honestly, I’ve used salted butter too—just skip the extra salt later on)
- 2 cups (400g-ish) white sugar (sometimes I swap in half brown sugar when I’m feeling cheeky)
- 4 big eggs (I’ve used three when I was short; the cake’s slightly denser but still tasty)
- 2 teaspoons real vanilla extract (or yeah, essence in a pinch—Grandma was strict about this but honestly, whatever’s handy)
- 1/4 teaspoon salt (unless your butter was already salted)
- 2 3/4 cups plain flour (some say cake flour, but I can’t be fussed)
- 1/2 teaspoon baking powder
- 3/4 cup milk (once, I used Greek yogurt and it wasn’t half bad actually)
How I Throw This Together
- Preheat your oven to 170°C (that’s about 350°F, ish). Butter a loaf pan or—if you’re feeling ambitious—a Bundt pan. Sometimes I just line the thing with parchment, less cleaning up later.
- Cream the butter with sugar until it’s pale and, well, fluffy. This is arm workout territory if you’re doing it by hand, but the cake’s worth it.
- Add eggs one at a time. Don’t worry if the mix looks a bit weird or splits. It always does—with me, anyway.
- Stir in the vanilla and salt (this is when the kitchen starts to smell like heaven, honestly).
- Whisk together the flour and baking powder. Fold it gently into the wet mix, alternating with your milk. I do about 1/3 flour, half milk, 1/3 flour, milk, the rest.
- Try not to overmix. Or do; some days it turns out fine anyway. But in theory, gentle folding is best.
- Spoon it into your pan. Smooth the top (I sometimes just tap the pan on the bench and hope for the best).
- Bake for, oh, 55 to 65 minutes? My oven tends to get a mind of its own, so I check after 50. Toothpick test is your friend—if it comes out with just a few crumbs, you’re golden.
- Let it cool in the pan about 10 minutes. Then tip it out gently—run a knife around the edges, maybe mutter a little encouragement if it’s stubborn. Cool on a rack (or don’t. Warm cake slices are pure bliss).
Notes I Wish I’d Learned Earlier
- The butter really does need to be soft, not melty. I tried microwaving it once and ended up with sad, oily cake.
- If you’re using a dark tin, reduce the heat by about 10 degrees. Trust me, or you’ll get a burnt crust and still-raw middle.
- You can halve the sugar if you need less sweetness. The cake is more breakfasty that way.
Twists I’ve Tried (and One I Regret)
- Add the zest of a big lemon or orange; it brightens things up.
- Sometimes I mix in a handful of chocolate chips. Kids love it—adults cheer too.
- I once tried swirling in raspberry jam. Looked gorgeous, tasted okay, but kind of sank to the bottom. Maybe you’ll have better luck?
- Oh—and toasted almonds on top are a real nice touch.
Gear You Need, Or Stuff I Use Instead
- An electric mixer is handy, but wooden spoon and elbow grease work in a pinch (remember: cake = exercise!).
- Loaf pan, or a square tin if that’s all you’ve got. I have used a muffin tray when I couldn’t find my proper tin—bit unconventional but it worked.
- Parchment paper saves lives. Otherwise, a greased tin and hope.
How to Store This (But It Won’t Last Long)
Keep leftover pound cake in an airtight container, right on the counter for a couple of days—it never lasts that long though, at least not in my place! Fridge if it’s humid or you’re trying to make it last. I think it actually tastes better after a night’s rest; the flavors settle and it’s less crumbly (if you can wait, which I usually can’t).
How I Like to Serve It
Slab of warm pound cake, big mug of tea, feet propped up…that’s heaven on a damp afternoon. My partner likes slices topped with fresh berries and a dollop of thick cream. Sometimes I toast leftover slices and slather them with butter (seriously, try this one).
This Step Might Be Fussy, But Hear Me Out
- I once tried to hurry the creaming stage—don’t; the cake comes out heavy and sad. Slow and steady, honestly.
- Scrape your bowl! Even that annoying floury bit at the bottom. It matters more than you think (I learned the hard way… more than once).
- And don’t skimp on vanilla; cheap stuff just isn’t the same, though I *have* used it during student days—those were wild times.
You Ask, I Answer (Or At Least I Try)
- Is this cake very sweet? It’s sweet but not toothache-sweet. I don’t have the world’s biggest sweet tooth—sometimes I cut the sugar a bit.
- Can I freeze it? Absolutely! Wrap lumps (chunks?) well. Freezer is your friend. Just thaw at room temp, or pop it in the toaster. Easy as pie (or cake, rather).
- What if my cake cracks on top? Oh, that’s totally normal. Honestly, looks homemade. It’s kind of its signature. (Plus, more room for glaze!)
- The cake is crumbly—help? If it’s really crumbly, it probably needed just a bit less baking. But crumble? Tastes just as good, especially with custard or ice cream on top. (Speaking of which, don’t get me started on British puddings…)
- Can I make it gluten-free? Haven’t tried it myself—my cousin did with a cup-for-cup blend, said it was grand but a bit denser. Let me know if you crack the code.
And there you go—my “Vanilla Pound Cake: A Classic Dessert That Never Disappoints”. If you try it out, let me know! Or don’t; just eat and enjoy. That’s what it’s all about, isn’t it?
Ingredients
- 1 cup (226g) unsalted butter, softened
- 2 cups (400g) granulated sugar
- 4 large eggs, room temperature
- 2 teaspoons vanilla extract
- 3 cups (375g) all-purpose flour
- 1/2 teaspoon baking powder
- 1/2 teaspoon salt
- 1 cup (240ml) whole milk
Instructions
-
1Preheat the oven to 350°F (175°C). Grease and flour a 9×5-inch loaf pan.
-
2In a large bowl, cream together the softened butter and granulated sugar until light and fluffy.
-
3Add eggs one at a time, beating well after each addition. Stir in the vanilla extract.
-
4In a separate bowl, whisk together flour, baking powder, and salt. Gradually add the dry ingredients to the butter mixture, alternating with the milk, beginning and ending with dry ingredients. Mix until just combined.
-
5Pour the batter into the prepared pan and smooth the top. Bake for 55 minutes, or until a toothpick inserted into the center comes out clean.
-
6Allow the cake to cool in the pan for 15 minutes before transferring to a wire rack to cool completely. Slice and serve.
Approximate Information for One Serving
Nutrition Disclaimers
Number of total servings shown is approximate. Actual number of servings will depend on your preferred portion sizes.
Nutritional values shown are general guidelines and reflect information for 1 serving using the ingredients listed, not including any optional ingredients. Actual macros may vary slightly depending on specific brands and types of ingredients used.
To determine the weight of one serving, prepare the recipe as instructed. Weigh the finished recipe, then divide the weight of the finished recipe (not including the weight of the container the food is in) by the desired number of servings. Result will be the weight of one serving.
Did you make this recipe?
Please consider Pinning it!!




