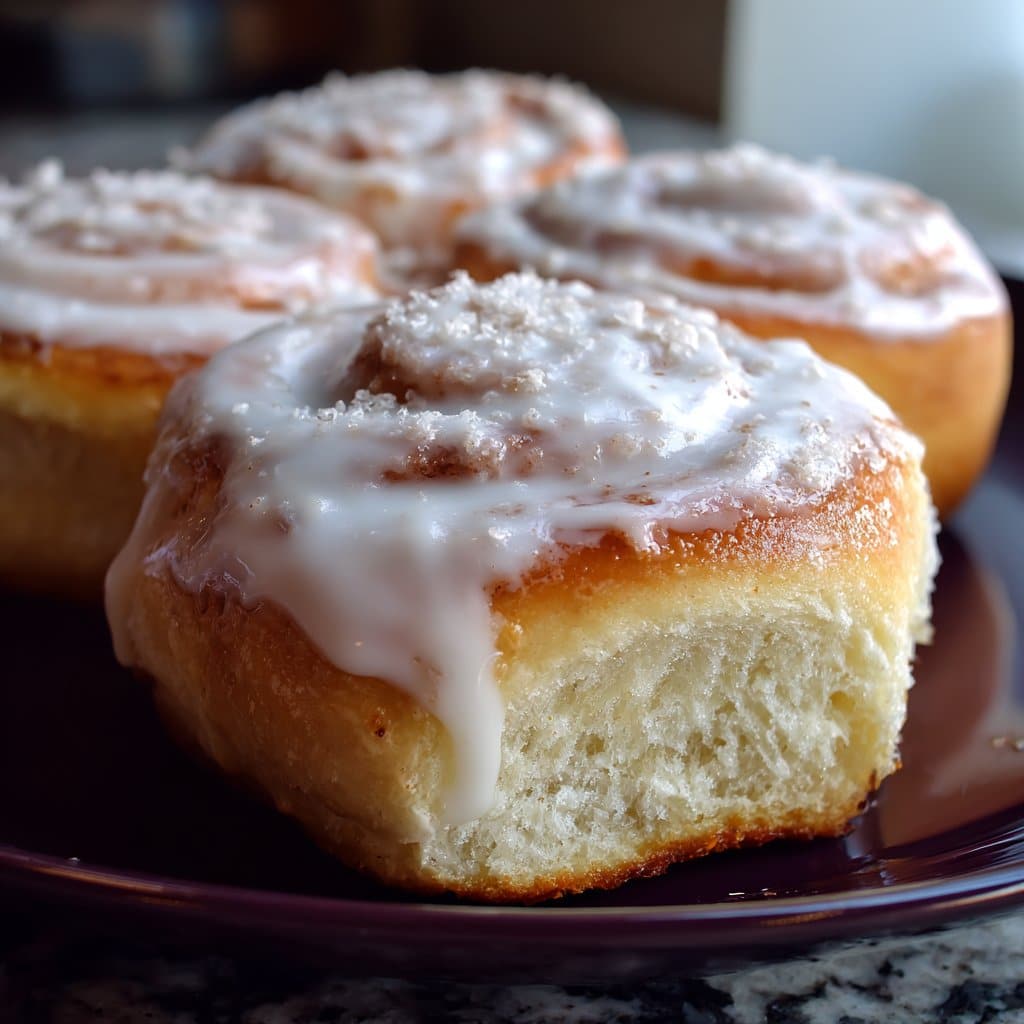
Let’s Talk About Ring-a-ling Sweet Rolls (aka my secret for winning brunch)
Alright, so if you’ve never had a Ring-a-ling Sweet Roll, you’re in for a treat. I first stumbled on this recipe at, of all places, a school bake sale—granted, someone else’s mum made them, and I’ve been obsessed ever since. When I attempted them the first time, I accidentally used salt instead of sugar (ugh, rookie move), but since then it’s become my go-to for when I want the house to smell like a bakery and everyone’s in need of something special. Picture this—Sunday morning, slippers on, coffee brewing, and these rolls baking away. Bliss! Oh, and if you’re wondering, yes, the name is as fun to say as the rolls are to eat.
Why I Keep Coming Back To This Recipe
I make these whenever the weather turns chilly or when I just feel like being everyone’s breakfast hero. My family goes absolutely bonkers for this (seriously, my kids have been known to hover in the kitchen, trying to sneak samples before I’ve even drizzled the glaze)! Actually, I used to think cinnamon rolls were the be-all-end-all, but these are fluffier and a bit more playful, you know? Plus, if you’ve ever had a bake go sideways because your yeast didn’t rise, you’ll appreciate that this one’s pretty forgiving.
What You’ll Need (with my off-script substitutions)
- 3 to 3 1/2 cups plain flour (sometimes I use half bread flour if I’m feeling ambitious; my granny swore by Gold Medal, but any brand will do)
- 1/4 cup white sugar (honestly, I’ve even swapped in brown when I ran out—tastes more caramel-y)
- 1 packet (about 2 1/4 tsp) active dry yeast
- 1/2 tsp salt
- 3/4 cup whole milk (warmed—if you only have 2%, it’s fine, just a bit less rich)
- 1/4 cup unsalted butter (melted; salted works too, just cut back on the salt)
- 1 large egg (room temp is best, but I almost always forget to take it out early)
- For filling: 1/3 cup softened butter, 1/2 cup brown sugar, 2 tsp cinnamon (or more, honestly I never measure exactly)
- For glaze: 1 cup powdered sugar, 1–2 tbsp milk, dash of vanilla extract (one time I ran out and used maple syrup, not mad about it)
How I Throw These Together (and what usually goes wrong…)
- In a big bowl, mix 1 cup flour, the sugar, yeast, and salt. Pour in the warmed milk and melted butter. Stir until it looks a bit like pancake batter.
- Add the egg. Now, I always feel like this part looks weird—it gets gloopy, but keep going. Mix it up, then start adding flour, about 1/2 cup at a time, until it forms a soft dough. Don’t overthink it; I sometimes need more or less flour depending on… I dunno, the mood of the dough?
- Knead on a floured surface for about 5 minutes till smooth-ish. If you have a stand mixer, use it—if not, elbow grease works fine. (One time I tried kneading with a spatula. Don’t.)
- Plop it in a greased bowl, cover with a tea towel, and let rise in a warm place for about an hour. Or until doubled. I’ve rushed this before and regretted it—let it do its thing.
- Once it’s puffy, punch it down (very satisfying), then roll out into a rectangle—like, 9 by 13 inches? I never measure.
- Spread with that softened butter (don’t skimp here), sprinkle brown sugar and cinnamon. Roll it up tight from the long side. Slice into 12 chunky pieces.
- Arrange the rolls in a greased ring or bundt pan (hence, ring-a-ling!), or just use any old cake tin if that’s what you have. They don’t mind.
- Let them rise again for 30-40 min. This is usually when I make the glaze or have a cuppa. Preheat oven to 350°F (175°C).
- Bake 20-25 min until golden and your kitchen smells like a cinnamon hug. If they look pale, give ’em another minute or two.
- Drizzle with glaze while still warm. It’s messy, but in the best way. (This is where I always burn my tongue, never learn.)
Notes Form My Many Attempts
- The dough can be made the night before and chilled. Actually, I find it works better if you give it a cold rise. Just let it warm up before shaping.
- Sometimes I add orange zest to the glaze—just feels fancier somehow.
- If the rolls stick to the pan, run a butter knife around before trying to flip them out. I learned that the hard way (still ate the mangled bits, though).
Variations I’ve Tried (and a flop or two)
- Adding chopped pecans to the filling—yum, if you’re into a bit of crunch.
- Subbing cardamom for cinnamon—unexpectedly lovely.
- I once tried a chocolate spread swirl. It… didn’t work. The rolls baked up weirdly soggy. Maybe someone cleverer than me can figure that one out.
What If You Don’t Have a Bundt Pan?
Honestly, I used to think a ring pan was non-negotiable, but any round cake tin or even a deep skillet gets the job done. Just be sure to grease it well or line with parchment if you’re worried about sticking.
How Long Do These Last? (Ha!)
Supposedly, you can store them in an airtight container for 2-3 days. In reality? They’re usually gone by lunch. But, if you do have leftovers, a quick zap in the microwave perks them right back up.
How I Like To Serve Them
Warm with a big mug of milky tea (Yorkshire, if you’re asking). My kids love a little extra glaze on the side for dunking. Sometimes, if I’m feeling extra, I’ll sprinkle a few toasted nuts on top, but really, they don’t need much dressing up.
Lessons Learned (don’t be like me)
- Don’t rush the rising. I once tried blasting the bowl with a hair dryer (don’t ask)—ended up with weird, tough rolls.
- Butter actually makes a difference. I tried margarine once, and they just weren’t as good, though if it’s all you have, go for it.
- Let the rolls cool at least a bit before glazing, unless you like runny puddles everywhere. (Actually, I kind of do, but it’s messy.)
Your Top Questions (that I’ve been asked for real)
Can I make these ahead of time?
Yep, the dough keeps overnight in the fridge; just assemble and bake in the morning. I’ve even frozen baked rolls—just rewarm and glaze.
Do I have to use a stand mixer?
No way! I usually knead by hand (good arm workout, right?), but if you’ve got a mixer, save yourself some effort.
Can I double the recipe?
I do all the time for holidays. Only thing is, you’ll need two pans—cramming them in together is a bad idea, trust me.
Is it ok to skip the glaze?
You could, but why would you? Actually, sometimes I just dust them with powdered sugar if I’m feeling lazy.
Quick Digression: My Cat Loves the Smell
Completely off topic, but every time I bake these, my cat camps out next to the oven like she’s expecting her own share. She doesn’t get any, but she’s hopeful.
If you want more baking inspo, I often browse King Arthur Baking for tips, or check out Sally’s Baking Addiction for more roll ideas. Both make me want to bake everything, all the time.

Ingredients
- 3 cups all-purpose flour
- 1 packet (2 1/4 tsp) active dry yeast
- 1/4 cup granulated sugar
- 1/2 cup warm milk
- 1/4 cup unsalted butter, melted
- 1 large egg
- 1/2 teaspoon salt
- 1/2 cup brown sugar
- 1 tablespoon ground cinnamon
- 1 cup powdered sugar
- 2 tablespoons milk (for glaze)
Instructions
-
1In a large bowl, combine warm milk, yeast, and granulated sugar. Let sit for 5 minutes until foamy.
-
2Add melted butter, egg, and salt to the yeast mixture. Gradually mix in flour until a soft dough forms.
-
3Knead the dough on a floured surface for 5-7 minutes, then place in a greased bowl, cover, and let rise for 1 hour or until doubled in size.
-
4Roll out the dough into a rectangle. Spread with brown sugar and cinnamon. Roll up and shape into a ring on a baking sheet, pinching ends to seal.
-
5Cover and let rise for 20 minutes. Bake at 350°F (175°C) for 25 minutes or until golden brown.
-
6Mix powdered sugar and milk to make a glaze. Drizzle over warm rolls before serving.
Approximate Information for One Serving
Nutrition Disclaimers
Number of total servings shown is approximate. Actual number of servings will depend on your preferred portion sizes.
Nutritional values shown are general guidelines and reflect information for 1 serving using the ingredients listed, not including any optional ingredients. Actual macros may vary slightly depending on specific brands and types of ingredients used.
To determine the weight of one serving, prepare the recipe as instructed. Weigh the finished recipe, then divide the weight of the finished recipe (not including the weight of the container the food is in) by the desired number of servings. Result will be the weight of one serving.
Did you make this recipe?
Please consider Pinning it!!




