Let Me Tell You About These S’mores Bars…
I won’t lie, these S’mores Bars were born from a late-night sugar craving and an almost embarrassing lack of patience. Maybe you’ve been there? You want s’mores, but the idea of a campfire (or even the microwave) just isn’t on the cards. That’s how these beauties came to be—me, pyjama-clad, staring into the pantry, hunting for inspiration. And honestly, they’ve become a sort of legend in my house. My sister still teases me about the time I dropped half the pan on the floor, but hey—five-second rule. (Actually, it was more like ten seconds, but who’s counting?)
Why I Keep Making These Bars Again (and Again)
I make these whenever I want that campfire nostalgia without a smoky hair situation. My family goes absolutely bonkers for these S’mores Bars because they’re both gooey and crunchy (and that’s a hard combo to beat, right?). Plus, they’re easier than wrangling with skewers and burnt marshmallows. And, if I’m really honest, they’re my “oops, forgot about the bake sale” rescue plan. If you’re the sort who gets a bit annoyed at sticky hands, don’t worry—they’re way less messy than the campfire classic, unless you eat them warm and then… well, they’re still a little sticky. It’s just part of the fun.
Ingredients: What You’ll Need (and What I Sometimes Swap)
- 1/2 cup (about 1 stick) unsalted butter, melted (sometimes I use salted if I forget, just skip the pinch of salt later)
- 1 cup light brown sugar, packed (I’ve used dark brown sugar in a pinch—makes ’em a bit richer)
- 1 large egg
- 1 teaspoon vanilla extract (my gran swore by the real stuff; I’ve used imitation and it’s fine, honestly)
- 1 cup all-purpose flour (I’ve even tried with a gluten-free blend once—worked surprisingly well!)
- 1 cup graham cracker crumbs (here’s how to make your own if you’re out)
- 1/2 teaspoon baking powder
- 1/4 teaspoon salt
- 1 1/2 cups mini marshmallows (or the big ones torn up—bit more work, but sometimes all I have)
- 1 cup milk chocolate chips (sometimes I go half dark, half milk, if I’m feeling fancy, or whatever’s in the baking drawer)
Okay, Here’s How You Actually Make Them
- Preheat your oven to 350°F (that’s about 175°C, I think—I always have to check). Grease an 8×8 inch pan, or just line it with some parchment paper. I only do this because I hate washing up stuck-on bits.
- In a medium bowl, stir together the melted butter and brown sugar until it’s smooth. Sometimes I do this with a fork if I can’t find my whisk. Beat in the egg and vanilla, but don’t overthink it—just until it looks mixed.
- Now add the flour, graham cracker crumbs, baking powder, and salt. Stir it all up till you’ve got a thick, kind of sandy dough. Don’t worry if it seems stiff—that’s normal. This is probably where I sneak a little taste (raw egg warning and all that, but, you know…)
- Press about two-thirds of this dough into the bottom of your pan. I usually just use my hands. Top with chocolate chips, then scatter the marshmallows. Drop the rest of the dough on top in little blobs—it won’t cover everything, and that’s fine. Actually, the messier it looks, the more the marshmallows can peek through later.
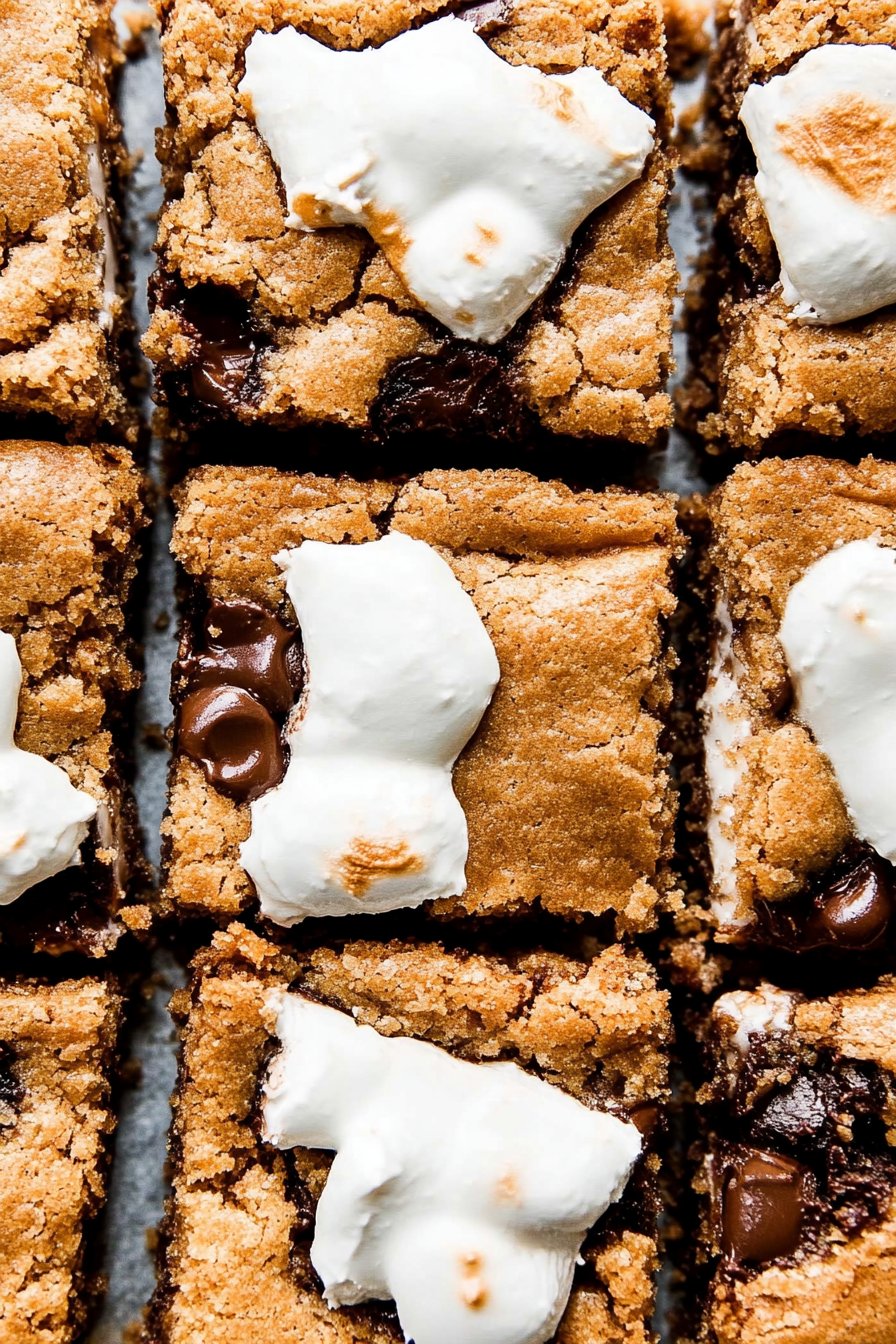
- Bake for 22–25 minutes, or until the edges look golden and the marshmallows start to brown. The middle might jiggle a bit—don’t panic, it’ll set up as it cools. (I used to try baking until the whole thing was solid. Nope. Dry bars.)
- Cool completely before cutting, or just accept that you’ll get goo everywhere (which, let’s be honest, is part of the charm.)
Notes from My (Many) Experiments
- Letting them cool is hard but worth it—if you cut them hot, they ooze everywhere. Not that this is a bad thing, it’s just messy.
- I once used all dark chocolate, and the bars were kinda intense—maybe try a half-and-half mix first.
- Actually, I think they taste better the next day. Not that they usually last that long.
Variations I’ve Tried (and One Epic Fail)
- Peanut butter chips instead of chocolate? Yes, do it. Just don’t overdo or it takes over.
- I tried adding chopped nuts once (pecans, I think?), and it was a bit too much. Maybe stick with just the basics unless you love a crunch.
- Swapping the graham crackers for digestive biscuits worked, but the flavor was a bit different—still nice if that’s what you’ve got lying around. Oh, and once I tried adding caramel bits. Disaster. Way too sweet, and it made a sticky mess that welded itself to the pan.
What If You Don’t Have the Right Pan (Or Other Gear)?
So, you’re supposed to use an 8×8 inch pan. But once, I used a loaf tin and just baked it a bit longer. Not ideal, but it totally worked. If you don’t have parchment paper, just give your pan a good buttering—use your hands, it’s less faff than hunting for a pastry brush.
How Long Do These Actually Keep?
If you’re more restrained than I am, these keep in an airtight container at room temp for about 3 days, maybe a bit longer in the fridge (but they get super firm). Though honestly, in my house, it never lasts more than a day! You can even freeze them, layered with parchment, but I think the marshmallows get a bit weird after defrosting.
Serving: Here’s What We Do
We usually just grab them right out of the pan, but if company’s coming, I’ll cut them into tiny squares and pretend I’m sophisticated. If you want to go all out, try topping them with a scoop of vanilla ice cream (or coffee ice cream if you’re feeling bold!). That’s our little Saturday night trick.
Things I’ve Learned (the Hard Way)
I once tried rushing the cooling step and ended up with a gooey heap that looked more like marshmallow stew than bars—so, yeah, be patient. Also, don’t skimp on greasing the pan. I tried that once and spent more time chiseling out bars than eating them. Oh, pro tip: If you’re doubling the recipe, use a 9×13 pan, but watch the baking time—it can go from golden to charred pretty quick.
FAQ: Real Questions (and My Honest Answers)
- Can I use regular marshmallows instead of mini?
Totally! Just chop them up or tear them into bits. Takes a little longer but works fine. - Can I make these gluten free?
Yep, just use a gluten-free flour blend and gluten-free graham crackers. I’ve done it and nobody could tell the difference, honestly! - What’s the best way to cut them cleanly?
Wait till they’re completely cool (I know, I know), and use a sharp knife wiped with a bit of oil between cuts. Or don’t worry about messy edges; it’s rustic, right? - Can I use dark chocolate instead of milk?
Yes—just be ready for a much richer flavor. I like mixing the two. - Do I really need parchment paper?
Well, it does make things easier, but if you don’t have any, just grease that pan as if your life depends on it and you’ll be fine. - Are these bars super sticky?
They can be, especially if you eat them warm (which, let’s be honest, is the best part). Just keep a napkin handy!
Looking for more easy treats? I swear by these cookie bars on crazy days, and if you’re a marshmallow fan, homemade marshmallows are super fun to try making at least once. Anyway, let me know if you make these S’mores Bars (or if you discover a new twist—I’m always game for a kitchen experiment!). Pass the napkins!
Ingredients
- 1 1/2 cups graham cracker crumbs
- 1/2 cup unsalted butter, melted
- 1/4 cup granulated sugar
- 1 1/2 cups milk chocolate chips
- 2 cups mini marshmallows
- 1/2 cup all-purpose flour
- 1/2 teaspoon baking powder
- 1/4 teaspoon salt
Instructions
-
1Preheat the oven to 350°F (175°C). Line an 8×8-inch baking pan with parchment paper.
-
2In a medium bowl, mix graham cracker crumbs, melted butter, and sugar until combined. Press the mixture evenly into the bottom of the prepared pan.
-
3Sprinkle half of the chocolate chips over the crust. In a separate bowl, whisk together flour, baking powder, and salt. Sprinkle this mixture evenly over the chocolate chips.
-
4Top with mini marshmallows and the remaining chocolate chips.
-
5Bake for 18-20 minutes, or until the marshmallows are golden brown and the chocolate is melted. Allow to cool completely before cutting into bars.
Approximate Information for One Serving
Nutrition Disclaimers
Number of total servings shown is approximate. Actual number of servings will depend on your preferred portion sizes.
Nutritional values shown are general guidelines and reflect information for 1 serving using the ingredients listed, not including any optional ingredients. Actual macros may vary slightly depending on specific brands and types of ingredients used.
To determine the weight of one serving, prepare the recipe as instructed. Weigh the finished recipe, then divide the weight of the finished recipe (not including the weight of the container the food is in) by the desired number of servings. Result will be the weight of one serving.
Did you make this recipe?
Please consider Pinning it!!




