If We’re Being Honest, Bang Bang Chicken Is My Weeknight Hero
I’ve lost count of how many times I’ve made this spicy Bang Bang Chicken with sauce—like, if I had a nickel for every time, I’d probably buy more Sriracha. The first time I tried it, I was genuinely skeptical. I thought, can something this simple really be that good? But after that first tender, spicy, creamy bite, I was hooked. My partner calls it “the dish that disappears,” because there’s never any left for tomorrow. And, really, is there any better compliment? (Also, don’t tell anyone, but I once ate the leftover sauce with crackers. No shame.)
Why You’ll Love This (Or At Least, Why I Do)
I make this when I want to impress, but not stress. My family goes crazy for it because it’s crispy, spicy, and dunkable (and who doesn’t like dunking things?). Plus, the sauce is so good I sometimes double the batch and use it on roasted veg later. Confession: for a while, I kept burning the chicken because I’d wander off to check my phone. Now I *try* to stay in the kitchen—though honestly, if you scorch a few bits, they’re still tasty!
What You’ll Need (And a Few Things You Can Swap)
- 2 chicken breasts, cut into bite-size chunks (I sometimes use chicken thighs—juicier, but a bit messier)
- 1/2 cup cornstarch (or plain flour if you’re out—my grandmother always insisted on Bob’s Red Mill, but I just use whatever’s cheapest)
- 2 eggs, beaten (once I used just one and it worked fine, but a little less crispy)
- 1 cup panko breadcrumbs (regular breadcrumbs will do, though panko is crunchier)
- Salt and pepper, to taste (I always eyeball this, which makes my brother crazy)
- Oil for frying (if you want to bake, use spray oil and a hot oven—it’s not exactly the same, but it’s alright)
- For the sauce:
- 1/2 cup mayo (Kewpie is amazing, but not essential)
- 2-3 tablespoons Sriracha (adjust for spice; sometimes I swap in gochujang or even a little chili crisp—yum)
- 1 tablespoon honey (maple syrup if you’re fancy or just ran out of honey)
- 1 tablespoon rice vinegar (white vinegar works in a pinch)
- 1 teaspoon garlic powder
How I Actually Make It (With a Few Honest Thoughts)
- Set up your dredging station: one plate with cornstarch, one bowl with beaten eggs, one plate with breadcrumbs. Sometimes I make a huge mess and use baking trays to keep crumbs from escaping, but they still do.
- Season the chicken bits with salt and pepper (I usually overdo the pepper; it’s just better that way).
- Dip chicken bits in cornstarch (or flour), then egg, then panko. I always get sticky fingers. It’s unavoidable, unless you use tongs, which I never do because they’re in the dishwasher.
- Heat oil in a deep-ish pan until shimmering. I go with medium-high heat, but honestly, if you’re not sure, just drop a breadcrumb in—if it sizzles, you’re good.
- Fry chicken in batches (don’t crowd the pan or you’ll end up with sad, soggy chicken; I’ve learned this the hard way). Each batch takes about 4-5 mins, flip halfway. Don’t worry if it looks a bit weird at first—it sorts itself out.
- Drain cooked pieces on paper towel. This is where I usually sneak a taste. You should too. For quality control, obviously.
- While chicken’s frying, whisk together all the sauce ingredients until smooth. If it looks too thick, add a splash of water or more vinegar. I’ve made it too garlicky before; a little goes a long way.
- Toss the hot chicken with sauce, or serve the sauce on the side if you like to dip. My kids insist on dipping—they say it’s more fun.
Some Lessons Learned (Notes from My Kitchen)
- Chicken thighs are great if you want juicier nuggets, but they are slipperier to cut; just a heads up.
- If your oil isn’t hot enough, the breading soaks it up like a sponge. Gross. Wait for the sizzle.
- Once I dumped all the sauce on while the chicken was still piping hot, and it went a bit runny. Now I let the chicken rest for a minute first. Actually, I find it works better if you serve the sauce on the side.
What I’ve Tried (And What Totally Flopped)
- Air fryer: Yes! Works pretty well, though I have to admit, it’s a smidge drier—just spray the chicken bits with oil.
- Baked: Not as crispy, but less mess. Worth it if you want to avoid frying.
- Tofu: Swapped the chicken for tofu once for my veggie pal. Honestly, not bad, but it was a bit… squeaky?
- Rice cakes as a base: Tried it once—strangest texture ever. Wouldn’t recommend.
The Gear I Use (Or Don’t, Sometimes)
I usually grab a big frying pan, but if you don’t have one, a deep saucepan works too—it just takes a bit longer. I don’t have a proper thermometer; I just go by the classic breadcrumb test. And if you don’t have panko, smash up some crackers. It’s all good. Oh, and if you want less mess, a baking tray with a rack is handy, but honestly, who has time for extra washing up?
How To Store It (If You Have Any Left!)
Store any leftovers in an airtight container in the fridge for up to 2 days. But, honestly, in my house it never lasts more than a day! The sauce keeps well too, but I find it separates a bit if left too long—just give it a stir. And, real talk, it’s not as crispy the next day, but still pretty darn tasty cold.
How We Serve It (And Sometimes, Why)
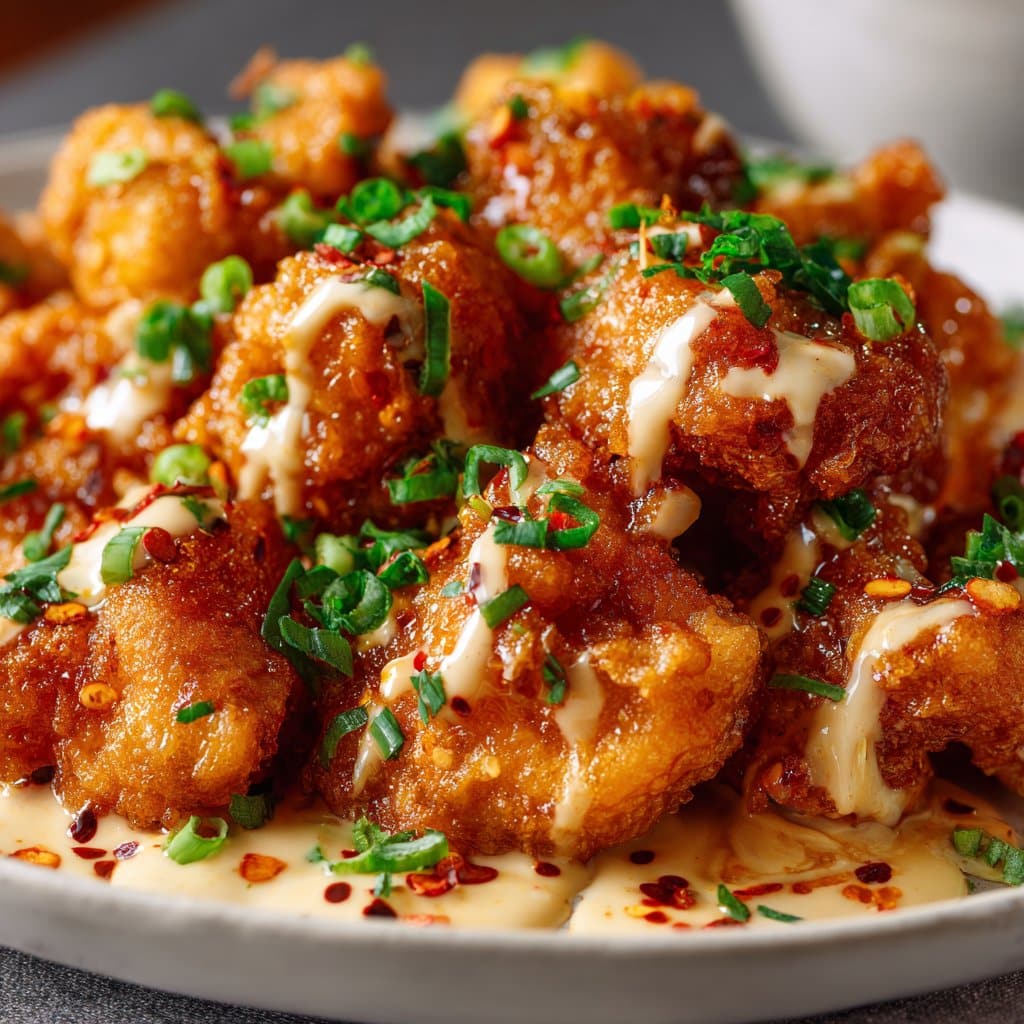
We like to pile it onto steamed jasmine rice, sprinkle with scallions, and sometimes add a squeeze of lime. For special nights, I’ll make a quick cucumber salad on the side. My brother dunks his in even more hot sauce. And, fun fact, my dad says it’s perfect with an ice-cold beer—can’t argue with that logic.
What I Wish I’d Known (Pro Tips, The Hard Way)
- I once tried rushing the breading step and regretted it because all the crumbs fell off in the pan—take your time here.
- Letting the chicken sit for a few mins after frying helps keep it crispy, especially if you’re saucing it up.
- Mix your sauce before you start frying, otherwise you’ll be frantically whisking while the chicken gets cold. Learned that the hard way.
Got Questions? Here’s What Folks Ask Me
- Can I make this less spicy? Totally! Just use less Sriracha, or swap for sweet chili sauce. Sometimes I do half-and-half for folks who don’t like the heat.
- Is there a gluten-free option? Yup, use gluten-free panko (like this one) and cornstarch. Easy peasy.
- Can I prep ahead? You can bread the chicken a few hours ahead and keep it in the fridge until ready to fry. But don’t sauce it until right before eating or it gets soggy. Trust me.
- What else is the sauce good on? Oh, everything. Fries, roasted veg, even as a salad dressing. Check out this guide for more ideas if you want to go down that rabbit hole.
- Can I freeze leftovers? Eh, technically yes, but the breading goes a bit weird when reheated. I’d just eat it up fresh (shouldn’t be hard!)
Side note: Last time I made this, I got distracted by a squirrel in the garden. Came back, pan was a bit smoky, but the chicken still turned out fine. Moral of the story—don’t sweat the small stuff. Cooking’s supposed to be fun anyway, right?

Ingredients
- 500g boneless, skinless chicken breasts, cut into bite-sized pieces
- 1 cup all-purpose flour
- 2 large eggs, beaten
- 1 cup panko breadcrumbs
- 1/2 teaspoon salt
- 1/2 teaspoon black pepper
- Vegetable oil, for frying
- 1/2 cup mayonnaise
- 2 tablespoons sweet chili sauce
- 1 tablespoon Sriracha sauce
- 1 tablespoon honey
- 1 teaspoon rice vinegar
- 2 green onions, sliced (for garnish)
Instructions
-
1In a bowl, combine mayonnaise, sweet chili sauce, Sriracha, honey, and rice vinegar to make the Bang Bang sauce. Mix well and set aside.
-
2Season chicken pieces with salt and black pepper. Dredge each piece in flour, dip into beaten eggs, then coat with panko breadcrumbs.
-
3Heat vegetable oil in a large skillet over medium-high heat. Fry the chicken pieces in batches until golden brown and cooked through, about 3-4 minutes per side. Drain on paper towels.
-
4Transfer the fried chicken to a serving plate. Drizzle generously with the prepared Bang Bang sauce.
-
5Garnish with sliced green onions and serve immediately.
Approximate Information for One Serving
Nutrition Disclaimers
Number of total servings shown is approximate. Actual number of servings will depend on your preferred portion sizes.
Nutritional values shown are general guidelines and reflect information for 1 serving using the ingredients listed, not including any optional ingredients. Actual macros may vary slightly depending on specific brands and types of ingredients used.
To determine the weight of one serving, prepare the recipe as instructed. Weigh the finished recipe, then divide the weight of the finished recipe (not including the weight of the container the food is in) by the desired number of servings. Result will be the weight of one serving.
Did you make this recipe?
Please consider Pinning it!!




