Catching Up Over Spinach Artichoke Dip Bites
So, spinach artichoke dip bites—I gotta tell you, these little things have become a sorta accidental tradition in my house. I think it started when I volunteered (mistake? maybe) to bring an appetizer to a last-minute game night. I was in full on ‘fridge scavenger mode’ and ended up cobbling together this recipe because, let’s face it, I forgot to buy chips. But honestly, that night became one of those “remember when…?” stories, and now if I don’t bring these, I get grief from my weirdly passionate family. Also, just as an aside, is there some law that says artichokes must hide in the back of every grocery shelf? Or is it only my supermarket?
Why I Reach For These (Every. Single. Time.)
I make spinach artichoke dip bites when I just know the party needs a little help livening up (or, you know, when I want to eat half the pan without judgment). My family goes wild for these because, honestly, they kind of taste like if a comfort blanket turned into a snack. Oh, and fun fact—my brother once insisted I add more cheese, thinking it would be better. Spoiler: it was not. Too gooey. So, you’ll see my cheese advice below, because I’ve been there and made the mistakes so you don’t have to. (Also, they’re a great way to sneak veggies in. Not that I’m keeping score…)
Here’s What You’ll Need (I Swear It’s Simple)
- 1 package (about 250g/8 oz) of frozen chopped spinach — thawed & squeezed dry. Sometimes I just use fresh spinach (2 or 3 good handfuls, steamed and chopped), if that’s what’s lingering in my crisper drawer.
- 1 cup canned artichoke hearts, chopped up (my gran swore by the ones in oil, but the water-packed ones are fine—don’t overthink it)
- 120g (4 oz) cream cheese, softened — I have tried low-fat, and it’s… fine, but I like the real deal
- 1/2 cup sour cream (Greek yogurt in a pinch works; I’ve done it, no complaints!)
- 3/4 cup grated mozzarella (And here’s where I once got wild and used pepper jack. Not bad! But mozzarella is classic.)
- 1/2 cup grated Parmesan
- 2 garlic cloves, minced
- 1/2 tsp black pepper
- 1/4 tsp salt (or less—Parmesan can be salty, so give it a taste first)
- 1 package (about 24) mini phyllo shells (or, in a pinch, puff pastry squares. Once I even used tortilla pieces, but wouldn’t recommend—bit too soft.)
How I (Usually) Throw These Together
- Preheat the oven to 375°F (190°C). Or, if you totally spaced and forgot, pop the oven on while you prep. No need to be perfect here!
- In a medium-ish bowl, mix the chopped spinach, artichokes, cream cheese, sour cream, mozzarella, Parmesan, garlic, pepper and salt. This is where I usually sneak a spoonful—quality control, right? If it looks a bit too stiff, add another spoonful of sour cream. Don’t panic if it seems goopy; it all comes together.
- Scoop a generous tablespoon of the mixture into each phyllo shell, right up to the top. Definitely don’t be stingy—it shrinks a bit as it bakes.
- Set the filled shells on a baking sheet (parchment paper is your best mate here, trust me).
- Bake for about 15 minutes, or until they’re bubbling and starting to turn the kind of golden brown that gets your mouth watering. Sometimes the cheese bubbles over, and that’s fine—those crunchy bits are the best anyway.
Notes That Took Me A Few Rounds To Figure Out
- It actually works better if you really squeeze the spinach dry—one time I got lazy, and the bites were basically soggy boats.
- Phyllo shells can get a little crispier than puff pastry—a good crunch, but don’t walk away from the oven for ages.
- Sometimes I skip the garlic, but honestly, it loses something. Garlic powder just doesn’t cut it. (It’s fine if you’re in a rush, but fresh is better. No contest.)
If You’re Feeling Adventurous (Or Just Bored)
I’ve experimented a few times: swapped some mozzarella for smoked cheddar—pretty tasty, actually—or chopped jalapeños for a kick. I even tried adding chopped sun-dried tomatoes once, thinking it’d be genius. No. Not for me—turned the whole thing oddly sweet. If you’re a spice fan though, I’d say a bit of hot sauce in the mix perks it right up.
Equipment (But Don’t Panic If You Don’t Have Everything)
- Baking sheet (just any will do)
- Mixing bowl
- A good ol’ spoon or spatula
- Mini muffin pan (optional—if you’re using puff pastry or want to shape your own shells)
Oh, and if you’re missing the fancy mini shells? I’ve wrangled regular muffin tins with cut-up pastry, and while it’s rustic, it totally works. Looks a bit more “homestyle,” which I kind of love.
How I Store (When They Last That Long…)
I’d say these bites keep in the fridge for two, maybe three days—though, honestly, in my house it never lasts more than a day! If you’re prepping ahead, you can easily assemble and keep them unbaked in the fridge for a few hours. I’ve even frozen a batch pre-baking, and they came out fine (just bake an extra couple minutes straight from freezer).
When and How To Serve—My Goofy Traditions
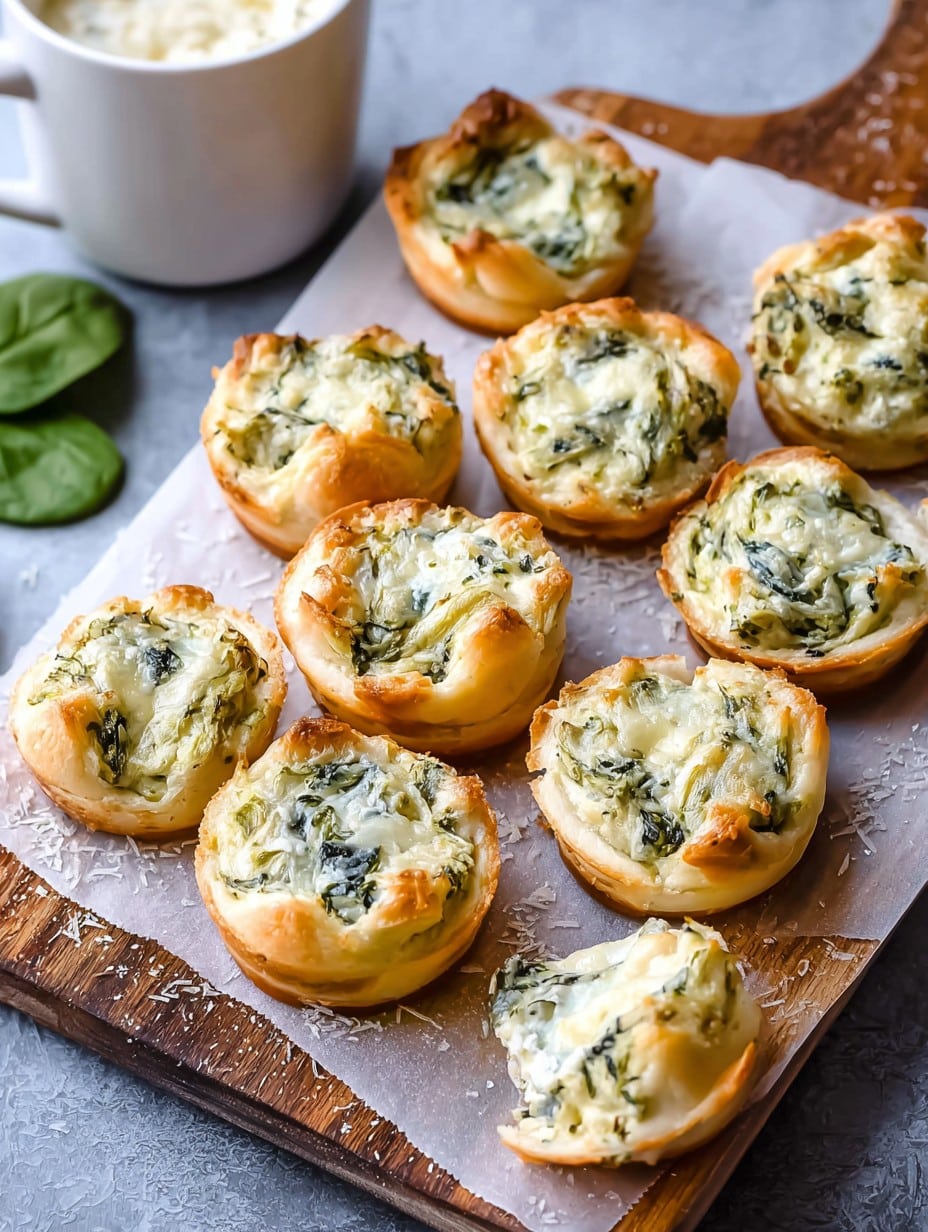
I tend to plate these on an old wooden cutting board, ‘cause it looks oddly charming. Sometimes we dip them in extra sour cream or, on truly chaotic evenings, spicy ranch. My family’s new weird habit is calling dibs on the crunchiest one—so sometimes I leave a batch in for just a touch longer. Also, if you’re ever stuck for a party drink idea, this margarita recipe from Serious Eats is dangerously good with these bites. (Just saying.)
Things I Learned (Usually The Hard Way)
- I once tried microwaving them to reheat—bad idea. Oven is 100 times better, crisps ’em right back up.
- Don’t bother rushing the thawing of spinach; I tried the hot water trick—it looked like a swampy mess. Let it thaw naturally.
- And, uh, don’t double the salt. Parmesan’s already doing a lot here.
Your Questions, Answered (For Real!)
- “Can I make these gluten free?”
Sure thing! Just look for GF phyllo (Whole Foods sometimes has it—this resource helped me once), or use GF puff pastry. They’re a tad crumblier, but all good. - “Do these work cold?”
They’re… okay? But I think they really shine warm. If I’m keeping them for a picnic, I’ll wrap in foil and let them hit room temp naturally. - “What’s the best cheese for this?”
Mozzarella and Parmesan are classics, but honestly, I’ve used whatever was left in the cheese drawer—cheddar, Swiss, pepper jack. Just not blue cheese—learned that one the hard way! - “Can I make these ahead?”
Yep, you can fill the shells earlier in the day, then bake fresh before serving. If you bake ahead, just warm them in the oven at 300°F for about 8 minutes. But don’t use the microwave—trust me on this!
Honestly, this recipe is forgiving (except for the salt thing, ha) and easy to double for crowds. Just don’t forget to save a couple for yourself before putting them out. Oh—and if you’re diving into more easy appetizers, I sometimes check out Love & Lemons’ fun appetizer ideas, too. Happy snacking!

Ingredients
- 1 package (8 oz) refrigerated crescent dough
- 1 cup frozen chopped spinach, thawed and squeezed dry
- 1/2 cup canned artichoke hearts, drained and chopped
- 4 oz cream cheese, softened
- 1/2 cup shredded mozzarella cheese
- 1/4 cup grated Parmesan cheese
- 2 cloves garlic, minced
- 1/4 teaspoon salt
- 1/4 teaspoon freshly ground black pepper
Instructions
-
1Preheat the oven to 375°F (190°C) and lightly grease a mini muffin tin.
-
2Unroll the crescent dough and cut into 24 squares. Press each square into the prepared mini muffin tin cups.
-
3In a medium bowl, mix together the spinach, artichoke hearts, cream cheese, mozzarella cheese, Parmesan cheese, garlic, salt, and pepper until well combined.
-
4Spoon the spinach artichoke mixture evenly into each dough-lined muffin cup.
-
5Bake for 18–20 minutes, or until the dough is golden brown and the filling is bubbly.
-
6Let cool for a few minutes before removing from the tin. Serve warm.
Approximate Information for One Serving
Nutrition Disclaimers
Number of total servings shown is approximate. Actual number of servings will depend on your preferred portion sizes.
Nutritional values shown are general guidelines and reflect information for 1 serving using the ingredients listed, not including any optional ingredients. Actual macros may vary slightly depending on specific brands and types of ingredients used.
To determine the weight of one serving, prepare the recipe as instructed. Weigh the finished recipe, then divide the weight of the finished recipe (not including the weight of the container the food is in) by the desired number of servings. Result will be the weight of one serving.
Did you make this recipe?
Please consider Pinning it!!




