Let Me Tell You Why These Heart Brownies Rule
Alright, imagine this: It’s the night before Valentine’s Day, I’m rummaging through my chaotic kitchen drawers searching (desperately) for a heart-shaped cookie cutter. My dog is keeping a close eye on a stray chocolate chip that rolled under the fridge. I finally find it—smushed between old takeout menus and a tape measure. Classic. Making these heart-shaped brownies is kind of a tradition for me. Usually, I make them for my girlfriend, but if I’m being honest, I probably eat half right off the rack. Whoops.

These brownies have seen it all, including an accidental swap of baking powder for cocoa powder (learned that lesson quick) and my friend Lucy once tried to cut them before they cooled. Let’s just say we wound up with more of a chocolate mess than hearts, but hey—they still tasted ridiculously good. If you’re after something cute, easy, and just a bit show-offy, give these a go. Bonus points for licking the spoon.
Why You’ll Be Making These More Than Once
I whip these out whenever I want to look like I’ve got my life together (but I definitely don’t). My family goes wild for ‘em, mostly for the chewy edges—especially my nephew who claims corner pieces are magic. Sometimes when it’s raining and I’m feeling moody, I just need something chocolatey, you know? (Oh, and if you hate washing extra pans, this is basically one-bowl heaven—unless you, like me, manage to use three by accident.)
True story: One year, I forgot to buy fancy chocolate hearts, so I just made these brownies and cut them into, well, questionably shaped hearts. No one cared. They disappeared faster than you’d believe.
What You’ll Need: Ingredients (And Some “Go With the Flow” Swaps)
- 200g (about 1 cup) unsalted butter – sometimes I just use salted and skip the pinch of salt later. Life’s short.
- 200g (roughly 1 cup) dark chocolate – I use 70%, but use whatever you have; milk choc works in a pinch (just a little sweeter is all)
- 1 ¼ cups sugar – granulated, but I have mixed in some brown sugar before and actually, I think it makes it chewier
- 3 large eggs – fresh is best, but I’ve snuck in a medium or two. Shhh.
- 2 tsp vanilla extract – I never measure this properly; just go with your nose
- 3/4 cup plain (all-purpose) flour – my cousin swears by cake flour, but honestly who keeps that around?
- 1/4 cup cocoa powder – I use Dutch process if I’m feeling fancy; supermarket variety works
- 1/2 tsp salt (unless you used salted butter, then maybe do a small pinch or none)
- Optional bling: a small handful of mini chocolate chips, chopped nuts, or pink/white sprinkles
Pro tip (that I learned the hard way): Don’t skimp on the chocolate. Once I used leftover Christmas chocolate, and my boyfriend politely said, “It tastes…festive.” Oops.
How I Throw These Together (With a Few Mischievous Side Notes)
- Melt butter and chocolate together: Toss them in a glass bowl and zap in the microwave in 30 sec bursts. Stir until glossy. No microwave? Just use a saucepan over low heat—watch it like a hawk or you’ll end up with a burned pan—I’ve done it, and it ain’t pretty.
- Let it cool for a few minutes. This is usually where I sneak a taste. If it’s hot, though, give it a minute; you don’t wanna scramble those eggs!
- Whisk in sugar—dump it in all at once, no need to be delicate.
- Add eggs & vanilla. A good whisk gets everything shiny and smooth—unless you drop the shell in. I did that yesterday. Just fish it out.
- Stir in flour, cocoa, and salt. Don’t over-mix—if the batter’s streaky, that’s fine. If you’re a perfectionist, ignore me and keep going. It’s your kitchen, mate.
- If you want extras, now’s your chance: chips, nuts, or those glorious sprinkles.
- Pour batter into a lined 8×8 inch pan (or close enough). Smooth the top, or just swirl it—honestly, nobody cares, and swirls look cool.
- Bake at 350°F (180°C) for about 20–25 minutes. Centre should be fudgy; a skewer might come out with a few moist crumbs. Overbake if you like cake brownies, but I don’t speak to those people. (Kidding. Sorta.)
- Let cool fully; trust me please, cutting warm brownies turns them into a zoo.
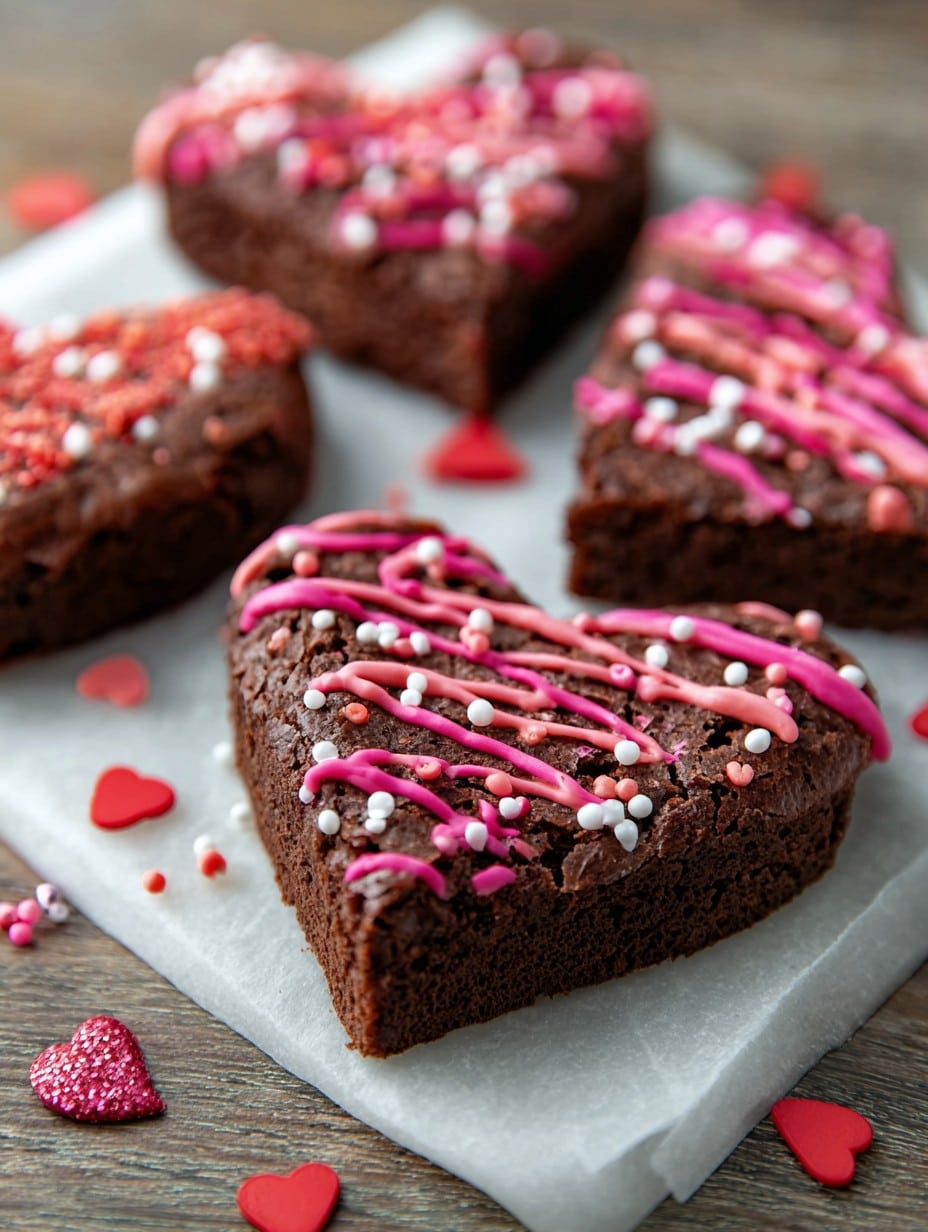
- Once cool, use a heart-shaped cutter to make hearts. Don’t fret about scraps—those are chef’s tax!
A Few Hard-Earned Notes (with a Dash of Sass)
- If you use foil instead of parchment, grease it well. I learned that the hard way last Valentine’s—nearly needed a chisel.
- The batter looks way too thick just before you bake—don’t panic. It does its thing in the oven, I promise.
- If you forget the vanilla (like I once did), I think it’s still edible, just not as rich. Add a smidge of instant coffee to boost the chocolate if you’re brave.
I meant to mention, I once tried making these in a silicone muffin pan and forgot to adjust the baking time. Let’s just say: hockey puck city.
Stuff I’ve Tried (And at Least One Fail)
- I’ve swirled in a spoonful of raspberry jam before baking. Actually not bad.
- Peppermint extract instead of vanilla; felt festive, a bit weird for Valentine’s Day though.
- White chocolate chips – they tend to burn on top (so mix ‘em in or skip)
- Once, I tried using coconut oil instead of butter. Wouldn’t recommend unless you love coconut. A lot.
Equipment (With a Kindly Workaround)
- 8×8 inch square pan – mine’s battered, but still steady
- Heart-shaped cutter – or just a sharp knife and steady-ish hand; that’s what I used before I found mine, actually!
- Mixing bowls, whisk & rubber spatula
- Parchment paper (except when I run out and have to MacGyver with greased foil)
How To Store ‘Em (If You Even Need To)
I’ve been told these last a few days in a container at room temp, but honestly (no joke), they barely make it 24 hours in my house. If you do somehow have leftovers, pop them in the fridge—sometimes they taste even fudgier cold. Or freeze for emergencies (I did once, and midnight me was grateful).
Serving It Up: A Family Thing
We always serve these with vanilla ice cream and a little dusting of powdered sugar, but my mum insists a cup of proper English tea is the best match. Sometimes, we let the kids decorate their own hearts with more sprinkles or a dab of strawberry jam. Honestly, whatever makes you grin.
Hard-Won Pro Tips (AKA, I’ve Messed This Up So You Don’t Have To)
- Don’t rush cooling. I once cut into hot brownies thinking it would be fine. No. Chocolate lava across the worktop. Still delicious, but not exactly Instagram material.
- Actually, line your pan well—even if you’re lazy about it like me. It saves heartache (ha) when lifting them out.
- And if your hearts come out a little lopsided, just call them “rustic.” Works every time.
Some Real Questions I Get
Q: Can I double the recipe?
Definitely. Use a bigger pan—like a 9×13—though you’ll need to keep an eye on bake time; it weirdly goes faster sometimes? Not sure why.
Q: What if I don’t have a heart cutter?
Sharp knife and steady hands do the trick, or, heck, just cut them in squares and call them “abstract love.”
Q: Can I make it gluten-free?
Yep! Use a 1:1 GF flour. Just don’t expect quite the same chewy bite, but it’s still worth making.
Q: Is it okay if my brownies sink in the middle?
Oh, for sure. Mine do that too. Usually means they’ll be fudgy—just go with it!
Q: Can I use milk chocolate?
Yes, but you might want to cut back a teensy bit on the sugar. Or not. Valentine’s isn’t a time for skimping, right?
Speaking of not skimping, I once made a batch for a friend’s birthday instead. Turns out heart brownies work for any occasion if you’re bold enough.
Ingredients
- 1/2 cup (115g) unsalted butter, melted
- 1 cup (200g) granulated sugar
- 2 large eggs
- 1 teaspoon vanilla extract
- 1/3 cup (40g) unsweetened cocoa powder
- 1/2 cup (65g) all-purpose flour
- 1/4 teaspoon salt
- 1/4 teaspoon baking powder
- Heart-shaped cookie cutter
- Powdered sugar or sprinkles for decoration (optional)
Instructions
-
1Preheat the oven to 350°F (175°C). Line an 8×8-inch (20×20 cm) baking pan with parchment paper and lightly grease.
-
2In a medium bowl, whisk together the melted butter and granulated sugar until well combined.
-
3Add eggs and vanilla extract; mix until smooth.
-
4Sift in the cocoa powder, flour, salt, and baking powder. Stir gently until just combined; do not overmix.
-
5Pour the batter into the prepared pan and spread evenly. Bake for 22-25 minutes, or until a toothpick inserted in the center comes out with fudgy crumbs.
-
6Allow brownies to cool completely, then use a heart-shaped cookie cutter to cut out shapes. Decorate with powdered sugar or sprinkles if desired.
Approximate Information for One Serving
Nutrition Disclaimers
Number of total servings shown is approximate. Actual number of servings will depend on your preferred portion sizes.
Nutritional values shown are general guidelines and reflect information for 1 serving using the ingredients listed, not including any optional ingredients. Actual macros may vary slightly depending on specific brands and types of ingredients used.
To determine the weight of one serving, prepare the recipe as instructed. Weigh the finished recipe, then divide the weight of the finished recipe (not including the weight of the container the food is in) by the desired number of servings. Result will be the weight of one serving.
Did you make this recipe?
Please consider Pinning it!!




