Well, This Wasn’t Planned: My Accidental 2-Minute Apple Mug Cake
Alright, I’ll just say it: if you’ve ever stood staring at your fridge—peckish, desperate for something sweet, and way too tired to commit to a full-blown baking session—boy do I feel your pain. One night after a shockingly stressful Zoom call (let’s not talk about pants or their absence), there I was, eyeing an apple, some flour, and my microwave. The 2-Minute Apple Mug Cake was born from hunger-fueled desperation, a little laziness, and, honestly, pure kitchen chaos. Ever since, it’s become my go-to when the munchies hit but my energy doesn’t quite match. If you’re thinking mug cakes are just for college students, well, they are—but not only for them!
Why You’ll Love This Little Cake (in a Mug!)
I make this when it’s cold out, or when the mood for apple pie hits but the energy just… doesn’t. (My family goes crazy for this, except my husband, who claims he “doesn’t like cooked apples.” He’s wrong.) Sometimes I add a dash of cinnamon just for that whole autumn-in-a-cup vibe, other times I skip even that because, well, spice jars mysteriously vanish in my kitchen. And let’s be real, you only need one hand and about as much commitment as remembering to take your laundry out—bliss! Minimal cleanup is a huge win, especially after the, um, great bundt pan incident of 2018.
What You’ll Need: Ingredients and Real-Life Substitutes
- 1 small apple, peeled and diced (or leave the peel on—less work, more fibre! Any variety’s fine; Granny Smith is classic, but I’ve used Gala too)
- 3 tbsp all-purpose flour (my aunt swears by whole wheat, which is fine but a little more “hearty”)
- 2 tbsp brown sugar (white sugar works when I run out of brown; honey, in a pinch)
- 1/4 tsp baking powder (don’t stress if you use just a bit more or less; I have and it’s always cake-ish)
- 1/4 tsp ground cinnamon (sometimes I skip, sometimes I double… it’s personal!)
- Pinch salt (I just use what sticks to my fingers)
- 2 tbsp milk (dairy or any plant milk; I’ve used almond and oat—it’s all good)
- 1 tbsp melted butter (or, honestly, vegetable oil; my grandma swore by Kerrygold, but supermarket brands are fine)
- 1/4 tsp vanilla extract (optional—if I remember it’s lovely, if not, cake’s still edible)
How to Throw This Together
- Take your favorite microwave-safe mug (I once used a bowl and it worked—so don’t stress if you can’t find the right mug!) and toss the diced apple in. Microwave for about 40 seconds to soften them up a bit. This is totally optional, by the way, but I find it gives you that cozy pie feel.
- Now, add your melted butter right in. Swirl the mug a bit to coat the apples (this is where I sometimes sneak a taste; don’t judge.)
- Next: toss in the flour, sugar, baking powder, cinnamon, and tiny pinch of salt. Give that a quick stir. It’ll look a bit lumpy and not super photogenic (warning: at this point I usually have doubts. Ignore them.)
- Pour in the milk and vanilla, mix everything until just combined. Don’t overdo it-everyone says this, but I really mean it, because if you keep mixing you get chewy table tennis balls instead of cake.
- Microwave on high for 1 minute and 20 seconds (could be 2 minutes, but my microwave is sort of ancient and occasionally aggressive, so you might want to check at 1:15 and again every 10 seconds.)
- Let it sit and cool for a minute. Trust me, the first time I made this I burnt my tongue and couldn’t taste the next two dinners. Don’t be me.
Some Notes: Lessons Learned the Not-So-Easy Way
- If you use too big a mug, your cake looks a bit sad and lonely. Smaller mugs = taller cake.
- Actually, I find it works better if you chop the apples really small so it cooks evenly. Live and learn.
- Cake will keep firming up as it cools, so don’t panic if it feels too soft at first (it always does but then it’s magic in five minutes flat.)
Variations and Experiments (Not All Were Winners!)
- Tried this with pears—actually, that totally worked!
- Once I swapped half the flour for rolled oats; got chewy, kind of like breakfast. Not my personal favorite but my sister loved it.
- Chocolate chips? Oh, yes—especially at 2am!
- Walnuts on top, sometimes. Tried raisins; regretted it. Sorry raisin fans.
The Bare Minimum: Equipment
- Microwave-safe mug (or a small bowl—whatever you’ve got, just not metal!)
- Microwave. No fancy blender needed! (And if your microwave’s on the fritz, maybe just… cold apple and a spoon?)
I mean, I use a tablespoon for all my measuring, but if you want to be precise you can bust out the scales… I basically never do.
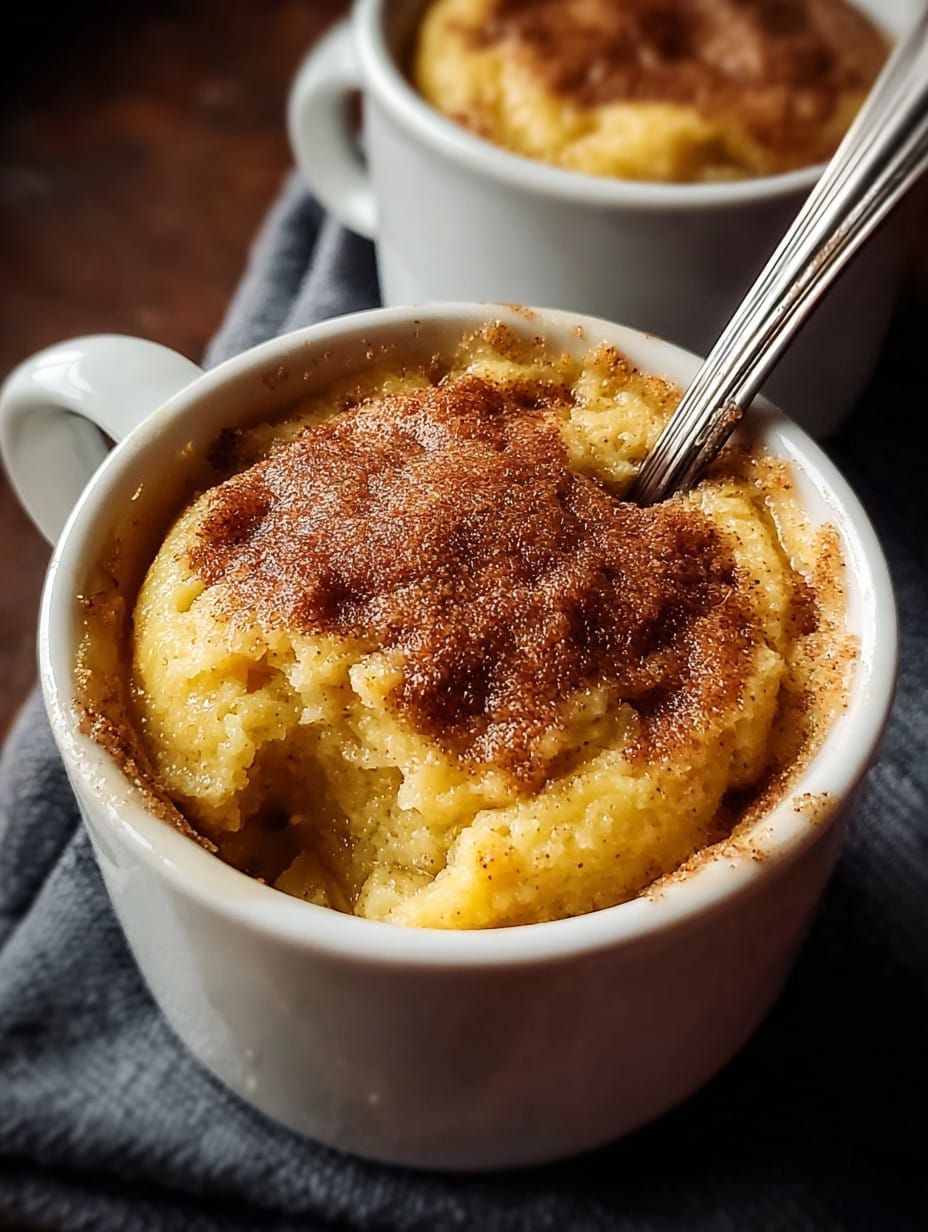
Keeping Leftovers – If That Ever Happens
This is a single-serve, so leftovers aren’t really a thing. But if you must, wrap the mug in plastic wrap and pop it in the fridge up to 24 hours. It does get a bit denser overnight—I think this tastes better the next day (controversial, I know). That said, in my house it never lasts more than a day, unless someone forgot where they put their mug.
How I Like to Serve It (and Maybe You Will, Too)
I love it with a little scoop of vanilla ice cream—because, let’s be honest, microwave cake and ice cream together are what dreams (my dreams, anyway) are made of. Sometimes, for a real treat, I’ll throw on a drizzle of caramel, if I have any. My friend puts whipped cream on literally everything, so that’s another idea. Oh! And if you’re feeling fancy, a dusting of powdered sugar makes you look like you tried way harder than you did.
From Experience: My ‘Pro Tips’ (Aren’t All That Pro)
- I once tried to double the recipe in one mug. Nope. Lava-flow overflow everywhere. Stick to single portions.
- If you rush the mixing, you’ll get flour pockets and, honestly, nobody wants a mouthful of raw flour at midnight.
- Don’t microwave straight for two minutes without checking! On second thought, maybe your microwave is smarter than mine, but still… baby steps.
Curious Folks Ask (Frequently!)
- Can I use another fruit?
- Yup! Pears are nice—peaches too if you’re feeling summery. Berries get a bit mushy, but I’m not the fruit police.
- What if I don’t have baking powder?
- You can leave it out, it’ll still be tasty—just a bit more like a dense pudding. You can try a tiny pinch of baking soda and a drop of lemon juice, too (saw that tip on Sally’s Baking Addiction—genius).
- Why is my cake gummy or tough?
- Probably overmixed or microwaved too long! The microwave’s a wild beast—less is more. Check out this guide from Serious Eats for weird science reasons (they’re way smarter than I am on this stuff).
- Can I make it vegan?
- Sure thing! Use plant-based milk and swap butter for margarine or oil. Nothing fancy required. I’ve done it, and it tasted just fine.
- Do I have to peel the apple?
- I never do if I’m in a rush. Texture’s a bit different, but honestly, who’s judging?
Alright, before I ramble too much—if you give this a go and it works (or it flops spectacularly), I’d genuinely love to hear! Drop me a message or tag me on social media. Or just shout your opinion into your mug. No judgment here.
And if you’re on the hunt for more breezy, quick dessert fixes, Gemma’s mug cake recipes are a total goldmine. Not sponsored, just a genuine fan!
Sláinte! And happy microwaving.

Ingredients
- 4 tablespoons all-purpose flour
- 2 tablespoons granulated sugar
- 1/4 teaspoon baking powder
- 1/4 teaspoon ground cinnamon
- 1/8 teaspoon salt
- 3 tablespoons milk
- 1 tablespoon vegetable oil
- 1/4 teaspoon vanilla extract
- 1/3 cup finely chopped apple (peeled)
- Optional: 1 tablespoon chopped walnuts
Instructions
-
1In a microwave-safe mug, whisk together flour, sugar, baking powder, cinnamon, and salt.
-
2Add milk, vegetable oil, and vanilla extract to the mug. Mix until a smooth batter forms.
-
3Fold in the chopped apple and walnuts (if using) until evenly distributed.
-
4Microwave the mug on high for 1 minute and 30 seconds to 2 minutes, or until the cake is set and cooked through.
-
5Let cool for 1 minute before enjoying. Optionally, sprinkle with extra cinnamon or top with whipped cream.
Approximate Information for One Serving
Nutrition Disclaimers
Number of total servings shown is approximate. Actual number of servings will depend on your preferred portion sizes.
Nutritional values shown are general guidelines and reflect information for 1 serving using the ingredients listed, not including any optional ingredients. Actual macros may vary slightly depending on specific brands and types of ingredients used.
To determine the weight of one serving, prepare the recipe as instructed. Weigh the finished recipe, then divide the weight of the finished recipe (not including the weight of the container the food is in) by the desired number of servings. Result will be the weight of one serving.
Did you make this recipe?
Please consider Pinning it!!




