Let Me Tell You About This Banana Bread (No Fuss, No Stress)
You know those days when bananas go from perfectly yellow to, well, let’s say “extra speckled” almost overnight? Happens to me more than I’d like to admit. I still remember the first time I tried to make banana bread on a rainy Sunday — my dog tried to eat one of the bananas, and honestly, it just made me want to bake even more. (Don’t worry, she didn’t get it.) This 4 ingredient banana bread with ripe bananas has become my go-to for those times, whether it’s for a quick breakfast, a snack for the kids, or just ‘cause the house needs to smell like something besides laundry.
Why I Keep Coming Back to This Recipe
I make this when I just can’t be bothered with a massive clean-up (which is more often than I’d like to admit). My family goes absolutely bonkers for it because, well, who doesn’t love warm banana bread that’s ready before you’ve finished your cuppa? Sometimes I throw in a handful of chocolate chips or nuts if I’m feeling wild, but honestly, it’s perfect as is. And here’s a little secret — this is the only banana bread my aunt (who claims to hate bananas) will actually eat. Go figure.
Here’s What You’ll Need (And a Few Swaps I’ve Tried)
- 3 super ripe bananas (the more brown spots, the better — I’ve used frozen bananas in a pinch, just thaw and drain ‘em first)
- 2 eggs (or if I’m out, I sometimes use flax eggs — 2 tbsp ground flax + 4 tbsp water, mixed and left to gel a bit. Not exactly the same, but hey, it works.)
- 1 cup self-raising flour (My Nanna swore by White Wings, but truthfully, I just grab whatever’s on special. If you only have plain flour, add 1 1/2 tsp baking powder and a tiny pinch of salt, and you’re sorted.)
- Half a cup sugar (brown sugar gives it a caramelly edge, but white sugar is fine. I’ve even used coconut sugar once when I was feeling fancy — not sure it made a huge difference!)
How I Make It — Step by (Sometimes Messy) Step
- Preheat your oven to 180°C (about 350°F). Grease a loaf pan — or just line it with baking paper if you’re like me and can’t be bothered scrubbing pans.
- In a big bowl, mash the bananas with a fork until they’re mostly smooth. (Don’t worry about lumps — they kind of disappear after baking. This is where I usually sneak a taste, just because.)
- Crack in the eggs and mix together. I just use the same fork, why dirty a whisk?
- Tip in the sugar and flour and give it a good stir. It might look a bit weird at this stage, but it all comes together in the oven, promise.
- Pour the batter into your loaf pan. Sometimes I sprinkle a bit of cinnamon or a handful of choc chips on top if the mood strikes.
- Bake for about 35-45 minutes. Check at 35 — if a skewer comes out clean, you’re done. (If you poke it and crumb comes out, it’s probably ready. If it’s gloopy, give it another five minutes or so.)
- Let it cool in the tin for a few minutes, then tip it onto a wire rack, or just onto a plate if you’re impatient like me.
Notes from My Many Attempts
- If your bananas aren’t ripe enough, stick them in the oven at 150°C for 15 mins. Actually, I find it works better if you leave them in a paper bag for a day or two, but sometimes you just can’t wait.
- I’ve made this with as little as 2 bananas when I was short — the loaf is just a bit smaller and, well, a touch less banana-y. But still tasty.
- If you want it extra moist, use slightly overripe bananas. But not, like, liquid. Trust me, I tried, and it was… interesting.
Variations and Experiments (Some Hits, Some Misses)
- Choc chips: Always a winner with kids.
- Chopped walnuts or pecans: Makes it feel a bit more “grown up” (whatever that means).
- I once tried adding shredded coconut. Not my best move — it got a bit dry. Maybe it’d work if you added an extra banana?
- For a gluten-free twist, I’ve swapped in an all-purpose gluten-free flour blend; just don’t expect the same rise.
What Equipment? (Don’t Worry If You Don’t Have Everything)
You really just need a loaf tin and a big bowl. If you don’t have a loaf tin, I’ve used a cake tin or even a muffin tray (just reduce the baking time, probably to 20-25 mins). For mashing bananas, a fork works, but a potato masher makes you feel slightly fancy. And hey, if you’re stuck, clean hands do the job in a pinch (just, you know, wash ‘em first).
Storing Your Banana Bread (If It Even Survives)
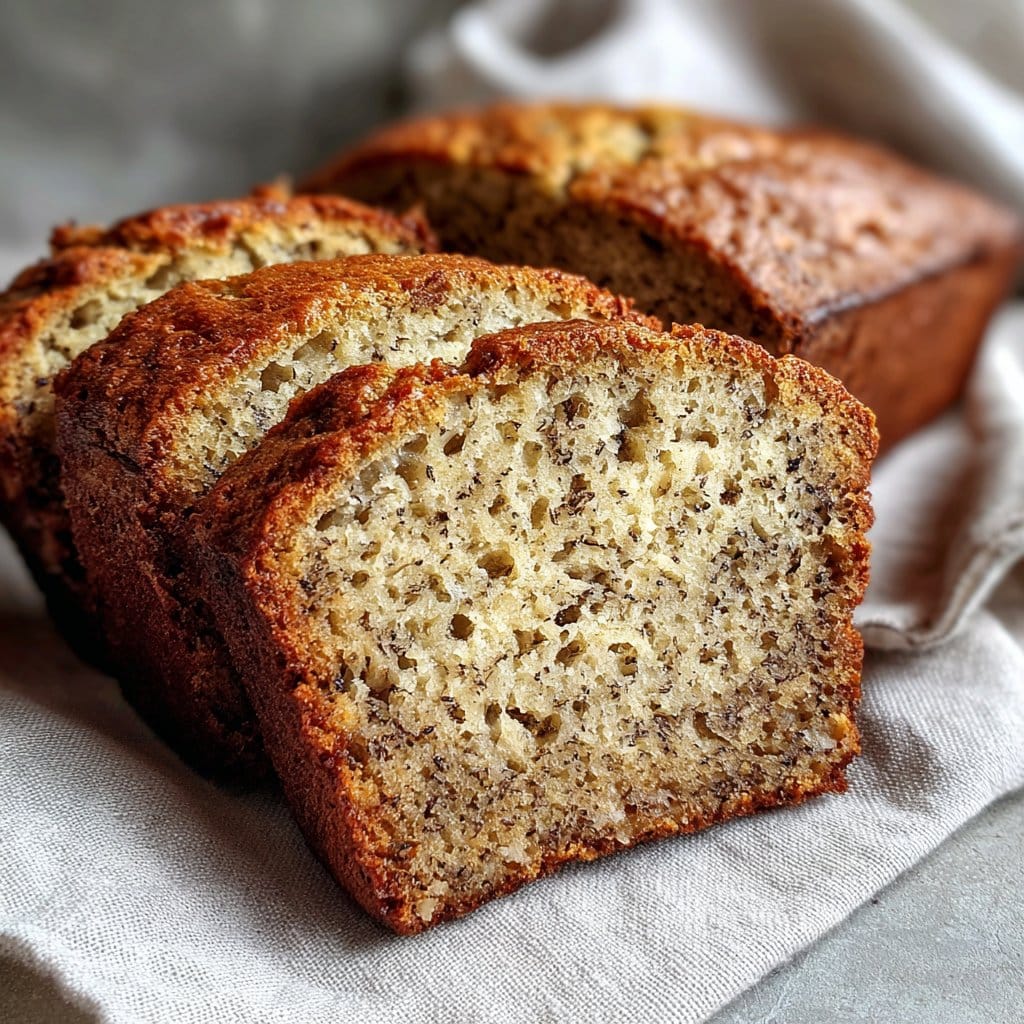
This is one of those rare bakes that’s actually better the next day — but honestly, in my house it never lasts more than a day! If you do have leftovers, wrap it in cling film or pop it in an airtight container. I’ve even frozen slices and toasted them later (so good with a dab of butter).
How I Love to Serve It (And Sometimes, It Disappears Before I Can)
I’ll happily eat a warm slice straight out of the tin, but if I’m feeling civilised, I spread on some salted butter or, occasionally, a swipe of peanut butter (don’t knock it till you’ve tried it). I’ve heard people serve theirs with a scoop of vanilla ice cream, which sounds pretty lush, but I’ve yet to try it. My youngest insists on sprinkles, but that’s a whole other story.
Lessons I’ve Learned (So You Don’t Have To Make My Mistakes)
- Don’t rush the baking time — I once tried taking it out at 30 minutes because I was starving, and ended up with a gooey middle. Not the good kind of gooey.
- Actually, I find it works better if you let it cool at least 10 minutes before slicing. Otherwise, it squishes. (But sometimes, you just can’t wait!)
- Using bananas that aren’t ripe enough? Your bread will taste flat. It really is worth waiting, as tedious as that sounds.
Banana Bread FAQ (Real Questions People Have Asked Me)
- Can I use less sugar? Yeah, totally! I sometimes use just 1/4 cup if the bananas are super sweet. Or swap it for honey — just, maybe drop a tablespoon or two of flour to balance it out.
- What if I don’t have self-raising flour? Easy fix; just use plain flour and add baking powder (1 1/2 tsp to 1 cup). I’ve forgotten the baking powder before, and the loaf was denser, but still edible!
- Can I double the recipe? Absolutely, but you’ll need a bigger pan — or make two. Just watch the baking time. I once tried this in a huge cake tin and, well, the middle never quite set. Live and learn.
- Is this bread healthy? Well, there’s fruit in it, so I tell myself yes. But it’s cake. Delicious, banana-packed cake. Oh, for healthy baking tips, I sometimes check Sally’s Baking Addiction — she knows her stuff.
- How do you freeze banana bread? Slice it, wrap each piece in cling film, and sling it in the freezer. Defrosts in the toaster or microwave. For freezing, I like this guide from King Arthur Baking.
Oh, and one last thing — if you’ve got leftover bananas, try making a smoothie (or freeze them for later). That’s what I do when the fruit bowl gets a bit out of hand. Honestly, some weeks I feel like I’m running a banana rescue centre. Anyway, hope you love this as much as I do! If you try it, let me know how it turns out — or what wild twists you come up with. Cheers!
Ingredients
- 3 large ripe bananas, mashed
- 2 cups self-rising flour
- 1/2 cup granulated sugar
- 2 large eggs
- 1/2 cup unsalted butter, melted (optional for extra moisture)
- 1 teaspoon vanilla extract (optional)
- 1/2 teaspoon ground cinnamon (optional)
- Pinch of salt (optional)
Instructions
-
1Preheat your oven to 350°F (175°C). Grease and line a 9×5-inch loaf pan with parchment paper.
-
2In a large bowl, mash the ripe bananas until smooth. Add the eggs and whisk until well combined.
-
3Stir in the granulated sugar and melted butter (if using), mixing until incorporated.
-
4Add the self-rising flour, vanilla extract, cinnamon, and salt (if using). Gently fold until just combined. Do not overmix.
-
5Pour the batter into the prepared loaf pan and smooth the top.
-
6Bake for 50 minutes, or until a toothpick inserted into the center comes out clean. Let cool in the pan for 10 minutes before transferring to a wire rack to cool completely.
Approximate Information for One Serving
Nutrition Disclaimers
Number of total servings shown is approximate. Actual number of servings will depend on your preferred portion sizes.
Nutritional values shown are general guidelines and reflect information for 1 serving using the ingredients listed, not including any optional ingredients. Actual macros may vary slightly depending on specific brands and types of ingredients used.
To determine the weight of one serving, prepare the recipe as instructed. Weigh the finished recipe, then divide the weight of the finished recipe (not including the weight of the container the food is in) by the desired number of servings. Result will be the weight of one serving.
Did you make this recipe?
Please consider Pinning it!!




