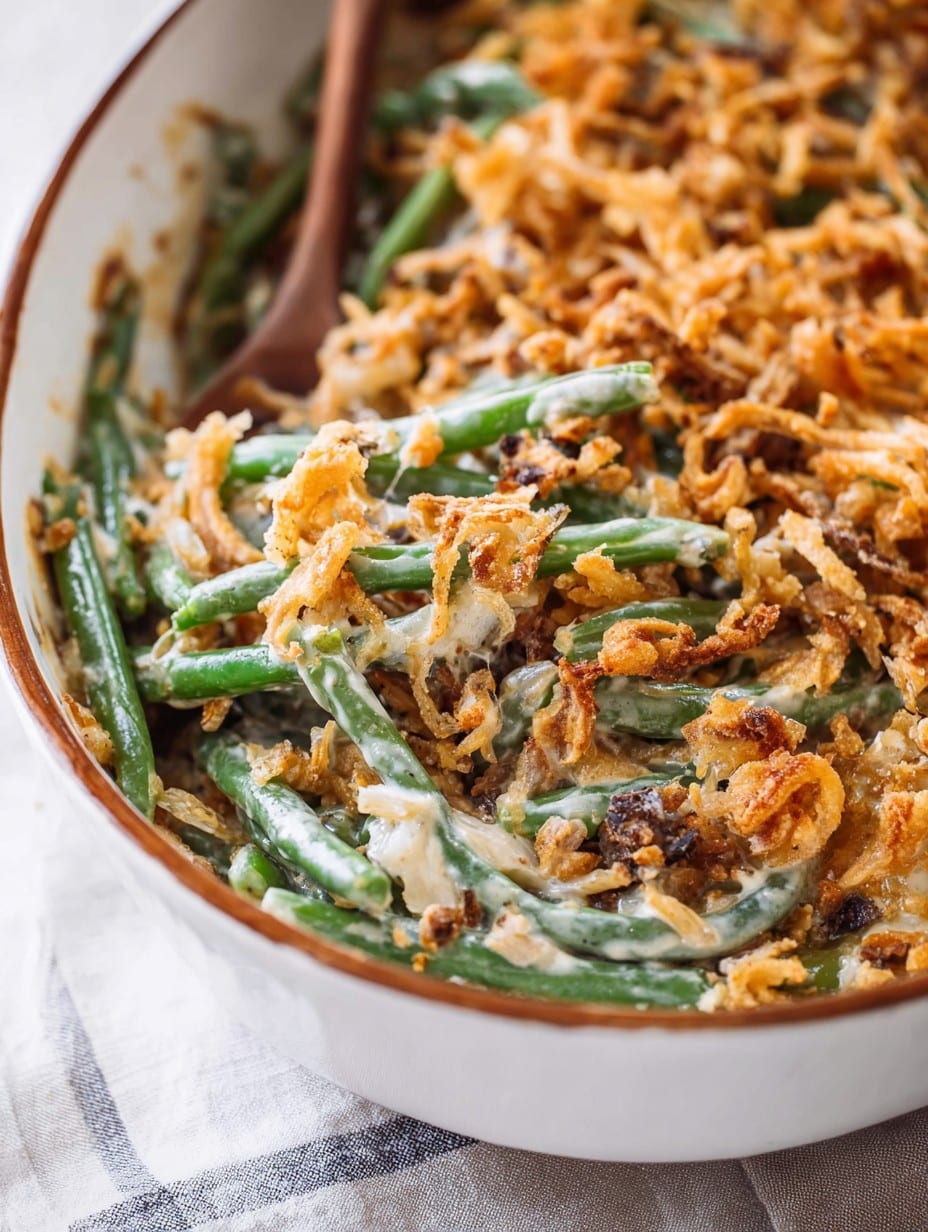
Let’s Gab About This Green Bean Casserole
Okay, so let me just say: if you’ve ever shooed your way around the potluck table hoping someone else grabbed the last bit of Green Bean Casserole, you are officially my kind of people! First time I made this, I was fresh out of college, at my mom’s house for Thanksgiving, half-panicking I’d mess it up—and, to be honest, I did burn the first round of onions. But it’s good memories. There’s something so heartwarming (and occasionally a little messy) about dishing up this bubbling, crispy-topped casserole. Plus, Aunt Clara still swears mine is better than the one she brings; she’s stopped trying to compete, bless her.

Why I Always Circle Back to This Recipe
I whip this up when I want something super cozy—like, rainy Sunday in November cozy. My family absolutely devours it. (If I left the table for half a second, I’d probably come back to an empty pan. Not kidding.) Sometimes the only complaint is there’s not enough, which, honestly, could be a compliment? I even make it mid-week just to have those leftovers. Oh, side note: once, I forgot the fried onions and my cousin nearly started a mutiny, so…don’t skip those.
What You’ll Need (With a Few Cheats and Options)
- Fresh green beans (400g, or about a big handful per person) – I’ve used frozen in a hurry, just thaw and pat ‘em dry. Canned works, too (my grandma’s way), but it gets a bit mushy. Your call!
- 1 can cream of mushroom soup (roughly 10 oz/300ml) – I sometimes use cream of celery if I’m feeling spunky, or homemade mushroom sauce if company’s coming.
- 1/2 cup whole milk – Anything creamy will do, though once I used almond milk and it was…not my finest hour.
- 1 tsp soy sauce – Or Worcestershire if you’re feeling classic. I actually forgot this once and nobody noticed.
- Salt & cracked black pepper – To taste! I go heavy on pepper because, why not?
- 1 1/2 cups crispy fried onions (the store kind, unless you’re an overachiever) – Or double it if you’re a fiend for crunch.
- Optional add-ins: dash of garlic powder, a handful of shredded cheddar, or bits of crispy bacon if nobody’s vegetarian (sometimes I’m wild and put all three in).
How I Actually Make It (Warts and All)
- Preheat the oven to 180°C/350°F. Or just stick your hand in and see if it feels hot—wait, don’t actually do that. Safety first.
- Blanch your green beans. Drop them in boiling salted water for 4-5 minutes, then straight into some ice water. They should be bright green and just-tender. (Honestly, I skip the ice bath when I’m in a rush—just don’t overcook them!)
- Mix it all together. In a big bowl, mix your mushroom soup, milk, soy sauce, black pepper, half the crispy onions, and any extras (cheese, garlic powder, etc.). Add your drained beans and stir until slathered in creamy goodness. This is where I sneak a taste—call it quality control.
- Spoon into a baking dish. Doesn’t matter if it’s a fancy casserole dish or your old Pyrex; just pile it all in. Spread it out, but don’t stress if it looks a little, um, questionable right now. It’ll all melt together.
- Bake (uncovered) for about 25-30 min, until hot and bubbly along the edges. Yank it out—careful, it’s hotter than it looks—and sprinkle the rest of your fried onions on top.
- Back in the oven for another 5-8 minutes. Or until those onions are golden and crunchified. Sometimes I get impatient and turn on the broiler for a minute, but then you really have to watch it or you’ll wind up with blackened bits (guilty as charged).
- Let it rest a moment. Just a few minutes, otherwise you’ll burn your tongue and curse my name. Personal experience.
Notes from a Slightly Scatterbrained Cook
- Sometimes, the beans seem too al dente after baking—letting it sit for 10 minutes softens them up just right. Or, if you’re like my cousin Jenny, you prefer them with crunch; that’s cool too.
- I used to be a fried-onion minimalist, but let’s be real: more is more. The onion mountain is sort of the point.
- If you use canned green beans, drain them really well, unless you fancy soup.
- Once, I left this sitting in the turned-off oven while picking up neighbors (don’t ask), and it was somehow even better a touch overbaked.
Weird and Wonderful Variations I’ve Attempted
- Spicy Version: I added a diced jalapeño once—turned out not too shabby! Kicked it up a notch, as Dad would say.
- Bacon, Bacon, Bacon: Chopped cooked bacon in the mix is popular around here. But it does disappear before anyone else gets a bite, so maybe warn your guests.
- With a Crunchy Panko Top: I tried swapping some of the onions for panko breadcrumbs mixed with melted butter—honestly, it wasn’t the best. Stick to the onions.
- Cheese Overload: I once dumped in a handful of sharp cheddar. It was actually amazing, but don’t tell the casserole purists in my family.
Equipment You Might Need (But Don’t Stress)
- Large saucepan (for blanching—except, you can microwave the beans in a pinch. I’ve done it. Works fine.)
- Mixing bowl—or honestly, just mix it up in the casserole dish if you hate more dishes. Me, every time.
- Baking dish—anything oven-safe. Once used a bread pan, didn’t regret it.
- Something for draining beans—colander, or a slotted spoon if you can’t find your colander (it happens, trust me).
How to Store It (But Chances Are, You Won’t Get to)
If, by some small miracle, you have leftovers, cover the dish with foil or dump it into a container—pop it in the fridge and it’ll keep for 2-3 days. Oddly enough, I sometimes think it tastes better the next day, after all the flavors do their mingling thing. But honestly, in my house it never lasts more than one day, so who am I kidding?
If You’re Wondering How to Serve This (Here’s What We Do)
I usually pile it on next to roast turkey and mashed potatoes, but sometimes we just eat it with crusty bread and call it dinner. Oh, and there’s always at least one person ladling gravy on top—no judgment! It’s tradition at our place to save a corner for Dad, since he likes the onions less crispy (weirdo).
Pro Tips: Or, Mistakes I’ve Made So You Don’t Have To
- I once tried to use low-fat soup and skim milk. Regretted it. Go with the creamy stuff, your tastebuds will thank you.
- Don’t skip the bean blanching if you’re using fresh. If you do, they’ll be too squeaky and weirdly crunchy. Ask me how I know.
- You can prep everything up to a day in advance, but don’t top with onions until right before baking. Or the onions turn into sad, soggy little things.
On the Off-Chance You’ve Got Questions…
- Can I use frozen green beans? Yep! Just thaw and pat dry. And honestly, I think they taste just as good as fresh (especially if I can’t be bothered peeling the ends).
- Is this gluten free? Hmm, well, not as written because of the soup and fried onions. But you can find gluten-free versions of both in most bigger grocery stores these days! I had a friend bring her own once and it was lovely.
- How do I make it ahead? Just mix everything but the onions and pop it in the fridge covered. I’ve left it overnight, then baked as usual—works fine, though it takes longer to heat up from cold.
- Can I double it? Absolutely! Use the biggest dish you own—or two smaller ones. Only thing, increase bake time by about 10 minutes. (Oh, and taste as you go—big batches sometimes need more seasoning.)
- What if I don’t like mushrooms? Well, you might be in the wrong place…but actually, cream of chicken or celery soup works just as well and still tastes great.
- Are leftovers good cold? I mean, technically you could eat it cold, but as someone who tried with slightly regretful results, I’d suggest reheating.
Honestly, for all its supposed simplicity, this dish has saved my skin more times than I care to admit. And if you end up putting your own weird spin on it, let me know—just don’t tell Aunt Clara, or she’ll want the recipe for her next potluck. But that’s a whole other story.
Anyway, cheers to Green Bean Casserole magic—and yes, I’m already craving it again.
Ingredients
- 1 1/2 pounds fresh green beans, trimmed and cut into 2-inch pieces
- 2 tablespoons unsalted butter
- 1 medium yellow onion, finely chopped
- 8 ounces cremini mushrooms, sliced
- 2 cloves garlic, minced
- 2 tablespoons all-purpose flour
- 1 cup whole milk
- 1/2 cup heavy cream
- 1/4 teaspoon ground black pepper
- 1/2 teaspoon salt
- 1 1/2 cups crispy fried onions
Instructions
-
1Preheat oven to 350°F (175°C) and lightly grease a 9×13-inch baking dish.
-
2Bring a large pot of salted water to a boil. Add green beans and blanch for 4-5 minutes until bright green and crisp-tender. Drain well and set aside.
-
3In a large skillet, melt butter over medium heat. Add chopped onion and cook for 3 minutes until softened. Stir in mushrooms and garlic; cook for 5-6 minutes until mushrooms are browned.
-
4Sprinkle flour over the vegetables and stir for 1 minute. Gradually add milk and heavy cream, stirring constantly until smooth and thickened, about 3-4 minutes. Season with salt and black pepper.
-
5Combine green beans with the creamy mushroom sauce. Spread mixture evenly in the prepared baking dish. Top with crispy fried onions.
-
6Bake for 25 minutes or until the casserole is bubbly and the onions are golden brown. Let cool for 5 minutes before serving.
Approximate Information for One Serving
Nutrition Disclaimers
Number of total servings shown is approximate. Actual number of servings will depend on your preferred portion sizes.
Nutritional values shown are general guidelines and reflect information for 1 serving using the ingredients listed, not including any optional ingredients. Actual macros may vary slightly depending on specific brands and types of ingredients used.
To determine the weight of one serving, prepare the recipe as instructed. Weigh the finished recipe, then divide the weight of the finished recipe (not including the weight of the container the food is in) by the desired number of servings. Result will be the weight of one serving.
Did you make this recipe?
Please consider Pinning it!!




