Let Me Tell You Why I Love Making This (and Why My Family Groans in Anticipation)
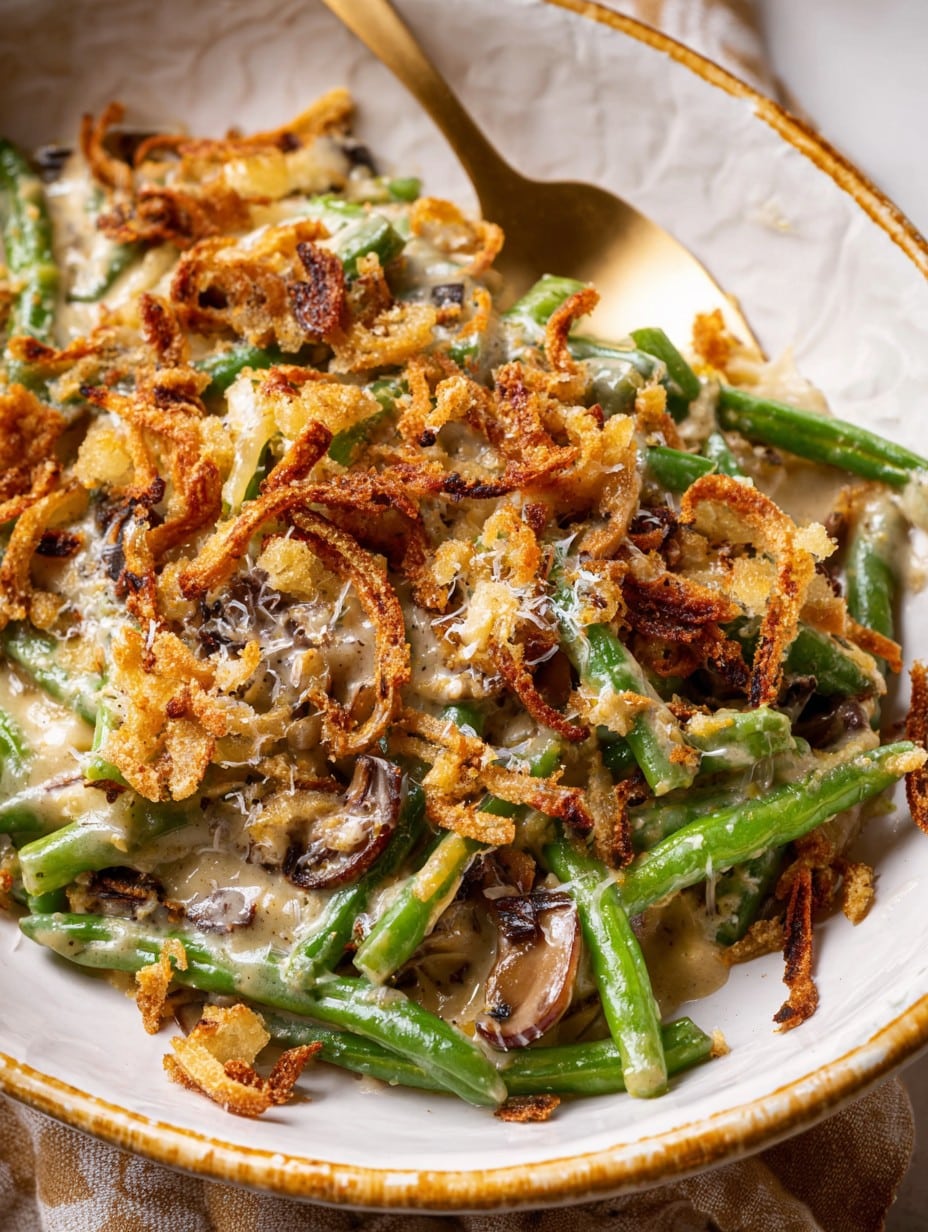
Okay, friend, settle in: green bean casserole always makes me think of Thanksgivings where everyone’s tipsy on laughter and a suspicious amount of gravy. But not just the polished magazine kind. I mean the gooey, slightly-too-crispy-on-top version that somehow disappears before I get seconds. I remember once, my cousin tried to pass off canned mushroom soup as ‘gourmet’ and let’s just say, nobody was fooled (sorry, Eric). Anyway, this homemade version has become my dish at family gatherings. And yes, I still sneak a corner nibble before serving—occupational hazard, right?

Why You’ll Love This (Or At Least Not Hate It)
I whip this up whenever I’m wanting something cozy but not fussy. My family legit asks for it at random times of year (like July, which feels odd but I’ve learned just to roll with it). It’s creamier than the old-school version, the beans still have some snap, and—I’ll keep it real—the leftovers are magic reheated the next morning (with a fried egg on top if you’re living life right). Do I sometimes get cranky about slicing a mountain of mushrooms? Sure, but actually, I’ve learned if you bribe someone with coffee, they’ll help.
What You’ll Need (And a Few Cheeky Substitutions)
- About 1 pound (450 g) fresh green beans, trimmed (I use frozen when it’s late and I can’t be bothered, or even the microwaveable bags if it’s a Tuesday and I’m tired).
- 1 tablespoon butter (or honestly, olive oil, whatever’s handy).
- 8 oz mushrooms, sliced. Cremini are lovely, but my gran used plain white and swore they were better—I’m not fighting that fight anymore.
- 1 small onion, diced (sometimes I just use a couple shallots if I want to feel fancy).
- 2–3 garlic cloves, minced.
- 1 tablespoon all-purpose flour.
- 3/4 cup whole milk (I’ve used oat milk, not bad, but it does taste different!).
- 1/2 cup heavy cream (or, when I forget to buy it, just more milk plus a dab more flour).
- Salt and black pepper, to taste—I’m heavy-handed, but you do you.
- 1/2 cup grated parmesan (optional, but honestly, it’s amazing in there).
- 1 1/2 cups crispy fried onions (the store kind, or you can make your own; but that’s a whole other saga).
How to Make It (With a Few Wobbly Steps and Honest Advice)
- Bean prep: Bring a big pot of salted water to a proper boil (don’t just let it simmer, really bubble it). Toss in the green beans for, like, 5 minutes—just til they puff up bright green and get a little soft, but not floppy. Drain, hit them with cold water so they keep their pep, and set aside.
- Veggie time: Melt butter in a large skillet on medium heat. Throw in onions, a pinch of salt, and mushrooms. Let them sweat for 6–8 minutes, stirring now and then. They’ll shrink a lot—and if your mushrooms look a bit sad and watery, don’t worry, it always looks a bit weird now. Toss in garlic, cook a minute longer. (This is my taste-test moment. If no one’s watching, I’ll admit I nibble a mushroom or two.)
- Make the sauce: Sprinkle your flour over the veggies, stir so it vanishes. Pour in milk and cream—slowly—while stirring or whisking out lumps. Let it bubble gently (not a roaring boil, or you’ll have a lumpy mess) for about 4–5 minutes, til it thickens like good soup. Stir in the parmesan if using. Salt and pepper to your liking.
- Bring It Together: Toss green beans into the skillet, stir to coat in the sauce. If your pan’s screaming full, just mix carefully (it’s a balancing act). Pour everything into a baking dish (an 8×8 works; I once used a pie plate in a pinch—no one cared). Top with about half the fried onions, saving the rest for after baking.
- Bake: 350°F (175°C) for 25–30 minutes, til bubbly and the edges are starting to brown. Pull it out, scatter that last bit of fried onions on top, and bake another 5 minutes or so. If your oven has a mind of its own and burns half the onions (like mine did once), just scrape off the black bits! Still edible.
Little Notes from a Serial green bean casserole Tinkerer
- It’s honestly worth letting everything rest for 10 minutes before diving in—hotter than a summer sidewalk otherwise.
- If your sauce seems thin, it tends to thicken up once baked…but if not, no one needs to know. It’s still delicious with crusty bread to sop it up.
- I used to skip the parmesan, but then tried it once and now I’m officially pro-cheese in casserole.
Things I’ve Tried (Some Better Than Others)
- Added crispy bacon once. Tasted great but my veggie friends almost chased me out of the kitchen—so now I mix it in on the side for anyone who wants.
- Used non-dairy milk and vegan fried onions for my friend who’s dairy-free—it’s not the same, but a good fix.
- One time I added red pepper flakes for a kick. It was…weird. Not bad, just not what I wanted. I’d say skip the heat, unless you’re wild.
Equipment Chat (You Really Don’t Need Fancy Gear)
Baking dish, skillet, big spoon. That’s the essentials. No colander for draining beans? I just use the pot lid—dangerous but works if you’re stubborn and coordinated. Tried mixing in a mixing bowl once…it bounced out and made a mess, just toss in the pan if you can.
Stashing the Leftovers (If You Have Any…)
Fridge for up to 3 days in an airtight container—though honestly, in my house it never lasts more than a day! I actually think this tastes better the next day (does anyone else like cold casserole for breakfast, or is that just me?). Freezing? Eh, the beans go a bit weird, I wouldn’t recommend.
Serving This Up (Let’s Make It a Party)
I serve it straight from the dish—no frills—mostly because someone always nabs the crispiest corners first anyway. Goes killer with turkey or roast chicken, and my aunt swears it’s perfect at room temp on a picnic table (that’s Ohio for you).
Lessons Learned (Usually the Hard Way)
- Don’t try to rush and crank the oven temp up; I did once and the sauce split. Patience actually helps.
- Tried skipping the cold-water bean trick—regretted it. Beans turned army green, nobody wants that. Just spend the two minutes, it’s worth it.
- Scraping burnt onions off the top? Been there. Just bake the final batch on a lower rack, or keep an eagle eye the last few minutes.
From the Mailbag (FAQs from Friends and Random Relatives)
- “Can you use canned green beans?” Look, you can, but they’re mushy and don’t have the snap. In a pinch, it’ll work, but it’s not the same.
- “Can I make it ahead of time?” Absolutely—just finish up to the point of adding fried onions, cover and chill. Add onions and bake it off when you’re ready (saves you a panic on the day).
- “What if I don’t have fried onions?” Toasted breadcrumbs with a touch of melted butter work in a pinch. But really, the crispy onions are worth hunting for. One Christmas, I used crumbled potato chips. It was…odder than you’d think, but oddly good.
- “Is this healthy?” Well, it’s got beans? But, friend, it’s comfort food, just enjoy it.
- “Do you have to use mushrooms?” Actually, no! I’ve made a version with sautéed carrots and celery. It’s different—more stew-like—but surprisingly tasty. Just not really a casserole anymore, eh?
There you go—the real homemade green bean casserole, not too prim, with just enough slapdash home cook energy to keep it interesting. If you burn the onions or forget the cheese, just say it’s ‘rustic’ and everyone will believe you (or at least they’ll eat it anyway).
Ingredients
- 1 1/2 pounds fresh green beans, trimmed and cut into 2-inch pieces
- 2 tablespoons unsalted butter
- 8 ounces cremini mushrooms, sliced
- 2 cloves garlic, minced
- 1/4 cup all-purpose flour
- 1 1/2 cups whole milk
- 1/2 cup low-sodium chicken or vegetable broth
- 1/2 teaspoon salt
- 1/4 teaspoon black pepper
- 1 1/2 cups crispy fried onions, divided
Instructions
-
1Preheat the oven to 350°F (175°C). Prepare a 9×13-inch baking dish by lightly greasing it.
-
2Bring a large pot of salted water to a boil. Add green beans and cook for 5 minutes, then drain and transfer immediately to ice water to stop the cooking. Drain again and set aside.
-
3In a large skillet over medium heat, melt the butter. Add mushrooms and cook until soft, about 4-5 minutes. Stir in garlic and cook for 1 minute more.
-
4Sprinkle the flour over the mushrooms and stir to coat. Gradually whisk in the milk and broth. Cook, stirring constantly, until the sauce thickens, about 5 minutes. Season with salt and black pepper.
-
5Add the blanched green beans and 1 cup of crispy fried onions to the sauce. Stir until well combined. Pour the mixture into the prepared baking dish.
-
6Bake uncovered for 25 minutes. Top with remaining 1/2 cup fried onions and bake for an additional 5-10 minutes, or until the onions are golden brown. Serve hot.
Approximate Information for One Serving
Nutrition Disclaimers
Number of total servings shown is approximate. Actual number of servings will depend on your preferred portion sizes.
Nutritional values shown are general guidelines and reflect information for 1 serving using the ingredients listed, not including any optional ingredients. Actual macros may vary slightly depending on specific brands and types of ingredients used.
To determine the weight of one serving, prepare the recipe as instructed. Weigh the finished recipe, then divide the weight of the finished recipe (not including the weight of the container the food is in) by the desired number of servings. Result will be the weight of one serving.
Did you make this recipe?
Please consider Pinning it!!




