So, About This Whole Orange Blender Cake…
You know when you find a recipe that just feels like a good friend popping by for tea? Well, this Whole Orange Blender Cake is exactly that for me. The first time I made it, I remember dropping half an orange on the floor, picking it up (five second rule, right?) and thinking, well, if this turns out edible, it’s a win. Turns out, it wasn’t just edible — it was a proper little showstopper. My neighbour Colin, who usually says cake is “fine,” asked for seconds. Can’t argue with that!
Oh, let me tell you, the smell when it’s baking… I’d bottle it up and wear it as perfume if I could. Actually, I’ve never tried that, but I might. Erm, anyway, let’s move on.
Why You’ll Probably Love This (Like, a Lot)
I make this when I want something easy, but a bit different—you throw the whole orange (yes, whole, peel and all) into the blender; no faffing with zesting or squeezing which, frankly, I always make a mess of. My family goes wild for this because it’s both zingy and sweet, and it manages to be moist without being one of those cakes that collapse in the middle (we’ve all been there).
Also, it’s slightly ridiculous how easy it is. Even when I’m short on time (or clean bowls!), it comes out beautifully. Unless you forget the baking powder. Which I’ve done. Once. Okay, twice.
What You’ll Need (Maybe With Some Swaps)
- 1 large orange (unpeeled, washed very well—you don’t fancy a gritty cake!), or two smaller ones. If I’m in a rush, mandarins work okay too.
- 3 eggs
- 1 cup (about 200g) regular white sugar (sometimes I chuck in brown sugar for a bit of caramelly depth; my gran swears by the white stuff, but she also insists on using a hand whisk, so…)
- 1/2 cup (125ml) neutral oil (sunflower, canola, or frankly any veg oil lurking in the cupboard; I’ve tried olive oil once and, hmm, wouldn’t recommend unless you love a savoury vibe)
- 1 1/2 cups (about 200g) all-purpose flour (wholemeal gives it a bit more bite—your call)
- 1 1/2 teaspoons baking powder (don’t skip this; trust me, it ends up oddly flat and sad)
- Pinch of salt (I *always* forget this but it does help brighten things up)
Alright, Here’s How I Make It (With a Few Wiggles)
- Heat oven to 180°C (350°F). Grease a loaf tin, or just line with baking paper if you hate scrubbing pans (I do).
- Wash your orange, cut off the very ends (the little stem bits), then chop it, peel and all, into chunks. Flick out any seeds, unless you like a random crunch. I don’t.
- Toss orange pieces into your blender with the sugar and eggs. Blitz it till it’s really liquidy—no big lumps, but a bit of texture is fine. This is usually where I pop the lid and sneak a taste—don’t worry, it’s safe enough, and quite tangy!
- Add oil to the blender, blend again till combined. Then dump the rest (flour, baking powder, and salt) into the blender. Blend just till it’s all mixed—if it looks a bit lumpy or thick, you’re probably good.
- Spoon batter into your tin. Don’t stress about perfection. Pop it in the oven, and set a timer for 40-45 minutes. Sometimes it’s ready by 38, sometimes it wants the full 50—it’s a little unpredictable, like my Uncle Terry.
- When the top’s golden and a skewer comes out (almost) clean, let it cool a bit in the tin, then shuffle it out onto a rack (or plate—I’ve used a cereal bowl in emergencies; it’s fine).
Stuff I’ve Learned the Hard Way (Notes from Many Cakes)
- If your blender’s a bit feeble, cut the orange smaller, or blend in stages; mine once made terrifying noises and spat pulp everywhere.
- Sometimes the peel is bitter (season, who knows?). Add a spoon of honey to the batter if you want.
- If you underbake, just call it pudding and serve with ice cream. Sorted.
Variations (Some Glorious, Some… Eh)
- Once swapped a lemon for the orange—yikes, way too sharp for me, but maybe you’d like it?
- Threw in a handful of chocolate chips once—worked a treat, melts slightly and you get these rich little pockets (especially good if the orange is a bit tart).
- I’ve seen people use blood oranges. Honestly, I was too cheap to buy them, but I bet it’s pretty.
What You’ll Need (But You Can Sometimes Improvise)
- Blender (but, on second thought, if you’ve got a food processor, give it a bash—did this at my cousin’s flat in Glasgow, turned out fine)
- Loaf tin (but cupcakes work if you’ve only got a muffin tray, though they cook a bit quicker)
Keeping It Fresh (But Not for Long…)
This keeps for 2-3 days in an airtight tin, but honestly, in my house it never lasts for more than a day—unless I hide a slice behind the broccoli in the fridge (you never saw that tip here). If you must, it freezes alright, just slice before freezing so you can sneak one out at midnight.
How I Like to Serve It (Just a Suggestion)
I love a fat slice with a bit of thick Greek yoghurt and a drizzle of honey—it’s equally good with tea, or even as a cheeky breakfast (don’t tell anyone). My youngest insists on spreading butter on her slice, which sounds weird but, actually works.
The “Wish I’d Known” Tips!
- I once tried opening the oven too early and the cake sank just as it was looking like a masterpiece—so don’t do that, trust the timer.
- If your blender smells a bit hot halfway through, give it a break; I’ve wrecked one by being impatient. Whoops.
- Let it cool before slicing. (I know, it’s hard.) Otherwise, you’ll get sticky crumbs everywhere, and I mean everywhere—still finding some under the toaster.
Questions Folks Have Actually Asked Me!
- Isn’t the peel bitter? I used to think so, but honestly, the sugar sorts it out. If you taste the batter and it’s a bit sharp, add a spoonful more sugar, or honey. Don’t stress.
- Can I use a hand mixer instead? You can try, but you’ll have to chop the orange really small. Or just steal a blender from your mum (return it, though!).
- What about gluten free? I’ve used Dove’s Farm blend before—it was a grand experiment and I’d say it was about 90% as good as the regular version. Couldn’t tell much once I slathered it with yoghurt.
- Can you freeze it? Oh for sure, just make sure it’s cooled and wrapped up tight. I like these wrapping tips from Good Housekeeping, they’re way more thorough than me.
- Any topping ideas? Sometimes, if I’m feeling posh, I make a quick orange syrup (just juice, sugar, heat it up, pour over) or even spread a bit of mascarpone on top. There’s a lovely orange glaze here on Smitten Kitchen if you’re feeling fancy, but honestly, plain is perfect too.
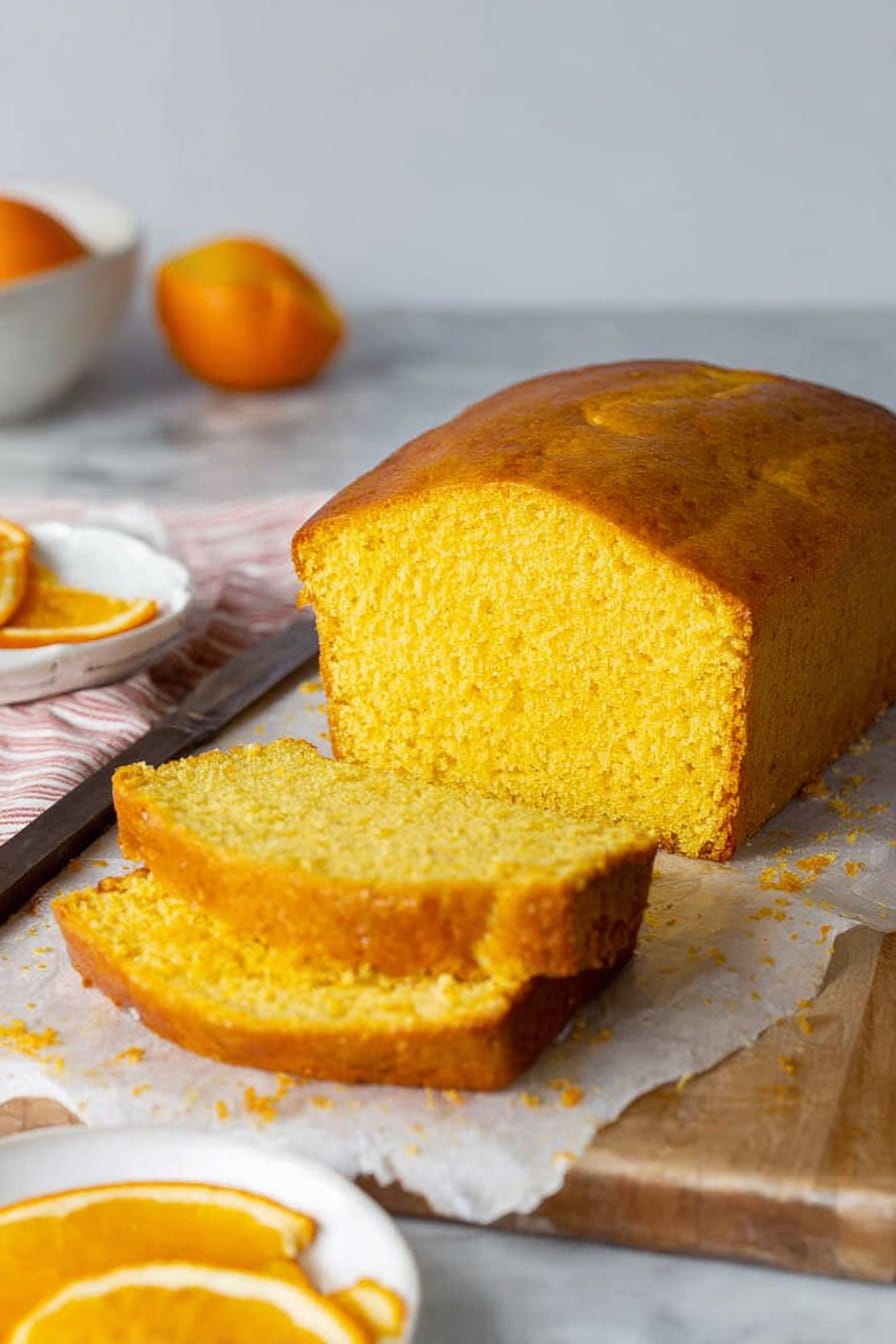
So, there you go. A delicious, irresistible picture of Whole Orange Blender Cake—from my slightly chaotic kitchen to yours. And one last thing—if Colin asks you for seconds, you’re officially in the Cake Club.

Ingredients
- 1 large whole orange, seeded and chopped
- 3 large eggs
- 1 cup granulated sugar
- 1/2 cup vegetable oil
- 2 cups all-purpose flour
- 2 teaspoons baking powder
- 1/2 teaspoon baking soda
- 1/4 teaspoon salt
Instructions
-
1Preheat your oven to 350°F (175°C). Grease and flour a 9-inch round cake pan.
-
2Wash the orange thoroughly. Cut into chunks and remove any seeds, keeping the peel on.
-
3Add the orange chunks, eggs, sugar, and oil to a blender. Blend until completely smooth and creamy.
-
4In a large bowl, combine the flour, baking powder, baking soda, and salt. Pour in the blended orange mixture and stir until just combined.
-
5Pour the batter into the prepared pan. Bake for 40-45 minutes or until a toothpick inserted in the center comes out clean.
-
6Allow the cake to cool in the pan for 10 minutes, then transfer to a wire rack to cool completely before serving.
Approximate Information for One Serving
Nutrition Disclaimers
Number of total servings shown is approximate. Actual number of servings will depend on your preferred portion sizes.
Nutritional values shown are general guidelines and reflect information for 1 serving using the ingredients listed, not including any optional ingredients. Actual macros may vary slightly depending on specific brands and types of ingredients used.
To determine the weight of one serving, prepare the recipe as instructed. Weigh the finished recipe, then divide the weight of the finished recipe (not including the weight of the container the food is in) by the desired number of servings. Result will be the weight of one serving.
Did you make this recipe?
Please consider Pinning it!!




