Alright, Settle In—Let’s Talk Chicken Pillows With Creamy Parmesan Sauce
I’ve got to tell you, there’s something downright magical about Chicken Pillows with Creamy Parmesan Sauce. One rainy Tuesday I whipped these up (didn’t even have the good mixing bowl clean, so I used my salad spinner—don’t ask). Anyway, my youngest licked his plate. Even my husband, who usually does that skeptical eyebrow thing at anything involving cream cheese, asked for seconds. Honestly, if I had a pound coin for every time someone’s asked me for this recipe—it’d cover my cheese habit for at least a month. So, buckle up. I’m sharing all my messy, real-life tricks and hiccups for this home-style classic.
Why You’ll Love This—Or At Least Why I Do
I always make this when I want dinner to feel a bit like a hug in edible form. (You know those days that just need a reset button?) My family goes positively bonkers for the creamy sauce—though for some reason my son thinks it’s ‘magic mashed potatoes’. Sometimes I cheat and use rotisserie chicken if I can’t be bothered with cooking raw breasts, and nobody’s ever noticed. Oh, and fun fact? The first time I tried these, I ripped half the dough. I just patched it with my fingers, and you seriously can’t tell once it’s baked. It’s the ultimate weeknight lifesaver. Trust me.
Here’s What You’ll Need (But Honestly, Sub As You Please)
- 2 cups cooked chicken, shredded (Roast chicken leftovers, rotisserie, or even—shh—canned in a pinch. Works fine.)
- 1 package (8oz) cream cheese, softened (I sometimes use light, though Grandma swears it’s a crime.)
- 2 green onions, finely chopped (Or just a shake of dried chives if you’re out—they taste different, but whatever.)
- 1/2 tsp garlic powder
- 1/2 tsp salt, plus more to taste
- 1/2 tsp black pepper
- 2 tubes refrigerated crescent roll dough (or puff pastry in a pinch—it puffs up more though, beware the cheese explosion!)
- 1/4 cup melted butter (Margarine works if your butter’s been abducted by sandwich fans.)
- 1/2 cup breadcrumbs (Panko is my favorite, but regular works. My aunt once used crushed cornflakes. Not bad, a bit sweet.)
For the Creamy Parmesan Sauce:
- 2 Tbsp butter
- 2 Tbsp flour
- 2 cups whole milk (or any milk, really—I used oat milk that one time I ran out. Still creamy!)
- 3/4 cup grated Parmesan cheese (Not the stuff in the green tube, but I won’t tell if you use it.)
- 1/2 tsp garlic powder
- Salt and pepper to taste
Let’s Get Cooking—Step By Step With a Few Twists
- Preheat your oven to 375°F (190°C). Grease a big ol’ baking sheet or use parchment if, like me, you can never scrub the last bit of cheese off.
- First, in a massive bowl, mix the shredded chicken with the cream cheese, green onions, garlic powder, salt, and pepper. You want creamy, fluffy, and basically not-too-chunky. This is where I usually sneak a bite. Just for quality control purposes.
- Pop open those crescent rolls (brace yourself for the inevitable dough explosion) and separate them into individual triangles. Flatten them a bit with your fingers to make more room for the filling.
- Spoon a generous dollop (about 2-3 Tbsp) of the chicken mixture onto the wide end of each triangle. Fold all the corners around the filling and pinch to seal—doesn’t matter if they look a little lopsided. Mine always do. Place each pillow seam-side down on your baking tray.
- Brush the tops with melted butter (or honestly, just dab it on if you’re in a hurry), then sprinkle breadcrumbs over everything. I go heavy on these because we love that crispy top.
- Bake for 13-16 minutes, or until golden and puffed—sometimes I rotate the tray halfway; sometimes I forget. Perfectly fine.
- While those are baking, let’s tackle the sauce: Melt butter in a saucepan over medium heat; stir in flour and cook 1-2 minutes (should smell a little nutty, but don’t let it brown too much).
- Gradually whisk in the milk—slowly!—until it thickens, then toss in Parmesan, garlic powder, and season with salt and pepper. It’ll look a bit thin at first; then suddenly it thickens. Don’t panic if it gets lumpy, just stir like your life depends on it. (It doesn’t, but still…)
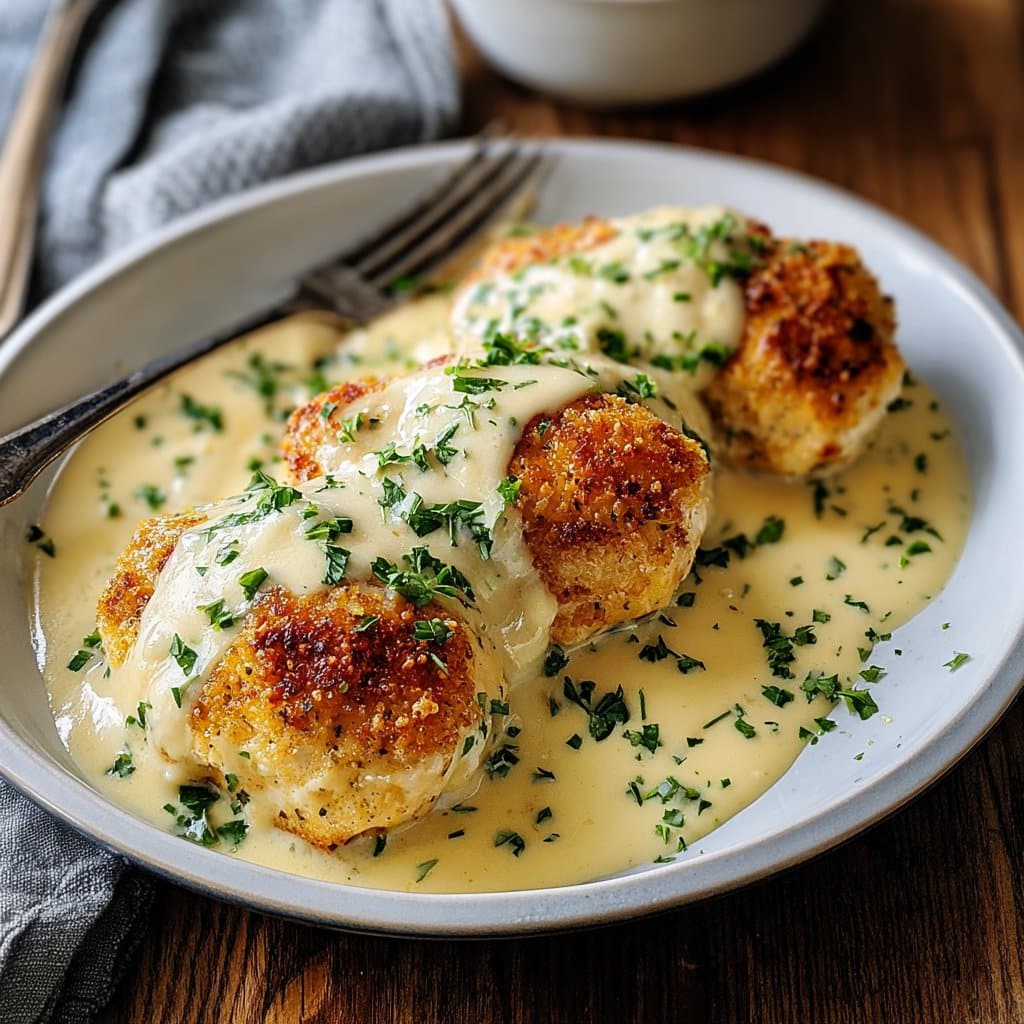
- When your chicken pillows are ready, pull them from the oven—let them rest a minute to avoid lava-mouth syndrome—then drizzle (or, in my case, douse) with the Parmesan sauce. Voila. Dinner is saved.
My Scruffy Notes
- If your sauce is too thick, I just add a splash more milk. Too thin? Sprinkle in a bit more cheese—or let it simmer, but keep stirring or the bottom burns. Learned that the hard way.
- You can totally make the filling a day ahead. Actually, I think it tastes better the next day. Maybe that’s just me, though.
- Don’t stress about perfect pillow shapes. They always look better cooked—and most folks are too busy eating to notice anyway.
Variations I’ve Tried (Not All Winners!)
- Swapped in chopped roasted mushrooms instead of chicken for my veggie sister—pretty tasty. The filling’s a bit softer, though.
- I once added chopped spinach. Good in theory, but turned a little soggy. Still, if you squeeze it dry, it’s decent.
- Sometimes a handful of cooked bacon goes in. No complaints from anyone, ever.
- Tried whole-wheat dough once. Eh. Not my favorite—tastes a bit too ‘health food’ for what is really comfort food.
Equipment—Or What to Use If You’re Short a Gadget
- Baking sheet (if you have a pizza stone, that works too. I’ve even used a big roasting pan, no shame.)
- Medium saucepan
- Mixing bowl (Salad spinner in a bind. Seriously, it worked!)
- Pastry brush for butter (I’ve used a wadded-up bit of parchment before. I mean, desperate times…)
- Whisk (or a fork if the whisk vanished in the drawer again)
If you’re missing something, improvise. That’s half the fun anyway.
About Storing—Though Honestly, It Never Lasts That Long
You can keep leftovers in an airtight container in the fridge for up to 3 days. Reheat in the oven at 325°F (160°C) till hot. The microwave works, but makes them a bit soft. Frankly, in this house, they rarely last more than a day (unless I hide a few). The sauce thickens up overnight, which I secretly prefer—just stir in a splash of milk when reheating.
Serving—What’s Our Tradition?
We serve these pillows smothered in sauce, with steamed broccoli or a big salad. Once, someone snuck them into a lunchbox the next day—huge hit. Try ‘em with mashed potatoes if you want to go full carb-commando. And a little sprinkle of parsley on top if you’re feeling fancy (or just want to impress the in-laws).
You Live, You Learn: A Few ‘Pro’ Tips
- I once tried rushing the sealing step—huge mess. Filling everywhere. Take the 30 extra seconds, trust me.
- Actually, I find it works better if you let the dough come to room temp for a bit. Less likely to tear—probably science, or just less cold.
- Don’t skimp on the Parmesan. Cheap stuff hides, but real shavings? Heaven.
- If the sauce breaks (looks curdled), try whisking in a spoonful of cold milk. Sometimes it helps, sometimes not, but worth a shot!
FAQ—These Are Real Questions From My Friends (Promise)
- Can I freeze these?
Yep, though I’d hold off on the sauce part until serving—freeze the baked pillows, then thaw and crisp up in the oven. Sauced ones get kind of weird, in my experience. - What’s a good side if I don’t like broccoli?
Hey, no judgment: roasted carrots or even a big pile of peas are great. Or just eat two pillows, who’s counting? - Does this work with gluten-free dough?
It kinda does—just mind that some GF brands fall apart easier. Be gentle with the folding, or you wind up with a chicken blanket instead of a pillow (not terrible, honestly). - Can I make the pillows ahead?
Sure, assemble and keep them covered in the fridge till baking. Or freeze before baking—just bake a little longer, straight form frozen. - What if I don’t have Parmesan?
I’ve subbed in shredded Gruyere or even sharp cheddar. Different flavor, still lovely!
Oh, And a Random Tangent—You’ve Read This Far
One time, I tripped over the dog running with a tray of these and almost lost the whole batch. Now I bake while she’s napping. Funny how food traditions and pet routines somehow mix together. If you need some cooking music, I always put on a Beatles playlist (here’s a good one on YouTube). Also, when searching for different crescent dough brands, I use this homemade one from AllRecipes when I’m feeling energetic… which isn’t often, but still.
Right, I think that about covers it. Go forth and make chicken pillows—your tastebuds (and maybe your soul) will thank you. Drop me a line if you try wild variations; I’m always game for new havoc in the kitchen!
Ingredients
- 2 cups cooked, shredded chicken breast
- 4 oz cream cheese, softened
- 1/2 teaspoon garlic powder
- 1/2 teaspoon onion powder
- Salt and black pepper to taste
- 1 tablespoon chopped fresh parsley
- 1 can (8 oz) refrigerated crescent roll dough
- 2 tablespoons butter, melted
- 2 cups milk
- 2 tablespoons all-purpose flour
- 1/2 cup grated Parmesan cheese
Instructions
-
1Preheat oven to 375°F (190°C). Line a baking sheet with parchment paper.
-
2In a bowl, mix shredded chicken, cream cheese, garlic powder, onion powder, parsley, salt, and black pepper until well combined.
-
3Unroll crescent dough and separate into 8 triangles. Place a spoonful of chicken mixture in the center of each triangle. Fold corners over and pinch to seal, forming pillows.
-
4Place chicken pillows seam side down on the baking sheet. Brush with melted butter. Bake for 22–25 minutes, or until golden brown.
-
5Meanwhile, in a saucepan over medium heat, whisk together flour and 2 tablespoons butter. Slowly add milk, whisking constantly. Cook until slightly thickened, then stir in Parmesan cheese until melted and smooth.
-
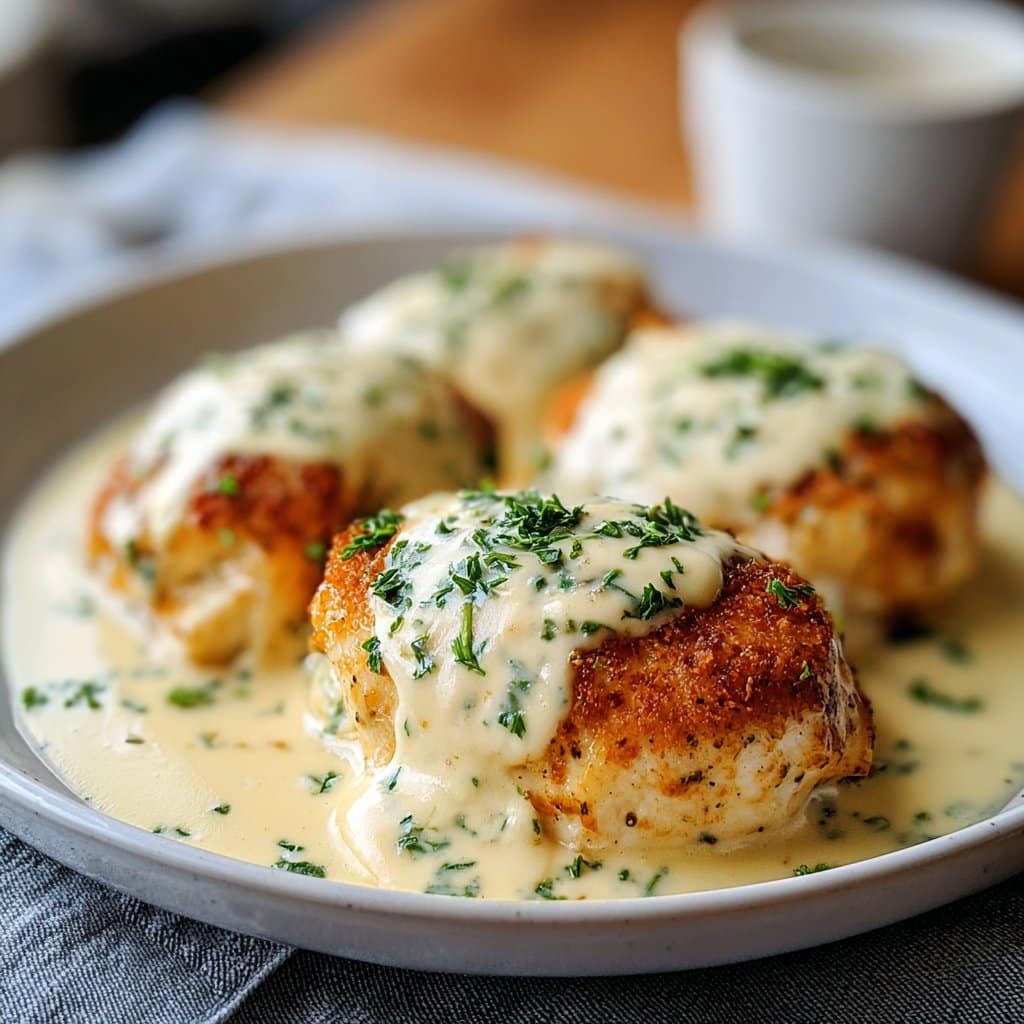
6Serve warm chicken pillows topped generously with creamy Parmesan sauce and garnish with extra parsley if desired.
Approximate Information for One Serving
Nutrition Disclaimers
Number of total servings shown is approximate. Actual number of servings will depend on your preferred portion sizes.
Nutritional values shown are general guidelines and reflect information for 1 serving using the ingredients listed, not including any optional ingredients. Actual macros may vary slightly depending on specific brands and types of ingredients used.
To determine the weight of one serving, prepare the recipe as instructed. Weigh the finished recipe, then divide the weight of the finished recipe (not including the weight of the container the food is in) by the desired number of servings. Result will be the weight of one serving.
Did you make this recipe?
Please consider Pinning it!!




