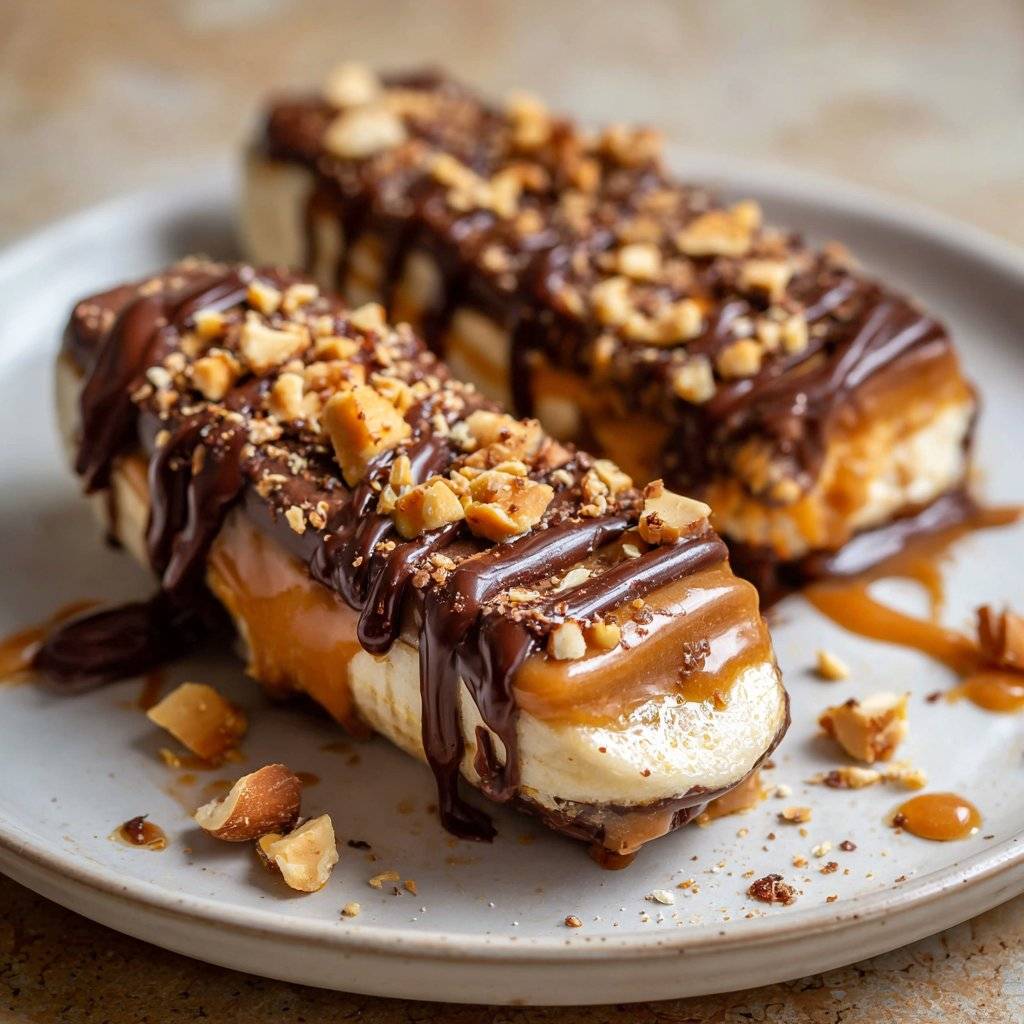
Okay, let me just get this out there: if you’ve ever stood in front of the freezer at midnight searching for something that’s not just ice cubes and a sad half-eaten pint of vanilla, frozen banana Snickers might just save your night (or afternoon, or…breakfast? No judgement here). The first time I made these was on a sweltering August day because I refused to bake. Honestly, I thought banana desserts would always taste like, well, smooshed banana bread. But these are way more like a Snickers bar that ran away to the tropics. Also: kids think it’s candy, which is, basically, the dream.
Why I Keep Coming Back to These
I make this when my sweet tooth starts singing but my brain says, “Eat a fruit instead, okay?” (Does it count as fruit when it’s covered in chocolate? Let’s just say yes.) My family goes absolutely nuts for these—I mean, every time, I have to wrestle the last piece form my partner, which is kinda ridiculous since I made them in the first place. There’s also, not gonna lie, a certain joy in knowing you didn’t pay $5 for a single snack bar. Oh, and cleanup isn’t a nightmare! (Which never hurts, right?)
What You’ll Need (but Feel Free to Improvise)
- 4 medium-sized bananas (ripe, but not mushy—if they’re too brown, just use them for banana bread instead)
- About 3/4 cup peanut butter (or almond butter, or that jar of hazelnut spread you forgot about—just avoid the stuff that pours like soup, unless you want a mess)
- 1/2 cup roasted peanuts, salted or unsalted (my grandmother swore by Planters, but honestly, the generic store brand works fine)
- 1 1/2 cups chocolate chips (dark or milk—sometimes I raid the Halloween stash, and it’s fine. Baking chocolate? Sure, if you must.)
- 2 teaspoons coconut oil (or just a spoonful of butter; this just helps the chocolate play nice)
- Optional: A handful of flaked salt for sprinkling on top—don’t skip it unless you hate happiness
How I Actually Make ‘Em
- First, peel your bananas and slice each one in half crosswise, then lengthwise—so you get four pieces from every banana. Sometimes mine end up a bit wonky shaped; it doesn’t matter. Lay them flat on a baking sheet lined with parchment (foil sticks, trust me…I tried it once and regretted it).
- Spread a generous spoonful of peanut butter onto the flat side of each banana piece. This is the part where peanut butter goes everywhere, so don’t fret. I use the back of a teaspoon; my friend swears by a mini spatula. Both work—you do you.
- Sprinkle on chopped peanuts. If you don’t have a knife handy (sometimes I just hit the bag with a rolling pin, much faster). Press them in a bit, they can be slippery devils.
- Now, freeze those banana-peanut stacks for at least 1 hour, until they’re firm. Sometimes I forget about them and come back three hours later—no harm done.
- Time for chocolate. Melt the chocolate chips with coconut oil in a microwave-safe bowl in 30-second bursts, stirring each time (don’t trust the microwave blindly; I burned a batch once and my house smelled like toast for a week).
- Dip or spoon chocolate over each banana piece so it’s mostly covered. I usually just use a spoon and drizzle, because dunking is messier than trying to stop a toddler with a marker. Set them back on the parchment—it’ll get messy underneath, that’s okay!
- Optional: Sprinkle a bit of flaky salt over the top before the chocolate sets. Trust me, it’s worth the extra two seconds.
- Freeze again until the chocolate is set and they’re solid, another 30 minutes or so. Or until you get too impatient.
Little Notes from the Trenches
- If your bananas seem a bit too soft, pop ’em in the fridge first so they’re easier to slice and handle
- I once tried skipping the coconut oil and my chocolate turned out kinda…chunky? So just add a bit, even if it feels weird
- Don’t worry if they look uneven or lumpy. Honestly, nobody cares. Everyone’s just glad you made them
Variations I’ve Messed Around With
- Almond butter + cashews = Next level, especially with dark chocolate
- Tried sunflower seed butter for a nut-free version; it was okay, but a bit too earthy for my liking
- White chocolate? Once. Let’s just say—it looked…interesting, but I probably won’t do it again
- Added a swirl of dulce de leche once (oh boy, so sticky, but pretty tasty if you’re patient)
The Gear I Use (and What I Don’t)
You really just need a good sharp knife and a bowl. That’s it. I do use a parchment-lined sheet tray—they’re kinda essential, unless you enjoy chiseling frozen bananas off metal. If you don’t have parchment paper, wax paper works, but sometimes it sticks. Baking pan too big? Use a big plate and cover with cling film, honestly (I do this all the time when my trays are in the dishwasher—why do they never seem clean when I need ‘em?).
How I Store Them (When I Actually Have Leftovers)
I keep these in a freezer bag or an airtight container—stuck together in a jumble, nothing fancy. They’re best eaten within about a week, though, honestly, in my house it never lasts more than a day! If they do get too hard, just let them thaw for a couple minutes before munching. Banana teeth aren’t a badge of honor.
How We Serve ‘Em (And You Can Too)
Most days, I just hand them out straight from the freezer the moment anyone looks hungry. But—and this might be overkill—they’re excellent chopped up over vanilla ice cream. I even slipped them into my kid’s lunch box once. (Okay, twice. Teacher said it was their best snack all semester.)
Pro Tips I Learned the Hard Way
- Don’t try to get fancy with drizzled designs until you’ve done this a few times. I tried zig-zagging chocolate with a fork once…let’s just say, it was more Jackson Pollock than bakery case
- If you’re short on time, don’t try to skip freezing between steps. I thought I could cheat once, and it all just slid around like a banana peel on a cartoon
- If you use super ripe bananas, they turn mushy later. Delicious, but not as much crunch—just a heads up
Questions I’ve Actually Been Asked
- Do I have to use coconut oil? Actually, no. Butter works fine, or a neutral oil. Just don’t skip something, or the chocolate gets weird.
- Can I use other nuts? Totally. I sometimes use almonds; my neighbor swears by pecans. Hazelnuts sound amazing, though I haven’t tried that yet.
- How do I keep them from sticking together? Short answer: line the pan with parchment and let ‘em set a bit before stacking. But honestly, I end up prying them apart most times anyway.
- What chocolate brand works best? Ghirardelli melts really smoothly for me, but I’ve used Nestlé too—or even just leftover bars chopped up. Don’t sweat it.
- Can I double the batch? Why not? But use two pans or they squish together. And your freezer might get a bit crowded.
If you want to make these with fancier chocolate, I’ve found some great melting tips over at Serious Eats. Oh—and for other fun frozen snacks, Sally’s Baking Addiction has a twist. Just don’t blame me if you end up eating the whole tray before anyone else gets home. On second thought, that’s probably the plan.
Last thing—I once forgot to add the peanuts altogether, and nobody even noticed. So, honest mistake? Or a new tradition. Either way, you can’t really mess these up. Enjoy!

Ingredients
- 3 large ripe bananas
- 1/2 cup creamy peanut butter
- 1/3 cup chopped roasted peanuts
- 1 1/2 cups dark chocolate chips
- 1 tablespoon coconut oil
- 2 tablespoons caramel sauce
- 1/4 teaspoon sea salt
- 1/4 cup chopped mini pretzels (optional)
Instructions
-
1Peel the bananas and cut each in half crosswise, then slice lengthwise to make 12 pieces.
-
2Spread a generous layer of peanut butter on each banana piece.
-
3Sprinkle chopped roasted peanuts and caramel sauce over the peanut butter layer. Add chopped pretzels if using.
-
4Place the banana pieces on a parchment-lined tray and freeze for at least 30 minutes until firm.
-
5Melt chocolate chips and coconut oil together in a microwave or double boiler until smooth. Dip each frozen banana piece into the chocolate, coating completely.
-
6Sprinkle with sea salt and return to the freezer for at least 10 minutes, or until chocolate is set. Serve frozen.
Approximate Information for One Serving
Nutrition Disclaimers
Number of total servings shown is approximate. Actual number of servings will depend on your preferred portion sizes.
Nutritional values shown are general guidelines and reflect information for 1 serving using the ingredients listed, not including any optional ingredients. Actual macros may vary slightly depending on specific brands and types of ingredients used.
To determine the weight of one serving, prepare the recipe as instructed. Weigh the finished recipe, then divide the weight of the finished recipe (not including the weight of the container the food is in) by the desired number of servings. Result will be the weight of one serving.
Did you make this recipe?
Please consider Pinning it!!