Let Me Tell You About My Chicken Spring Roll Adventures
Alright, so you know how every family has that one snack that just vanishes from the table before you can even blink? That’s chicken spring rolls for us. I swear, as soon as I take them out of the pan, they do a disappearing act worthy of a magic show. The first time I tried making these I ended up with something closer to chicken bundles than rolls (yeah, I tried to roll them too tight—rookie mistake). But hey, that’s how you learn! Plus, I remember my cousin Nick randomly dropping by in the middle of my first attempt, and I made him be my taste tester. He didn’t mind—he never does when there’s food involved.
Why You’ll Love This (Or At Least, Why I Do)
I make these chicken spring rolls whenever there’s a game on or if I’ve got leftover rotisserie chicken sitting in the fridge (because, honestly, what else am I going to do with half a bird?). My family goes absolutely bonkers for these, especially when I let them pick their own dipping sauce. And if you’re like me and get a tiny bit twitchy about deep frying, don’t sweat it—I sometimes bake or air fry these and no one seems to notice the difference. Actually, the only time I got complaints was when I tried to make them with just cabbage and no chicken. Big mistake—don’t do it unless you want dirty looks at the dinner table.
What You’ll Need (And a Few Swaps I’ve Tried)
- 2 cups cooked chicken, shredded (rotisserie chicken is a lifesaver here, but boiled or grilled works too)
- 1 cup finely shredded cabbage (sometimes I use pre-mixed slaw if I’m in a rush)
- 1/2 cup grated carrots (honestly, I just eyeball this—maybe a big handful?)
- 3 spring onions, chopped (my gran always insisted on red onions, but they’re a bit strong for me)
- 2 cloves garlic, minced (if you’re feeling lazy, the stuff in the jar totally works)
- 1 tablespoon soy sauce (or tamari, or whatever salty stuff you’ve got lying around)
- 1 teaspoon sesame oil (optional, but I like that nutty thing it does)
- Spring roll wrappers (my local Asian market sells these fresh; but frozen ones work, just thaw them first)
- Oil for frying (sunflower, canola—heck, I even used olive oil once, but it’s not my favorite for this)
- Pinch of pepper or chili flakes if you like a little kick
The (Mostly) Foolproof Method
- Mix the Filling: Toss the chicken, cabbage, carrots, spring onions, and garlic in a big bowl. Add soy sauce, sesame oil, pepper—then stir it up. This is where I usually sneak a taste (you should too, in the name of quality control).
- Get Wrapping: Set your wrappers out on a clean, damp towel so they don’t dry out. Spoon a couple of tablespoons of filling onto each wrapper. Fold the sides in, then roll up tight, sealing the edge with a dab of water. Don’t worry if your first few look lumpy or weird—they still taste great.
- Cooking Time: Heat about an inch of oil in a deep-ish pan. You want it hot, but not too hot—if you drop a tiny piece of wrapper in and it sizzles, you’re good. Fry in batches, flipping once, until golden (usually 3-4 minutes per side). Or, if you want to keep your kitchen from smelling like a chippy for days, brush them with oil and bake at 400°F (200°C) for 20-25 mins, flipping halfway. Air fryer? 390°F for about 12 mins works for me.
- Drain & Serve: Let them drain on paper towels. Try not to eat them all before they hit the table—no judgement if you do though.
Things I Wish I’d Known (Notes From the Trenches)
- Don’t overstuff. I still make this mistake sometimes and end up with exploding rolls.
- If you’re freezing them, stick a sheet of baking paper between layers or they’ll fuse together into one giant roll slab (which is pretty hard to separate without cursing).
- Actually, I find it works better if you let the filling cool before wrapping—less steam = crispier roll.
Variations I’ve Tried (With Mixed Results)
- Prawn & Chicken Mix: Fancy, right? Adds a nice sweetness. But my nephew is allergic, so maybe don’t do this if you’ve got seafood haters.
- Veggie-Only: Like I said earlier, didn’t go over well in my house, but if you bulk it out with mushrooms and tofu, it’s pretty tasty.
- Curry Powder: I tossed some in once—too much and it overpowers everything, but a pinch is fun.
Once, just for kicks, I tried stuffing them with mac and cheese (don’t judge me). I don’t recommend it… unless you really, really love cheese.
Equipment You’ll Probably Need (but Don’t Panic)
- Big mixing bowl
- Sharp knife (or the one that’s kind of sharp—just be careful)
- Frying pan or wok (if you don’t have one, a heavy-bottomed saucepan works fine—just don’t overcrowd)
- Paper towels for draining (though in a pinch, a brown paper bag totally works)
Storing Your Spring Rolls (If Any Survive)
In theory, you can pop leftovers in an airtight box and refrigerate for up to 3 days. They never last that long in my house (someone’s always sneaking in for an 11PM snack). You can freeze them before cooking, just wrap well; bake from frozen, adding a few extra minutes.
How We Like to Serve ‘Em
Dipping sauces are a must. My personal favorite is a mix of sriracha and mayo, but sweet chili sauce is always a crowd-pleaser. Sometimes (okay, most times) my family insists on a bowl of ketchup on the side, which kind of ruins the whole ‘exotic’ vibe, but who am I to judge?
Pro Tips (Learned the Hard Way)
- I once tried rushing the sealing step and every single roll popped open in the oil. Not my finest hour.
- Actually, if the oil’s too hot, the outside burns before the inside is warm—don’t crank it up, just be patient.
- On second thought, it’s probably best to keep the first batch small so you can see how your pan behaves.
Real Questions I’ve Gotten (And My Honest Answers)
- Can I make these ahead? Oh, for sure. Wrap them up and freeze—just cook straight from frozen (add a few mins). Or keep them in the fridge for a day or two max.
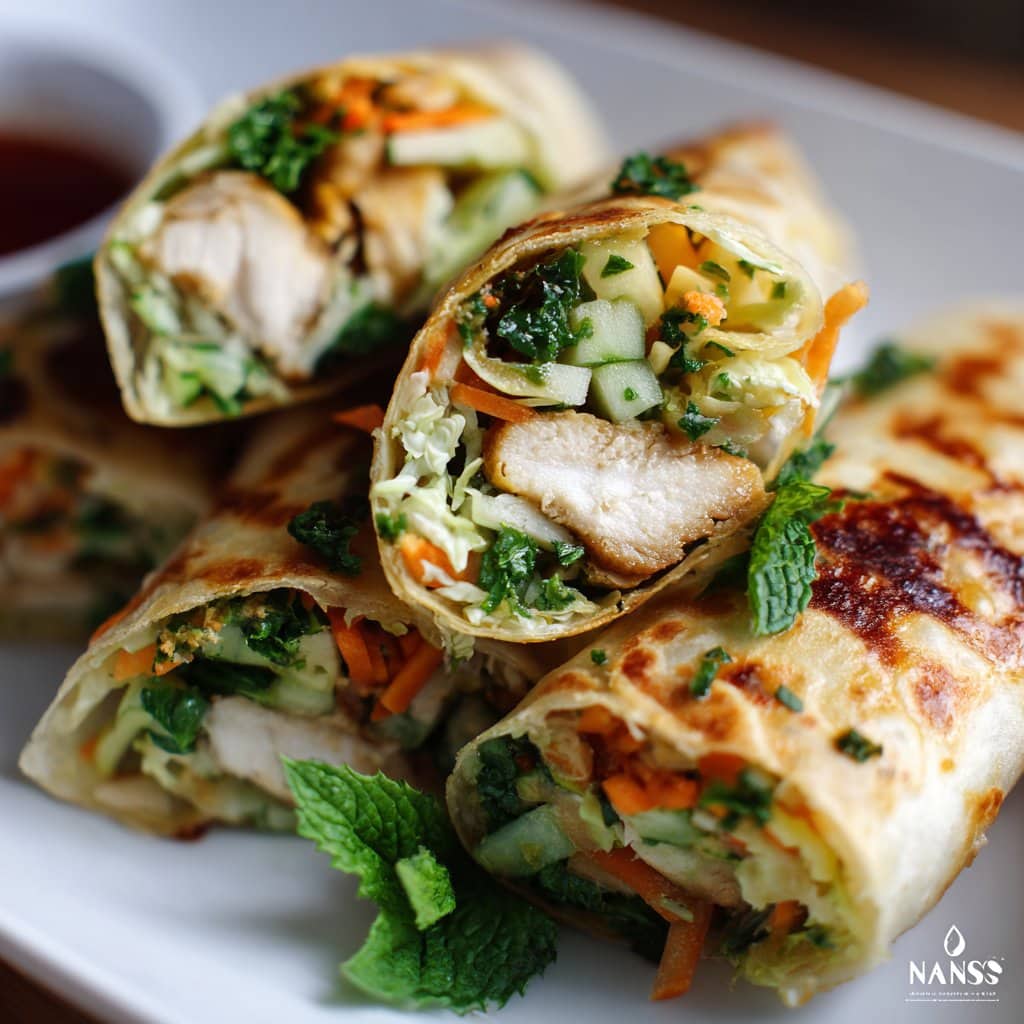
- Can I use tortillas instead of spring roll wrappers? Technically, yes, but they come out more like chimichangas and less like spring rolls. Still tasty, just… different.
- How do I keep them crispy? Serve right away if you can! If you need to reheat, pop them in the oven, not the microwave (unless you like them a little sad and soggy).
- What dipping sauce do you recommend? Personally, I love this simple nuoc cham from Serious Eats, or you can check out these sauce ideas at Feasting at Home. The more sauces the better, honestly.
- Can I air fry them? Yep! Honestly, I think they come out even crispier sometimes. Just lightly oil and don’t overcrowd.
By the way, if you’ve got any tips of your own, or if you try a weird filling (like, I dunno, leftover chili?), let me know! Cooking’s more fun when everyone chucks their ideas into the mix.

Ingredients
- 200g boneless chicken breast, finely chopped
- 8 spring roll wrappers
- 1 cup shredded cabbage
- 1/2 cup grated carrot
- 2 green onions, finely sliced
- 2 cloves garlic, minced
- 1 tablespoon soy sauce
- 1 teaspoon sesame oil
- 1/2 teaspoon ground black pepper
- 1 tablespoon vegetable oil (for filling)
- Oil for deep frying
Instructions
-
1Heat 1 tablespoon vegetable oil in a pan over medium heat. Add minced garlic and sauté until fragrant.
-
2Add chopped chicken breast and cook until no longer pink. Stir in soy sauce, sesame oil, black pepper, shredded cabbage, grated carrot, and green onions. Cook for 3-4 minutes until vegetables are slightly tender. Remove from heat and let cool.
-
3Place a spring roll wrapper on a clean surface. Add 2 tablespoons of the chicken filling near one edge. Fold the sides over the filling and roll tightly, sealing the edge with a little water.
-
4Repeat with remaining wrappers and filling.
-
5Heat oil in a deep pan to 180°C (350°F). Fry spring rolls in batches for 3-4 minutes or until golden brown and crispy. Drain on paper towels.
-
6Serve hot with your favorite dipping sauce.
Approximate Information for One Serving
Nutrition Disclaimers
Number of total servings shown is approximate. Actual number of servings will depend on your preferred portion sizes.
Nutritional values shown are general guidelines and reflect information for 1 serving using the ingredients listed, not including any optional ingredients. Actual macros may vary slightly depending on specific brands and types of ingredients used.
To determine the weight of one serving, prepare the recipe as instructed. Weigh the finished recipe, then divide the weight of the finished recipe (not including the weight of the container the food is in) by the desired number of servings. Result will be the weight of one serving.
Did you make this recipe?
Please consider Pinning it!!




