Let Me Tell You About This Cake…
Alright, so picture this: a blustery fall afternoon, the kind when your toes just refuse to warm up, and you’re half tempted to wear mittens indoors (don’t judge). That’s almost always when I reach for this Cozy Pumpkin Poke Cake Recipe. First time I made it, I nearly forgot the eggs because my neighbor popped in to borrow a cup of sugar—classic. Still turned out pretty decent, though! There’s just something about pumpkin cake that’s basically like a hug you can eat, you know? Plus, poking holes in cake is weirdly satisfying (but maybe that’s just me).
Why You’ll Love This One
Honestly, I make this when I need an easy win or when the gang is coming over for movie night and I want to seem like I tried harder than I did. My family goes a bit wild for it—especially my cousin, who pretends she’s “not a dessert person” (yeah, right) but always ends up scraping the pan. The best bit? The caramel just sinks right in. Oh, and if you get distracted like me and leave it a bit too long, it’s still forgiving. I used to get annoyed at the poking step, but now it’s cathartic after a long week. It’s perfect for potlucks, and people will ask you for the recipe—so be warned.
What You’ll Need (And What I Sometimes Swap)
- 1 box spice cake mix (I’ve used yellow cake in a pinch—tastes different, still good)
- 1 can (15 oz) pumpkin puree (not pumpkin pie filling—though, once I accidentally used that and it was… fine)
- 3 large eggs (or two if you run out, but the cake gets a little dense)
- 1/2 cup vegetable oil (I’ve done melted coconut oil, but it makes it taste a bit tropical?)
- 1 can (14 oz) sweetened condensed milk (Eagle Brand is my grandma’s favorite, honestly any will do)
- 1/2 cup caramel sauce, plus more for drizzling (store-bought or make your own if you’re feeling fancy)
- 1 tub (8 oz) whipped topping (Cool Whip, or whip your own cream—sometimes I go wild and double the topping)
- 1 teaspoon cinnamon (optional, but I always toss some in)
- Chopped toasted pecans or walnuts, for topping (unless you hate nuts, then just skip it)
- Sprinkle of flaky sea salt (makes it fancy, but I forget half the time)
How I Actually Make It (Warts and All)
- Preheat your oven to 350°F (175°C). Grease a 9×13-inch pan—sometimes I use parchment if I’m feeling lazy about scrubbing.
- In a big bowl, toss in cake mix, pumpkin puree, eggs, and oil. Mix until it looks smooth-ish. (This is where I sneak a taste, even though I shouldn’t—raw eggs, but I live dangerously.)
- Pour the batter into your prepared pan and spread it out. Bake about 25-30 minutes. Don’t panic if it’s a little soft in the middle; poke a toothpick in and if it mostly comes out clean, you’re good.
- Let it cool for 10-15 minutes. This is when I forget about it and get distracted by something on TV. Still turns out fine.
- Now, poke holes all over with the handle of a wooden spoon (or a fat straw, or a chopstick—whatever’s handy). Don’t be shy—more holes means more gooey goodness.
- Pour the sweetened condensed milk right over, letting it soak in. Then drizzle half the caramel sauce; wiggle the pan a bit to help it sink in.
- Let that chill in the fridge; an hour is good, but overnight is better (I swear it tastes richer the next day—but sometimes my patience gives out).
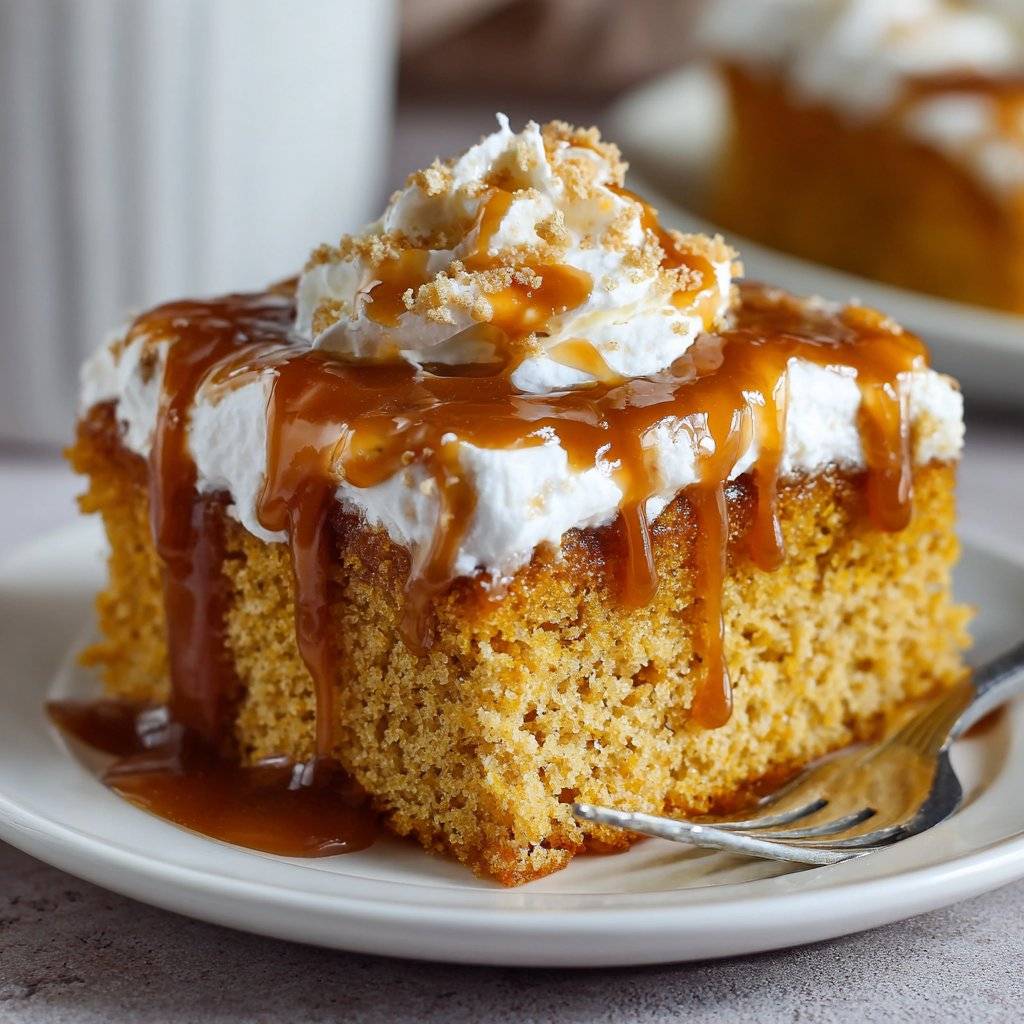
- Spread whipped topping over the whole thing. Drizzle more caramel, toss on some nuts, and a dash of cinnamon if you’re feeling chef-y.
- Slice and serve, or just eat straight from the pan while standing at the fridge. Your call.
Notes Only a Real Person Would Discover
- If you’re out of caramel, butterscotch sauce works too (or even maple syrup, in a pinch; learned that from running out at the worst possible time).
- The longer it sits, the more the flavors hang out together. But, sometimes it gets too soggy if you overdo the condensed milk—been there, not fun.
- I’ve skipped the nuts entirely for a pal with allergies, and honestly, still dreamy.
Variations I’ve Actually Tried (and One I Won’t Again)
- Chocolate chips sprinkled before baking—pretty yum, but not strictly necessary.
- Tried swapping in applesauce for half the oil once; cake was fluffier but missing some oomph. Up to you.
- Made a “healthy” version with Greek yogurt instead of oil; it was… not my finest hour. Wouldn’t recommend.
- Once added a splash of bourbon to the caramel. That worked a treat (as long as kids aren’t digging in).
What If You Don’t Have All the Tools?
So technically, a stand mixer is nice, but I’ve just used a fork in a big bowl and it was fine. No wooden spoon for poking? Use a straw, a chopstick, or even a knitting needle (wash it, please). I even heard someone used a meat thermometer (okay, that’s a bit much, but you get the idea).
How To Store (If You Actually Have Leftovers)
Stick it in the fridge covered in foil or plastic wrap. It’ll last 3-4 days, supposedly, though honestly, in my house it never makes it past day two. If you want to freeze, just do the cake base and add toppings after defrosting—it helps avoid the whipped topping turning weirdly watery (trust me).
How I Like To Serve It (And Family Traditions)
We go all in with extra caramel and a sprinkle of sea salt, and if there’s vanilla ice cream nearby, all bets are off. Sometimes I’ll light a candle on the table so it feels like a café (my daughter thinks I’m a bit much, but she eats two pieces, so…). On chilly nights, a mug of homemade hot chocolate on the side makes it over-the-top cozy.
If I Could Go Back—Pro Tips Learned the Hard Way
- Don’t rush the poking and drizzling; I once hurried and the caramel just sat on top instead of soaking in. Regret.
- Let the cake cool a bit before adding condensed milk. Added it too early once, and it ran straight through and pooled at the bottom.
- Don’t use pumpkin pie filling unless you really want it sweet, or you’re out of options—it changes everything.
Real FAQ From Folks (And Sometimes Me)
- Can I use homemade pumpkin puree? Sure thing—just make sure it’s not too watery. Learned that the messy way.
- What if I don’t like caramel? You could skip it, or use chocolate sauce maybe? But why would you skip caramel?! (Kidding.)
- Is it okay to make ahead? Yup, actually I think it tastes better the next day, but don’t add the topping until you’re about to serve. It gets a bit runny otherwise.
- Can I double this for a crowd? Absolutely, but use two pans—one giant pan doesn’t bake evenly. Learned that the hard way on Thanksgiving.
- Is this super sweet? It’s a treat, so yeah, pretty sweet. If you want it less so, cut back the caramel or use unsweetened whipped cream. Or just eat a smaller slice (ha!).
Oh, quick digression: if you’re after more easy bakes, Budget Bytes has some fun pumpkin ideas—I’ve borrowed a few tricks form there too. Anyway, let me know if you try this—always curious how other kitchens tweak it!

Ingredients
- 1 box yellow cake mix
- 1 cup canned pumpkin puree
- 3 large eggs
- 1/2 cup vegetable oil
- 1/2 cup water
- 2 teaspoons pumpkin pie spice
- 1 can (14 oz) sweetened condensed milk
- 2 cups whipped topping
- 1/4 cup chopped pecans (optional)
- 1/2 teaspoon ground cinnamon
Instructions
-
1Preheat oven to 350°F (175°C). Grease a 9×13-inch baking pan.
-
2In a large bowl, combine yellow cake mix, pumpkin puree, eggs, vegetable oil, water, and pumpkin pie spice. Mix until smooth.
-
3Pour the batter into the prepared pan and bake for 30-35 minutes, or until a toothpick inserted in the center comes out clean.
-
4Remove cake from oven and let cool for 10 minutes. Using the handle of a wooden spoon, poke holes all over the cake.
-
5Slowly pour sweetened condensed milk evenly over the cake, allowing it to soak into the holes. Let the cake cool completely.
-
6Spread whipped topping over the cooled cake. Sprinkle with chopped pecans and ground cinnamon before serving.
Approximate Information for One Serving
Nutrition Disclaimers
Number of total servings shown is approximate. Actual number of servings will depend on your preferred portion sizes.
Nutritional values shown are general guidelines and reflect information for 1 serving using the ingredients listed, not including any optional ingredients. Actual macros may vary slightly depending on specific brands and types of ingredients used.
To determine the weight of one serving, prepare the recipe as instructed. Weigh the finished recipe, then divide the weight of the finished recipe (not including the weight of the container the food is in) by the desired number of servings. Result will be the weight of one serving.
Did you make this recipe?
Please consider Pinning it!!




