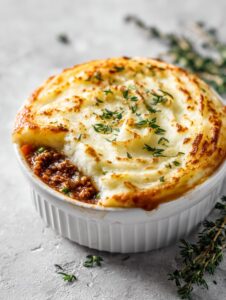
A Shepherd’s Pie Freezer Fix for Real Life
Oh, shepherd’s pie. For me, it smells like Sunday afternoons when my mum was anxiously juggling—oh, everything at once—and I’d sneak a piece of crusty potato off the top, convinced she didn’t notice. Recently, I’ve been doing the make-ahead freezer version because, let’s be honest—there’s always that one week night when hunger arrives and patience runs out. (And takeout just doesn’t have that shepherd’s pie warmth, does it?)

Why You’ll Love This (Trust Me, I Do)
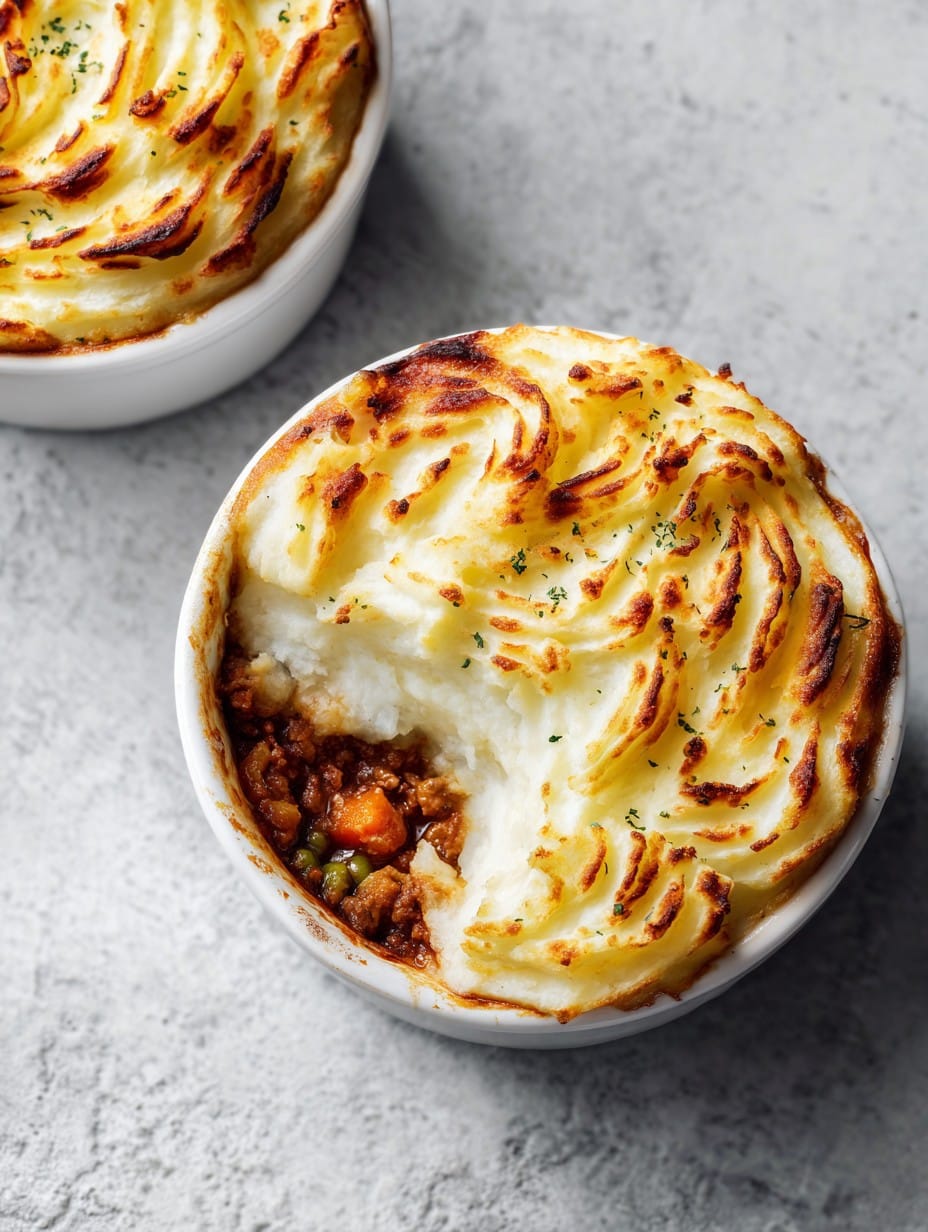
I pull this one out when I’ve got wild plans to meal-prep but trips to the grocery store wear me out. My family goes wild for it because the mashed potato top is basically a cloud, and it’s got all that rich, cozy stuff underneath. Plus, you set it up and—magic!—future dinner, sorted. Occasionally, I’ll grumble about mashing potatoes, but actually, I find it sort of soothing if I’m not in a rush. (Kids love pressing the fork pattern on the top.)
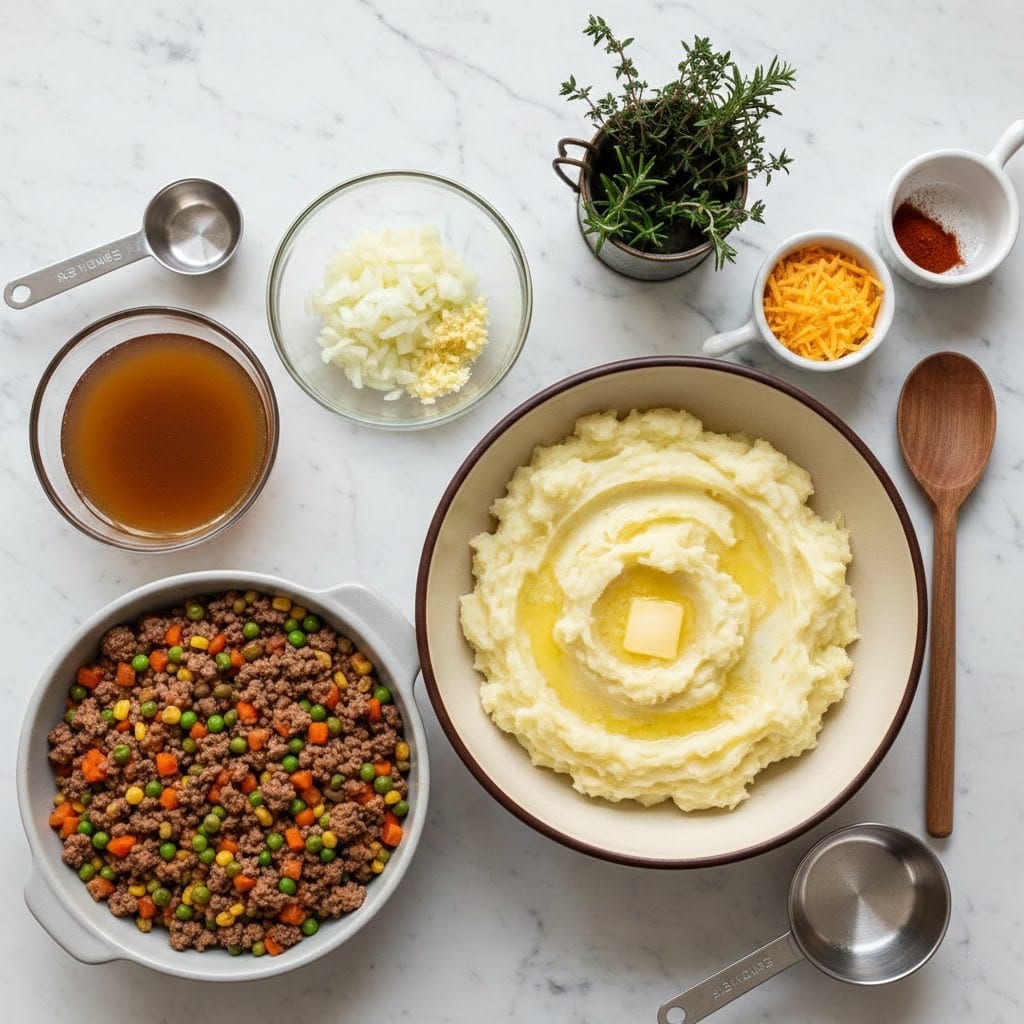
What You’ll Need (or, What I Usually Toss In)
- 1 1/2 lbs (about 700g) ground beef (I sometimes use ground lamb if it’s on sale, or turkey if I want to “health it up” a bit. Ground beef is just… easy.)
- 1 onion, chopped pretty small (yellow, white, or red—I mean, whatever’s on hand)
- 2 cloves garlic, minced (sometimes I just do a squeeze of that pre-minced stuff, no shame)
- 2 carrots, diced (once substituted with a big handful of frozen peas and carrots—worked fine)
- 1 cup frozen peas (skip or double—the kids are suspicious of green things, but I sneak in as much as I can)
- 2 tablespoons tomato paste (if ketchup is all you have, a generous squirt works in a pinch)
- 1 tablespoon Worcestershire sauce (honestly, I’ve replaced it with soy sauce before)
- 1/2 cup beef broth (or chicken or even veggie; sometimes, just water and a bouillon cube since I get lazy)
- 2 lbs potatoes, peeled and chopped for mashing (Russets are my go-to but Yukon Golds are lush)
- 4 tablespoons butter (give or take—I rarely measure butter with a ruler)
- 1/4 cup milk (or more if your mash needs loosening—sometimes cream or what’s left in the carton)
- Salt and pepper—honestly, just to taste.
- Optional: 1/2 cup shredded cheddar for topping (my grandma insisted, but sometimes I skip if we’re low on cheese)
How I Throw It Together
- Start off by boiling the potatoes in salted water—takes about 15-20 minutes till they’re fork-tender. I always forget to peel at least one, but eh, a little peel never hurt anyone.
- While the potatoes are doing their thing, brown the beef in a big skillet. Drain off fat (unless you’re going for that extra-rich pub-style pie, no judgment).
- Toss in your chopped onion, carrots, and garlic. Stir and let them soften for about 5-7 minutes—this is where I sneak a taste just to test. Add in the tomato paste, Worcestershire (or whatever), and mix well so everything looks sort of reddish and inviting.
- Pour in your broth. Let it all simmer for about 10 minutes, until everything’s mingling nicely. Throw in peas at the last minute so they don’t go army-green.
- Potatoes ready? Drain, then mash with butter, milk, salt, and pepper. If it’s too stiff, add a splash more milk. Tastes better with enough salt (I’ve under-salted before; don’t).
- Now, take a big spoon or spatula and plop that meat-and-veggie mixture into a 9×13 casserole dish (or whatever you’ve got that’s roughly that size—I once used a cake tin, it worked OK, just a bit full). Spread mashed potatoes over—it doesn’t have to be perfect, and swirls on top get nice and crusty. Fork patterns, zig-zags, or whatever squiggle you’re in the mood for.
- If you’re into cheese, a sprinkle over the top is magic. If not, carry on.
- Let cool before you freeze, or pop straight in the oven. To freeze: cover tightly with foil or a lid (plastic wrap sticks, be warned).
- Bake from fresh: 400°F (205°C) for 25-30 minutes till golden and bubbly. From frozen: unwrap, cover with foil, and bake 45-50 minutes at 375°F (190°C); then uncover for 10 more minutes to crisp the top. (But I mean, if it’s bubbling it’s done.)
Totally Real Notes Form My Kitchen
- Letting it cool before freezing is crucial—one time I rushed and got this weird ice scene on top next day. Not ideal.
- Don’t be shy with the seasoning. It’s not bland if you properly salt every layer (been there, learned my lesson in 2019… blander than dishwater).
- This tastes even better the next day, honestly. Like the flavors took a nap and woke up best friends.
Some Variations I’ve Actually Tried
- Use ground lamb instead of beef—makes it way more traditional, but my kids get a bit dramatic about it.
- Vegetarian version with lentils and mushrooms instead of meat—surprisingly hearty! Just up the seasoning.
- Tried sweet potatoes once for the top. Looked gorgeous, but the flavor wasn’t for me (thought it’d be clever, wasn’t).
Equipment I Usually Grab (With a Backup Plan)
- Large skillet (I once used a soup pot—worked, but not ideal for browning)
- Casserole dish, around 9×13 inches (or those aluminum disposable trays for freezer ease)
- Potato masher (a big fork will do; I’ve definitely had to improvise when the masher vanished)
- Freezer-safe foil or lid, plastic wrap if you’re feeling patient
How I Store It (And How Long It Actually Lasts)
Wrap well and stash in the deep freeze for up to three months, but to be totally honest, we’ve never had one last longer than two weeks. Once I had two in the freezer “for emergencies”—my idea of emergency is just, like, not wanting to cook.
How I Serve Mine (Family Traditions, Optional)
If I’m pulling out all the stops, I’ll serve it alongside a heap of buttery peas and crusty bread. But it’s honestly a meal all on its own—and sometimes we do ketchup on the side, which would horrify my gran but delights the kids. I like mine with extra black pepper and a glass of something cold (that’s not always milk, wink).
If I Could Give Just a Couple Pro Tips…
- I once tried rushing the mashed potatoes, and they came out lumpy. Take your time. Actually, I find using warm milk and melted butter makes a world of difference—less clumping.
- Wait till the filling really simmers down or your pie can end up sloppy when reheated, not a good look.
- Don’t over-stack the freezer. Smash a pie, and you’ll not be happy when you go to bake it (voice of experience, folks!).
Your (Totally Valid) Questions, Answered
- Can I make this dairy-free? Yep, absolutely. Just use olive oil (or any plant-based spread) in the potatoes and swap in your fave milk alternative. Fairly certain I forgot the butter once and nobody really noticed.
- How do I stop the mashed potatoes from sinking? Don’t skimp on draining the potatoes well, and let the meat cool a bit before topping. Even then, it sometimes happens—it still tastes good!
- Can I reheat it in the microwave? I do, but only in a pinch. The oven’s better for keeping the top crispy, but don’t sweat it if you’re hungry and have zero patience.
- Does this freeze well with cheese on top? Yeah, it works! Sometimes the cheese’s texture gets a bit odd on freezer pies, but it browns up when you bake from frozen. (Or just add fresh cheese on bake day, easy fix.)
- Wait, can I add corn? My cousin swears by it. Yep! Stir in a handful before the peas (why not, live a little!).
- Oh, by the way—once I forgot to label, and it ended up as surprise dinner. Adds mystery to the week.
Anyway, to wrap up (before I go make a cup of tea I probably won’t finish), shepherd’s pie is one of those scrappy classics that just works—whether you follow the rules or not. And if you end up with a bit of filling left, honestly, stick it in a sandwich or hand pie. Waste not, want not, eh?
Ingredients
- 1 1/2 lbs (about 700g) ground beef (I sometimes use ground lamb if it’s on sale, or turkey if I want to “health it up” a bit. Ground beef is just… easy.)
- 1 onion, chopped pretty small (yellow, white, or red—I mean, whatever’s on hand)
- 2 cloves garlic, minced (sometimes I just do a squeeze of that pre-minced stuff, no shame)
- 2 carrots, diced (once substituted with a big handful of frozen peas and carrots—worked fine)
- 1 cup frozen peas (skip or double—the kids are suspicious of green things, but I sneak in as much as I can)
- 2 tablespoons tomato paste (if ketchup is all you have, a generous squirt works in a pinch)
- 1 tablespoon Worcestershire sauce (honestly, I’ve replaced it with soy sauce before)
- 1/2 cup beef broth (or chicken or even veggie; sometimes, just water and a bouillon cube since I get lazy)
- 2 lbs potatoes, peeled and chopped for mashing (Russets are my go-to but Yukon Golds are lush)
- 4 tablespoons butter (give or take—I rarely measure butter with a ruler)
- 1/4 cup milk (or more if your mash needs loosening—sometimes cream or what’s left in the carton)
- Salt and pepper—honestly, just to taste.
- Optional: 1/2 cup shredded cheddar for topping (my grandma insisted, but sometimes I skip if we’re low on cheese)
Instructions
-
1Start off by boiling the potatoes in salted water—takes about 15-20 minutes till they’re fork-tender. I always forget to peel at least one, but eh, a little peel never hurt anyone.
-
2While the potatoes are doing their thing, brown the beef in a big skillet. Drain off fat (unless you’re going for that extra-rich pub-style pie, no judgment).
-
3Toss in your chopped onion, carrots, and garlic. Stir and let them soften for about 5-7 minutes—this is where I sneak a taste just to test. Add in the tomato paste, Worcestershire (or whatever), and mix well so everything looks sort of reddish and inviting.
-
4Pour in your broth. Let it all simmer for about 10 minutes, until everything’s mingling nicely. Throw in peas at the last minute so they don’t go army-green.
-
5Potatoes ready? Drain, then mash with butter, milk, salt, and pepper. If it’s too stiff, add a splash more milk. Tastes better with enough salt (I’ve under-salted before; don’t).
-
6Now, take a big spoon or spatula and plop that meat-and-veggie mixture into a 9×13 casserole dish (or whatever you’ve got that’s roughly that size—I once used a cake tin, it worked OK, just a bit full). Spread mashed potatoes over—it doesn’t have to be perfect, and swirls on top get nice and crusty. Fork patterns, zig-zags, or whatever squiggle you’re in the mood for.
-
7If you’re into cheese, a sprinkle over the top is magic. If not, carry on.
-
8Let cool before you freeze, or pop straight in the oven. To freeze: cover tightly with foil or a lid (plastic wrap sticks, be warned).
-
9Bake from fresh: 400°F (205°C) for 25-30 minutes till golden and bubbly. From frozen: unwrap, cover with foil, and bake 45-50 minutes at 375°F (190°C); then uncover for 10 more minutes to crisp the top. (But I mean, if it’s bubbling it’s done.)
Approximate Information for One Serving
Nutrition Disclaimers
Number of total servings shown is approximate. Actual number of servings will depend on your preferred portion sizes.
Nutritional values shown are general guidelines and reflect information for 1 serving using the ingredients listed, not including any optional ingredients. Actual macros may vary slightly depending on specific brands and types of ingredients used.
To determine the weight of one serving, prepare the recipe as instructed. Weigh the finished recipe, then divide the weight of the finished recipe (not including the weight of the container the food is in) by the desired number of servings. Result will be the weight of one serving.
Did you make this recipe?
Please consider Pinning it!