So Here’s the Thing About Key Lime Pie Bars…
Okay, so I first made these Key Lime Pie Bars with Vanilla Wafer Crust on a muggy summer afternoon when my cousin decided to invite half the neighborhood over for a “small get-together” (which, if you know my family, means at least twenty people). I needed something sweet, crowd-pleasing, and—let’s be honest—impressively tangy that’d distract my uncle Jim from his slightly alarming potato salad experiment. These bars, they did the trick. Actually, they’re sort of my secret weapon for potlucks. They’re tart, creamy, and crazy simple. Plus, you don’t need to fuss with a rolling pin or anything like that. I’ll tell you, the hardest part is not eating all the crust before you even make the filling (guilty as charged).
Why You’ll Love These Bars (Or At Least I Do)
I make these when I want something that looks fancy but is basically foolproof. My family goes absolutely bonkers for this recipe—especially my niece, who claims it’s her “birthday wish every year” (never mind that her birthday is in December; she’d eat these in a snowstorm, I swear). They’re pretty much the ultimate BBQ dessert in my book. Plus, if you’re the type who hates squeezing limes, you can totally use bottled juice. I won’t tell. And hey, getting the crust just right took me a few tries—once I burned it because I was too busy scrolling through Serious Eats for dinner ideas—so don’t stress if yours looks a little too golden. It’ll probably still taste fab.
What You’ll Need (And How I Cheat Sometimes)
- 2 cups vanilla wafer cookies (Nilla or store-brand, who cares)
- If I run out, I’ve even used graham crackers. My grandma swore by Nilla, but honestly, whatever’s on sale.
- 1/2 cup unsalted butter, melted (I never measure this exactly, just a generous half stick)
- 1/4 cup sugar (sometimes I skip this if the cookies are really sweet)
- 4 large egg yolks (I tried with whole eggs once. Not recommended.)
- 1 can (14 oz) sweetened condensed milk (brand doesn’t matter, though I do think Eagle Brand is a bit richer)
- 1/2 cup key lime juice (fresh is best, but Nellie & Joe’s bottled is totally fine—here’s the one I use)
- 1 tablespoon lime zest (optional, but I like the extra zing)
- Whipped cream, for topping (or Cool Whip, if you’re feeling retro)
How To Make ‘Em (With My Two Cents)
- Preheat your oven to 350°F (175°C). Grab an 8×8-inch baking dish. Line it with parchment—no need to be perfect, just so the bars don’t stick.
- Crush the vanilla wafers into crumbs. You can use a food processor or just stick ‘em in a zip bag and bash with a rolling pin (or, honestly, a wine bottle—don’t judge me). Mix the crumbs with melted butter and sugar, and press into the pan. I usually sneak a nibble here; who wouldn’t?
- Bake the crust for 10 minutes, then let it cool while you make the filling. If it puffs or cracks a bit, that’s normal. It always looks a bit weird at this stage.
- Whisk together the egg yolks, sweetened condensed milk, key lime juice, and lime zest. It turns this pale yellow-green that’s a little suspicious-looking but smells amazing.
- Pour the filling over the crust, spread gently. Bake for about 18–20 minutes. The center should be a bit wobbly, but not soupy. Don’t panic if it jiggles—it’ll set as it cools!
- Cool completely, then chill in the fridge at least 3 hours (overnight is even better, if you can resist).
- Slice into bars—sometimes mine come out with ragged edges, but nobody ever complains. Top with whipped cream just before serving. Or don’t. I sometimes just eat ‘em plain, right out of the pan.
My (Possibly Useless) Notes
- I think this tastes way better the next day, but it’s usually gone before breakfast.
- If the crust is too crumbly, add a smidge more butter. Or, just embrace the mess.
- Don’t use regular limes and call it “key lime”—someone will always notice. I’ve tried. But if you’re in a pinch, it’s still delicious, just… different.
Experiments and Variations (Some Wins, One Fail)
- Once, I swapped in lemon juice instead of lime—tasted like a lemonade bar. Not bad!
- My friend insisted on making a chocolate crust version, which was… interesting? Not for me, but you do you.
- I tried coconut flakes in the crust once, but it made things kind of soggy. Wouldn’t recommend unless you like it mushy.
Do You Need Fancy Equipment?
Nah, not really. I use a food processor for the cookies, but a zip-top bag and some elbow grease works great. If you don’t have an 8×8 pan, a 9-inch round cake pan will do (they’ll just be pie wedges instead of bars—no biggie).

How Do You Store These? (Not That They Last Long)
Fridge is best—just cover tightly. They’ll keep for 3 days, though honestly, in my house it never lasts more than a day! I once found a lone bar hiding in the back of the fridge after two days, and it was still lovely.
How We Serve ‘Em At My Place
I like to pile a mountain of whipped cream on top and add a few lime zest curls (if I’m feeling fancy). My nephew puts rainbow sprinkles on his. Or serve with a cold iced tea—feels like summer, even if it’s raining cats and dogs outside.
Things I Learned (the Hard Way)
- I once tried rushing the chilling step and regretted it because the bars sort of melted into an oozy mess. Patience: not my strong suit, but necessary.
- Be careful not to overbake, or the filling cracks (which, I guess, is still tasty, but looks like it’s had a rough day).
- Oh, and don’t let the dog sneak a lick. Trust me.
Real Questions I’ve Gotten (And Honest Answers)
- Can I use regular limes? – Yep, you can. It won’t be the same as true Key lime, but it’ll still be good. Maybe a bit less zippy.
- Is there a gluten-free version? – Sure! Grab gluten-free vanilla wafers or even almond flour. Actually, I find it works better if you toast the almond flour a bit for flavor.
- Can this be doubled for a crowd? – Absolutely, just use a 9×13 pan. Keep an eye on the baking time, though; it might need a few extra minutes.
- What if I don’t have parchment? – Grease the pan well with butter. It won’t lift out as neatly, but hey, still yummy.
- Do I need to use a mixer? – Not at all, a sturdy whisk gets the job done. Or a fork, if that’s all you’ve got handy.
- Can I freeze them? – I have, in a pinch. Just wrap tightly. Texture’s not quite the same when thawed, but if you’re desperate for a lime fix, go for it!
- By the way, if you love citrusy desserts, I found a brilliant collection of ideas over at Sally’s Baking Addiction—her lemon bars are ace.
Alright, that’s the long and the short of it. Or actually, probably the long of it. If you try these Key Lime Pie Bars with Vanilla Wafer Crust, let me know how they turn out—or, just tell me your best kitchen misadventure. Those are half the fun, aren’t they?
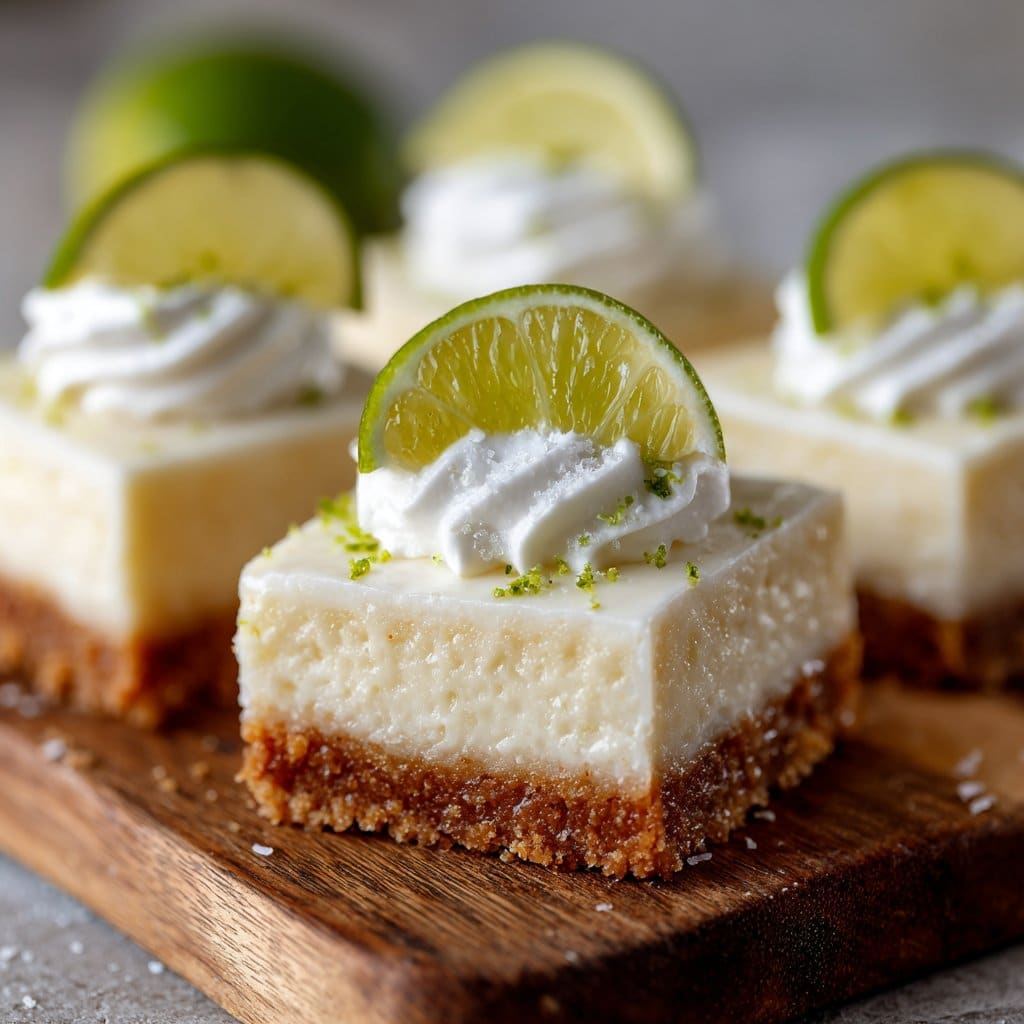
Ingredients
- 2 cups vanilla wafer crumbs
- 1/3 cup unsalted butter, melted
- 1/4 cup granulated sugar
- 2 (14-ounce) cans sweetened condensed milk
- 1/2 cup key lime juice (fresh or bottled)
- 2 teaspoons key lime zest
- 4 large egg yolks
- 1 teaspoon pure vanilla extract
- Whipped cream, for topping (optional)
- Extra lime zest, for garnish (optional)
Instructions
-
1Preheat oven to 350°F (175°C). Line an 8×8-inch baking pan with parchment paper, leaving an overhang for easy removal.
-
2In a medium bowl, mix vanilla wafer crumbs, melted butter, and granulated sugar until combined. Press mixture firmly into the bottom of the prepared pan to form the crust.
-
3Bake the crust for 8-10 minutes, then remove from oven and let cool slightly.
-
4In a large bowl, whisk together sweetened condensed milk, key lime juice, key lime zest, egg yolks, and vanilla extract until smooth and fully combined.
-
5Pour the key lime filling over the cooled crust and spread evenly. Bake for 15 minutes, or until the center is set but still slightly jiggly.
-
6Cool bars to room temperature, then refrigerate for at least 2 hours before slicing. Top with whipped cream and extra lime zest if desired.
Approximate Information for One Serving
Nutrition Disclaimers
Number of total servings shown is approximate. Actual number of servings will depend on your preferred portion sizes.
Nutritional values shown are general guidelines and reflect information for 1 serving using the ingredients listed, not including any optional ingredients. Actual macros may vary slightly depending on specific brands and types of ingredients used.
To determine the weight of one serving, prepare the recipe as instructed. Weigh the finished recipe, then divide the weight of the finished recipe (not including the weight of the container the food is in) by the desired number of servings. Result will be the weight of one serving.
Did you make this recipe?
Please consider Pinning it!!




