Well, Here’s How My Family Fell in Love With Banana Pudding
Alright, friend, let’s talk banana pudding. But not the run-of-the-mill kind—this is not yo mama’s banana pudding with Cool Whip topping! I still remember the first time I tried to make this for a family BBQ. I thought, “How hard can it be?” Spoiler: I made a huge mess, my youngest tried to eat half the vanilla wafers before they even hit the dish, and my husband hovered like a hungry cat. But when we finally dug in, everyone agreed: this is the only way we’re making banana pudding from now on. (Even my aunt who swears by her old recipe—sorry, Aunt Bea!) Oddly enough, I always think of that afternoon every time I whip this up, usually at 10 p.m. after a random craving hits.
Why I Think You’ll Love This (And When I Make It)
I make this when I need something that tastes like I spent hours slaving away—but (don’t tell anyone) it’s mostly stirring, layering, and trying not to eat all the bananas. My family goes crazy for this, especially after a hot day outside (it’s extra cold straight from the fridge!). And, okay, I used to get frustrated when the pudding wouldn’t set perfectly, but honestly, nobody cared. They were too busy fighting over seconds. If you’re after a no-bake dessert that’s absurdly creamy and a little over the top, just trust me and give this a go.
What You’ll Need (and What You Can Swap)
- 2 boxes instant French vanilla pudding mix (5.1 oz each)—If you’re out, regular vanilla or banana flavor works too, but French vanilla feels a bit fancier
- 3 cups cold milk (whole is great, but honestly I’ve used 2% and it’s fine—skim if you’re feeling wild, but it’ll be thinner)
- 1 can sweetened condensed milk (14 oz)—my grandma always swore by Eagle Brand, but I just grab what’s on sale
- 1 box vanilla wafers (about 12 oz)—Nilla is classic, but generic is totally fine. Graham crackers in a pinch? Sure, I won’t tell.
- 5-6 ripe bananas, sliced
- 1 tub Cool Whip (16 oz), thawed—if you’re fancy, fresh whipped cream works, but I rarely have the patience
- 8 oz softened cream cheese (sometimes I use Neufchâtel if I’m pretending it’s healthier)
- Optional: a dash of vanilla extract, or a handful of mini chocolate chips if you’re feeling wild
How I Throw This Together (Real Life Version)
- In a large mixing bowl, beat the softened cream cheese until it’s smooth-ish—don’t panic if there are a few lumps. Sometimes I use a hand mixer, but a good ol’ wooden spoon and elbow grease works too (just takes longer). If you’re using a stand mixer, lucky you.
- Pour in the sweetened condensed milk and blend until combined. I usually sneak a quick taste here—so sweet but in a good way.
- Add the pudding mixes and the cold milk. This is where you’ll want to mix for a couple minutes until it thickens up. Don’t worry if it looks a bit weird at first; it’ll come together. If it’s super runny, wait a few more minutes.
- Fold in about half the Cool Whip. You want it fluffy, not flat, so just kind of swirl it in gently. (I used to overmix—don’t do that; trust me, it turns gluey.)
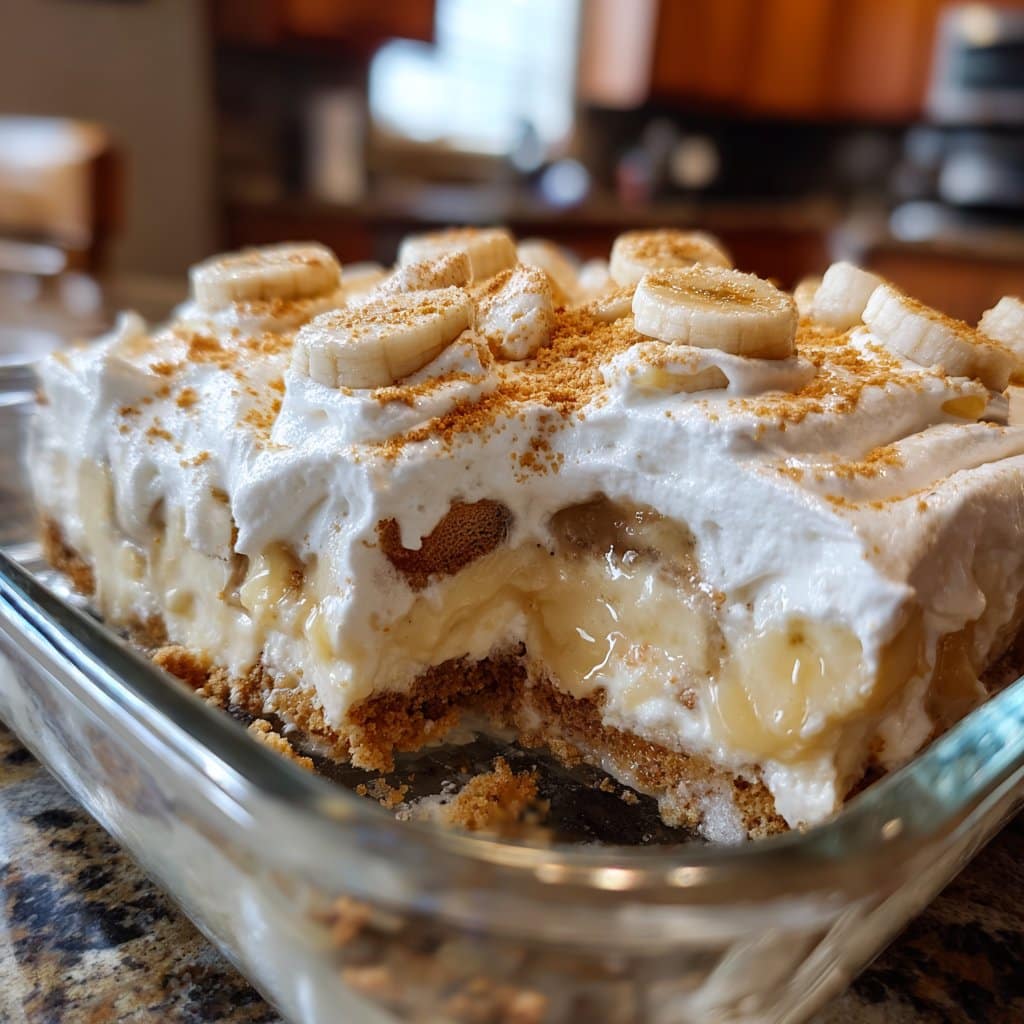
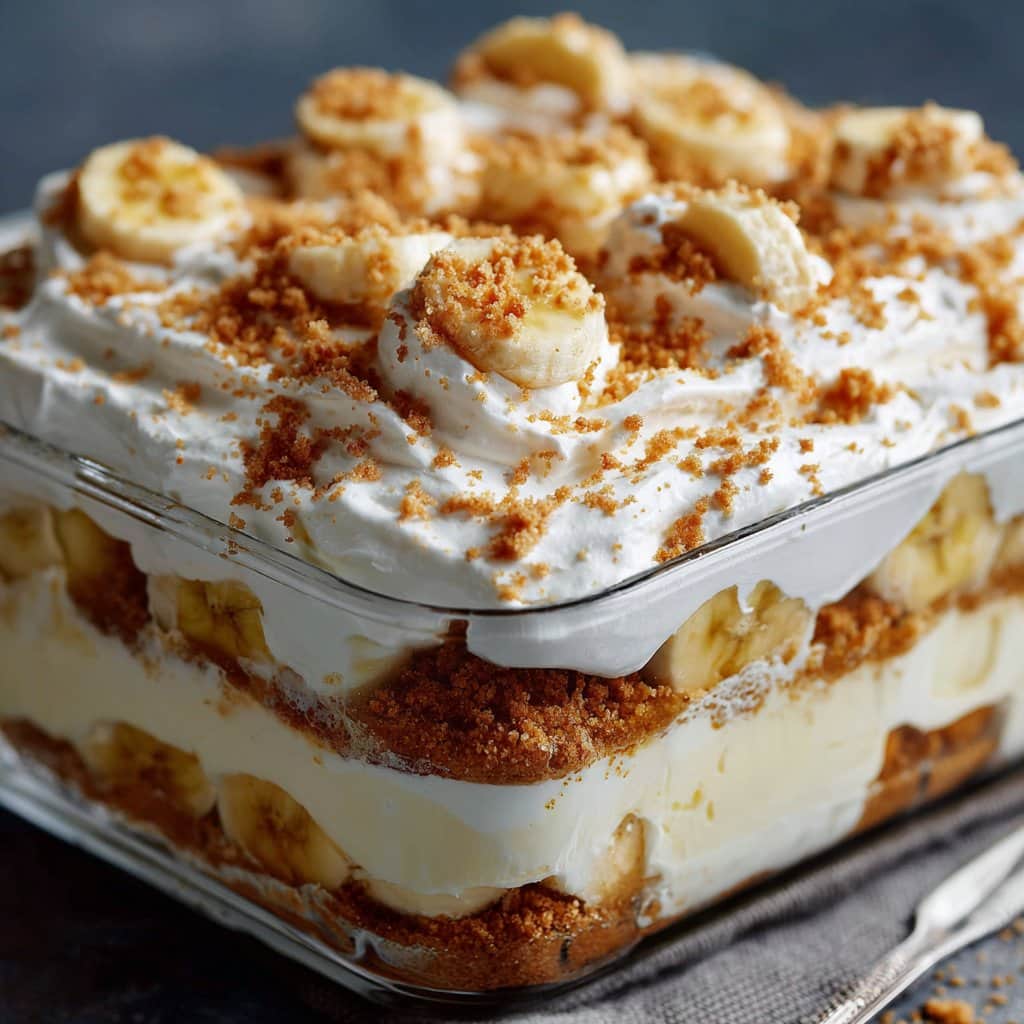
- Now for the layering: I grab a big ol’ glass dish (9×13 is classic, but honestly I’ve used mixing bowls before when everything else was in the dishwasher. Works just fine.) Start with a layer of vanilla wafers, then sliced bananas, then half the pudding mixture. Repeat. Top with the rest of the Cool Whip and, if you remember, save a few cookies for the very top. Or crush up some extra for a messy but delicious finish.
- Chill in the fridge for at least 4 hours. Overnight is better, but who has that kind of patience? (Certainly not me.)
Some Notes From My Many Mess-Ups
- The bananas: Slice them right before you need them. I once tried to get ahead and prepped them early, but they went all brown and sad. A little lemon juice helps, but not too much or you’ll taste it.
- Pudding thickness: If yours is too thin, just let it sit an extra 10 minutes in the fridge before layering. Actually, I find it works better if you use slightly less milk than the box says, but then again, I like mine thick.
- Wafers: Don’t stress if they get soggy. Some folks love it that way (my brother claims the mushier, the better).
Things I’ve Tried (and Which Ones Didn’t Quite Work)
- Adding strawberries: Yummy, but they got kinda mushy after a day—maybe not the best for leftovers.
- Chocolate wafers instead of vanilla: Surprisingly good! But I wouldn’t do it at a family reunion. People get oddly passionate about tradition.
- Making it in mason jars for “individual servings”: Looked cute, but I made a huge mess and ended up just dumping them all back into a big bowl.
Do You Need Fancy Equipment? (Not Really)
I use a hand mixer when I’m feeling energetic, but I’ve definitely done this with just a whisk and some determination. If you don’t have a 9×13 dish, just use whatever’s deep enough—honestly, I once used a lasagna pan. It’s not that deep, but it still tasted great.
How Long Does This Last? (Or, Does It Ever?)
If you have more self-control than us, this keeps covered in the fridge for up to 3 days. Though honestly, in my house it never lasts more than a day! The bananas start getting a bit odd after 48 hours, so I try to keep portions realistic (but it’s hard, not gonna lie).
Serving Ideas From My Table to Yours
We usually scoop big, messy spoonfuls and call it dinner (kidding… mostly). Sometimes I sprinkle a bit of cinnamon on top, just for fun. Or, if I’m feeling fancy, I’ll garnish with a sprig of mint—makes it look like I know what I’m doing. Oh, and my cousin dunks extra cookies in her bowl. Go for it.
A Few “Learned The Hard Way” Tips
- Don’t rush the chilling time. I once tried to serve it after only an hour—everything slid around like a banana landslide. Not cute.
- Layer gently. If you get too aggressive, the bananas mush up and look… well, let’s just say not Instagram-ready. But, who’s really taking photos?
- Forgot the cream cheese once and the texture was off. Not bad, just not the same. Best to remember it, but hey, we survive.
Real FAQ (Because You Asked, and I’ve Wondered Too)
- Can I use homemade whipped cream instead of Cool Whip?
Sure can! I’ve done it—honestly, it tastes a bit richer, but I’m usually too lazy. Cool Whip is easy and holds up longer. - What do I do if my pudding is runny?
Just let it sit a bit longer; if it’s still thin, try adding a touch more cream cheese. Or chill it overnight. It’ll set up, promise! - Are graham crackers really okay?
Yeah, I’ve used them. It’s a little less classic, but still yummy. My son actually prefers them, but what does he know? - Is this gluten-free?
Nope, not as written, but check out Celiac.org’s tips for wafers you can use instead. I tried a gluten free version from King Arthur Baking—pretty good! - Can I freeze leftovers?
I wouldn’t, honestly. The bananas get weird and the texture goes all off. Better to share with neighbors (or just eat it for breakfast—no judgment).
And before I forget: one time I dropped half the box of wafers on the floor and the dog got to them before I could. So, if that happens, just use what you have and roll with it. Life’s too short to sweat the small stuff, right?
Ingredients
- 2 (3.4 oz) packages instant vanilla pudding mix
- 3 cups cold milk
- 1 (8 oz) package cream cheese, softened
- 1 (14 oz) can sweetened condensed milk
- 1 (12 oz) container frozen whipped topping (Cool Whip), thawed
- 1 box vanilla wafer cookies
- 4 large ripe bananas, sliced
- 1 teaspoon pure vanilla extract
Instructions
-
1In a large mixing bowl, whisk together the instant vanilla pudding mix and cold milk until thickened, about 2 minutes. Set aside.
-
2In another bowl, beat the softened cream cheese until smooth. Add the sweetened condensed milk and vanilla extract, and mix until well combined.
-
3Fold the cream cheese mixture into the prepared pudding until fully incorporated. Gently fold in half of the Cool Whip until smooth.
-
4In a 9×13-inch dish, layer vanilla wafers on the bottom. Top with half of the banana slices, then spread half of the pudding mixture over the bananas. Repeat layers with remaining wafers, bananas, and pudding mixture.
-
5Spread the remaining Cool Whip evenly over the top. Cover and refrigerate for at least 4 hours before serving to allow flavors to meld.
Approximate Information for One Serving
Nutrition Disclaimers
Number of total servings shown is approximate. Actual number of servings will depend on your preferred portion sizes.
Nutritional values shown are general guidelines and reflect information for 1 serving using the ingredients listed, not including any optional ingredients. Actual macros may vary slightly depending on specific brands and types of ingredients used.
To determine the weight of one serving, prepare the recipe as instructed. Weigh the finished recipe, then divide the weight of the finished recipe (not including the weight of the container the food is in) by the desired number of servings. Result will be the weight of one serving.
Did you make this recipe?
Please consider Pinning it!!




