The Wrap That Saved My Tuesday Night… Again
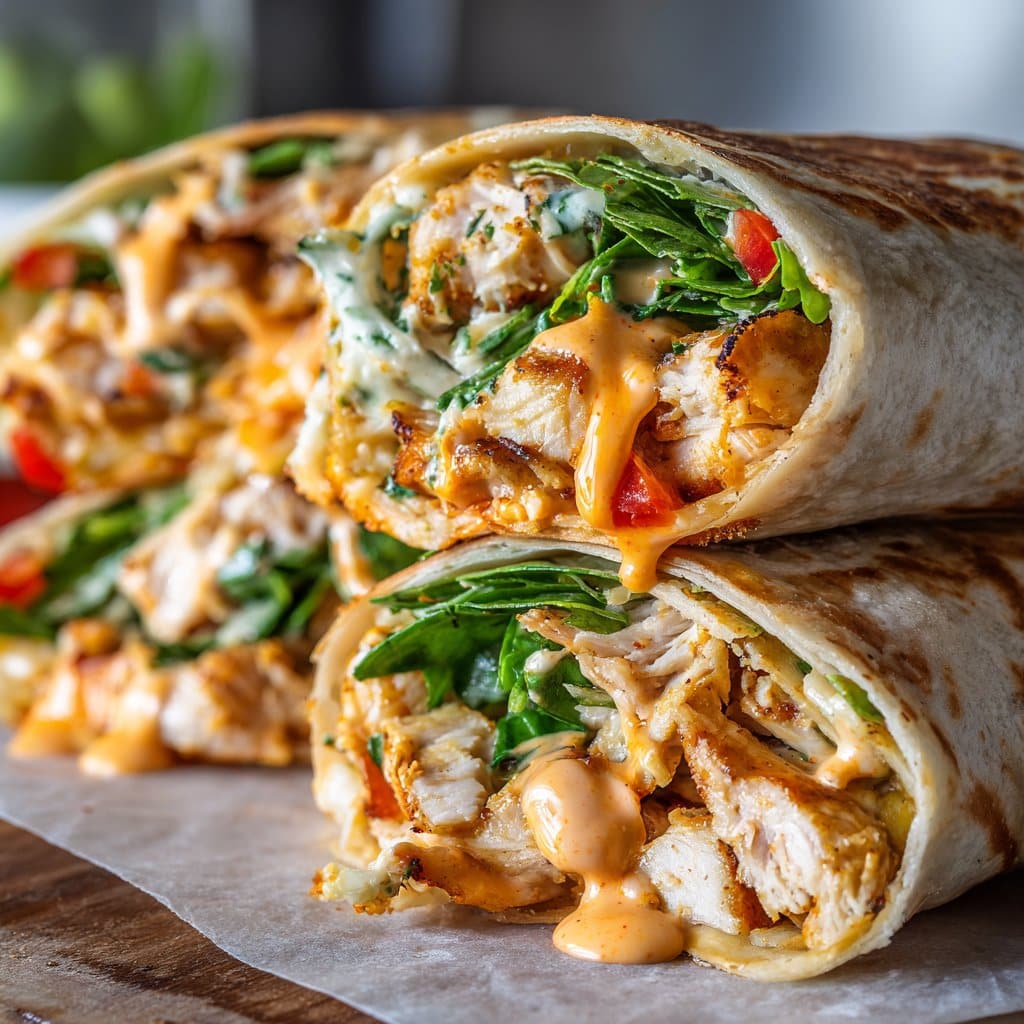
OK, so here’s the thing: Sometimes, you just need dinner to hug you back. That’s how I feel about these Ooey-Gooey Cheesy Garlic Chicken Wraps. I first threw this together after a particularly bonkers Tuesday when my kiddo spilled orange juice all over the science project (don’t ask) and I had zero energy left for anything fancy. I wanted comfort food, but the idea of another bland sandwich made me want to run for the hills. And so, I ended up with a wrap that oozes cheese, garlic, and chicken-y goodness—plus, you eat it with your hands, which somehow just feels like a tiny rebellion against adulthood. Even my skeptical neighbor, Pete, gave it two thumbs up and he’s the pickiest eater I know.
Why You’ll Love This
I make this when I need a bit of a cheesy pick-me-up (or, honestly, when there’s leftover rotisserie chicken lurking in the fridge and I have no idea what to do with it). My family goes a little wild for these—especially if I double the cheese. And, I’ve learnt the hard way, don’t try to skip the garlic. Once I did (because I was out, whoops), and it just wasn’t the same; it’s the secret handshake of this recipe. Also, if you’re short on time, these are way quicker than they look—and if the cheese spills out and gets crispy, that’s actual gold.
Gathering the Goodies (Ingredients)
- 2 cups cooked chicken, shredded or chopped (sometimes I just grab a supermarket rotisserie chicken—it’s a lifesaver)
- 1 1/2 cups shredded mozzarella cheese (but cheddar works great, too—my cousin swears by pepper jack for a kick)
- 1/2 cup cream cheese, softened (full fat or light—honestly, both work, though the full fat tastes richer)
- 3 tablespoons garlic butter, melted (or just mix butter with a clove or two of minced garlic if you don’t have the pre-made stuff)
- 1/4 cup chopped fresh parsley (dried parsley works in a pinch, but it’s not the same)
- 4-6 large flour tortillas (sometimes I use spinach wraps or whatever’s lurking in the bread bin)
- Salt and pepper, to taste (I get heavy-handed with the pepper, not sorry)
- Optional: red pepper flakes, for a bit of fire, or a handful of baby spinach for a green boost
Let’s Get Wrapping: Directions
- Heat up your pan. Grab your trusty nonstick skillet (or griddle if you’re feeling fancy) and stick it on medium heat. No need to pre-oil if your pan’s decent, but a swipe of oil never hurt anyone.
- Mix the filling. In a big ol’ bowl, toss in your chicken, mozzarella, cream cheese, and about 2 tablespoons of that garlicky melted butter. Sprinkle in parsley, salt, pepper, and—if you’re up for it—red pepper flakes. Give it a good stir. I usually sneak a taste here. Chef’s privilege!
- Assemble the wraps. Lay out a tortilla, scoop a big handful of filling down the center, and if you’re feeling virtuous, scatter some spinach on top. Fold in the sides, then roll it up tight so nothing escapes (well, almost nothing—it’s a messy wrap, after all).
- Grill to golden goodness. Brush the outside of each wrap with the rest of your garlic butter. Pop the wraps onto your pan, seam side down. Cook for 2-3 minutes per side, or until golden and the cheese is all melty and trying to escape. If things get messy, well, you’re doing it right.
- Serve (but let them cool a sec!). Remove from the pan and let them hang out for a minute—otherwise, you’ll burn the roof of your mouth like I did last time. Slice in half if you want to feel like a pro.
Notes From My Kitchen (A.K.A. Things I’ve Learned the Hard Way)
- If your tortillas crack, microwave them for 10 seconds with a damp paper towel—they’ll soften right up. Don’t ask how many times I’ve forgotten this…
- Actually, I find it works better if you don’t overstuff the wraps. I know, it’s tempting, but they burst every time.
- Any leftover filling is amazing on toast. Weird, but true.
So Many Ways to Mix It Up
- I once swapped the chicken for roast beef—honestly, not my finest hour. Chicken just goes better with the garlic and cheese.
- Swap out the cheese for whatever’s lurking in the fridge. Gouda? Sure! Swiss? Why not.
- Vegetarian pals: sautéed mushrooms (lots of them) and spinach are a dreamy swap for the chicken.
You Don’t Need Fancy Gear
All you really need is a pan and a bowl. No sandwich press? No problem. I’ve done these with a heavy plate pressed on top of the wrap if I’m feeling like a makeshift chef. Honestly, they’re not fussy. If you want to check out some pretty nifty pan options, Serious Eats has some great recommendations.
How to Store (If You Actually Have Leftovers)
Wrap these in foil or an airtight container and stick ‘em in the fridge. They’ll keep for about two days, but honestly, in my house, it never lasts more than a day! If you want to reheat, a quick trip back into the skillet beats the microwave, trust me—I’ve tried both.
How We Serve ‘Em (and Sometimes Fight Over the Last One)
I like to slice mine on the diagonal and serve with a little side salad or soup. My partner dunks his in sriracha mayo (which isn’t traditional but, hey, it’s tasty). Sometimes we put out a pile of pickles, too. On chilly nights, they go great with tomato soup—sort of like a grown-up grilled cheese and soup situation.
Pro Tips (Learned the Messy Way)
- Don’t try to rush the cheese melting step—if you do, the filling stays cold, and nobody likes a lukewarm wrap. I once tried to crank the heat and just ended up with burnt tortillas and cold cheese. Not my proudest moment.
- If you’re making a bunch, keep finished wraps in a warm oven so everyone eats hot ones.
- On second thought, parchment paper is your friend if you’re worried about cheese lava during grilling.
Questions I Actually Get (and Some I Wish People Would Ask)
- Can I use leftover turkey? Yep! Actually, it’s a great way to use up those post-Thanksgiving bits. Just add a dash more seasoning, since turkey’s a bit milder.
- Do you have to use garlic butter? Well, technically no, but plain butter just isn’t as exciting. If you’re desperate, rub a garlic clove on the tortilla first—it works in a pinch!
- Is there a way to make these ahead? For sure. You can prep the filling and wrap them, then just grill right before serving. They’re not quite as crispy if you grill and reheat, but still totally edible.
- How spicy can I make these? Go wild. Add chopped jalapeños or a spoonful of chipotle—my brother once added ghost pepper sauce, but, uh, proceed with caution unless you’ve got a fire extinguisher handy.
- Any good sauces to dip in? Oh, yes—ranch, spicy mayo, or even tzatziki. I’ve got a simple tzatziki I like from Love & Lemons if you want to try making your own.
So, next time you need something warm, cheesy, and just a bit messy, give these a go. And if you end up eating the filling straight from the bowl, well, I’m not judging. We’ve all been there.

Ingredients
- 2 cups cooked chicken breast, shredded
- 1 1/2 cups shredded mozzarella cheese
- 1 cup shredded cheddar cheese
- 4 large flour tortillas
- 3 tablespoons unsalted butter, melted
- 3 cloves garlic, minced
- 1/4 cup chopped fresh parsley
- Salt and black pepper to taste
Instructions
-
1Preheat oven to 375°F (190°C). Line a baking sheet with parchment paper.
-
2In a small bowl, combine melted butter and minced garlic. Set aside.
-
3In a large bowl, mix shredded chicken, mozzarella cheese, cheddar cheese, parsley, salt, and black pepper until well combined.
-
4Lay out the tortillas and divide the chicken and cheese mixture evenly among them. Roll each tortilla tightly into a wrap.
-
5Place the wraps seam-side down on the prepared baking sheet. Brush the tops generously with the garlic butter mixture.
-
6Bake for 15-20 minutes, or until the wraps are golden and the cheese is ooey-gooey. Serve warm.
Approximate Information for One Serving
Nutrition Disclaimers
Number of total servings shown is approximate. Actual number of servings will depend on your preferred portion sizes.
Nutritional values shown are general guidelines and reflect information for 1 serving using the ingredients listed, not including any optional ingredients. Actual macros may vary slightly depending on specific brands and types of ingredients used.
To determine the weight of one serving, prepare the recipe as instructed. Weigh the finished recipe, then divide the weight of the finished recipe (not including the weight of the container the food is in) by the desired number of servings. Result will be the weight of one serving.
Did you make this recipe?
Please consider Pinning it!!




