Let’s Talk Pumpkin Snickerdoodle Cookies (And My Slight Obsession)
So, picture this: it’s late October, there’s a chill in the air, and I’m trying—again—to use up the last can of pumpkin puree lurking at the back of my pantry. Honestly, there are only so many times you can make pumpkin bread before your family starts to stage a gentle, cinnamon-scented intervention. But these Pumpkin Snickerdoodle Cookies? Total game changer. I still remember the first time I made them—the kitchen smelled amazing, and my kid tried to swipe one straight off the cooling rack (burned his tongue and everything, but he swears it was worth it). There’s just something about that combo of warm spices and soft, pillowy cookies that makes me feel like I’m wearing a sweater, even when I’m not. Oh, and if you’re thinking this is going to be complicated—nah. If I can whip these up during a weeknight episode of Bake Off, so can you.
Why I Keep Coming Back to This Recipe (And Maybe You Will Too)
I make this when I’m craving fall but my wallet says, “Stay home.” My family goes wild for these—especially if I underbake them just a tad (don’t tell my mom). They’re perfect for potlucks—or, if I’m being honest, for eating three in a row on the couch while watching reruns. The spices are cozy, the pumpkin keeps ’em soft for days (if yours make it that long, which… they never do here, thanks to my snack-gremlin teens), and they’re just the right kind of chewy. Occasionally, my dough turns out a bit stickier than I expect, but honestly? That just makes licking the bowl more rewarding. And if you’ve ever tried to make classic snickerdoodles but found yourself wishing for a little more autumn oomph—yeah, this is your jam. Or, well, your cookie.
What You’ll Need (And What I Sometimes Swap)
- 2 3/4 cups all-purpose flour (I’ve subbed half whole wheat when I’m feeling healthy—really changes the vibe, though, so use your judgement)
- 1/2 tsp baking powder
- 1/2 tsp baking soda
- 1/2 tsp salt (I’m not picky about the brand—Mum always swore by Morton, but I just use whatever’s knocking about the cupboard)
- 1 1/2 tsp ground cinnamon
- 1/2 tsp ground nutmeg (sometimes I skip or swap for pumpkin pie spice—no shame)
- 1 cup (2 sticks) unsalted butter, room temp (I’ve used salted in a pinch; just back off on the salt above)
- 3/4 cup granulated sugar
- 1/2 cup packed brown sugar (light or dark, honestly… whatever you grab first)
- 3/4 cup pumpkin puree (not pumpkin pie filling, unless you like surprises)
- 1 large egg
- 2 tsp vanilla extract (the real stuff is best but imitation does the job, honestly)
- For Rolling: 1/4 cup sugar + 2 tsp cinnamon mixed together
Let’s Get Baking (Don’t Sweat the Small Stuff!)
- Preheat your oven to 350°F (175°C). I always forget to do this first, so if you do too, you’re in good company.
- In a biggish bowl, whisk together the flour, baking powder, baking soda, salt, cinnamon, and nutmeg. You can totally use a fork if you’re too lazy to wash a whisk (I usually am).
- In another bowl, cream the butter with the granulated sugar and brown sugar until it’s light and fluffy—about 2-3 minutes. Actually, if you’re doing it by hand, just give it a good arm workout and call it good when it looks combined.
- Add in the pumpkin puree, egg, and vanilla. Mix until smoothish. It gets a bit curdled looking here—don’t panic. That’s just the pumpkin doing its thing.
- Dump the dry ingredients into the wet. Stir gently—don’t overmix, unless you like tough cookies (which, no judgement, but…)
- The dough will be sticky. I usually pop it in the fridge for at least 30 minutes. If you’re impatient (like me), try 15. Or just go for it and get sticky hands.
- Scoop out balls of dough (I use a tablespoon or a cookie scoop, but honestly, two spoons work fine). Roll them in the cinnamon-sugar mix. This is where I sneak a taste—just saying.
- Place on a baking sheet lined with parchment (or lightly greased foil, or honestly, just the bare pan if you’re feeling brave). Space them a bit—they spread a little but not too much.
- Bake 10-12 minutes. They’ll look a bit underdone in the center—that’s what you want! They’ll finish setting up as they cool. If you wait until they look totally baked, they’ll be dry and, well, not what you want. Trust me, I’ve learned this the hard way.
- Let them cool on the pan for 5 minutes (I know, it’s hard), then move to a wire rack. Or, if you don’t have one, just a clean tea towel on the counter works in a pinch.
Notes Form the Trenches (AKA: My Kitchen)
- I once tried to skip chilling the dough. They came out flat as pancakes—still tasty, but not that fluffy snickerdoodle vibe.
- If you use fresh pumpkin puree (ambitious!), you might need to blot it with paper towels first—mine was too watery the first time and I ended up with pumpkin puddles instead of cookies.
- Sometimes the dough’s too sticky to roll properly. Add a tiny bit more flour if it’s unworkable, but don’t overdo it or you’ll lose that soft chew.
If You’re Feeling Adventurous: Variations I’ve Tried
- Chopped pecans or walnuts—adds nice crunch, but my youngest picks them all out (kids, right?).
- White chocolate chips—actually, I think this tastes better the next day, but some folks find it too sweet.
- Drizzle with a simple glaze (just icing sugar and a splash of milk). Once I tried maple syrup in the glaze and it was way too sweet for me, but maybe you’ll love it?
- I tried making these with coconut oil once—don’t recommend. Texture gets weird.
Equipment (And What To Do If You Don’t Have It)
- Mixing bowls (any will do; I’ve even used a saucepan in a pinch!)
- Hand mixer or stand mixer, but a sturdy wooden spoon and some elbow grease gets you there too
- Parchment paper (nice, but not strictly necessary—I’ve baked straight on the pan plenty of times)
- Cookie scoop—great if you’ve got it, but two spoons work just fine, or well-washed hands
- Wire rack (or improvise with a clean towel or even an upside-down muffin tin—did that last week!)
Storage—But Will You Even Need It?
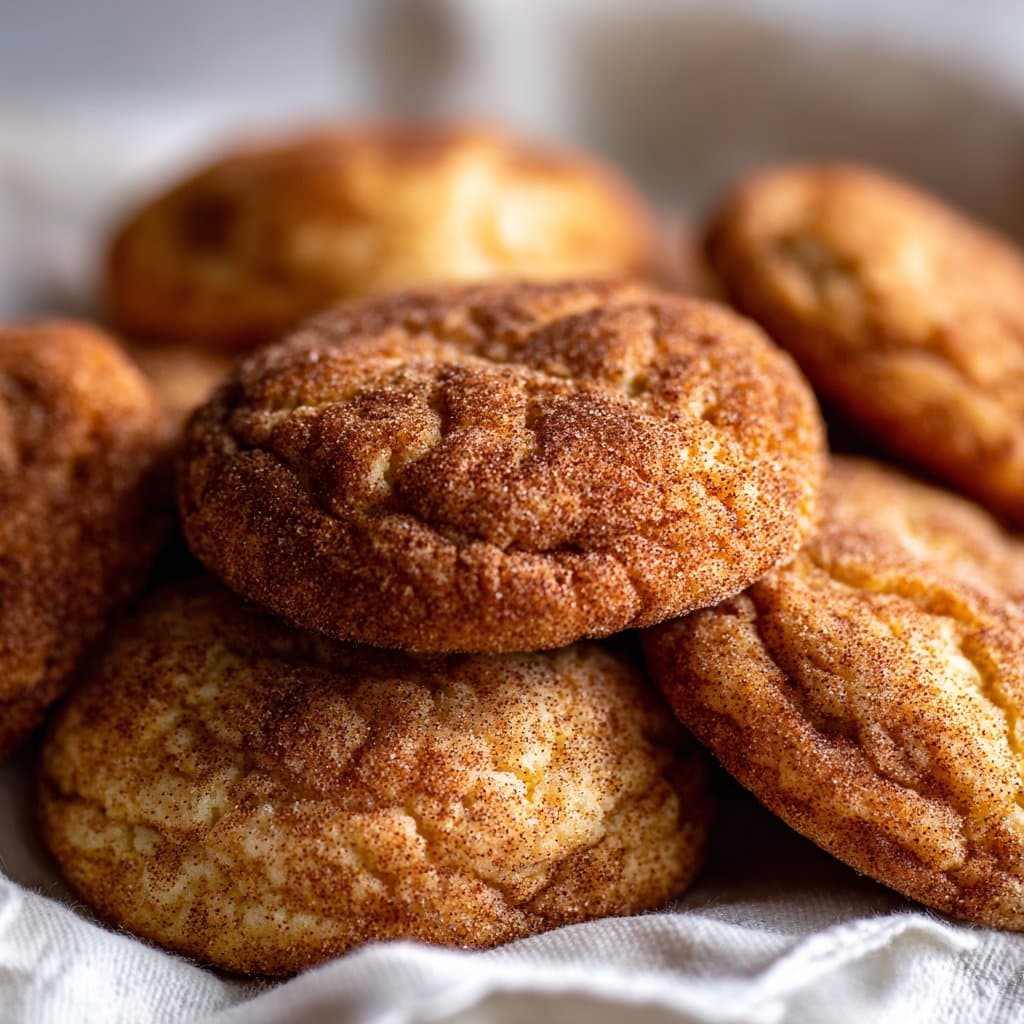
These supposedly last up to 4 days in an airtight container at room temp. Ha. In my house, cookies rarely survive more than 24 hours, but in theory, you could also freeze the dough balls and bake them off later for fresh cookies on-demand (I say “in theory” because I keep eating the frozen dough).
How I Like to Serve ’Em (And a Bit of Family Tradition)
Honestly? With a mug of something warm. I’m partial to chai or a big milky coffee, but my partner dunks theirs in hot cocoa. Sometimes we stack them up on a big plate and eat them picnic-style in the living room while watching old movies. If it’s a holiday, I’ll pile them in a basket with a checked napkin for full “cozy home” effect—very Instagram, but in a real, “I haven’t vacuumed” kind of way.
Pro Tips—A Few Lessons Learned the Hard (and Messy) Way
- Don’t skip chilling the dough. I tried to rush it once; regret. The cookies were flat and sad, and my dog wouldn’t even beg for them.
- If your cookies look underbaked, that’s actually perfect. If they look fully baked in the oven, they’ll be dry once cooled. (Learned this the hard way, more than once.)
- Don’t overmix. I sometimes get carried away with the mixer and end up with dense cookies—just mix until combined. Actually, I find it works better if I finish by hand.
FAQ—Real Questions From Real Friends (and Nosy Neighbors)
- Can I use pumpkin pie filling instead of puree? Technically, yes, but it’s sweeter and has extra spices, so the flavor will be different. If you like surprises, give it a go!
- Why is my dough so sticky? That’s normal. If it’s too sticky to roll, chill it longer or add a tablespoon more flour.
- Do I really have to use parchment? Nah. It just makes cleanup easier. I’ve buttered the pan, or even just gone commando (the pan, not me!), and it works out.
- Can I freeze these? Yep! Freeze dough balls on a tray, then pop in a zip bag. Bake from frozen, just add 1-2 min to the bake time.
- Do I need cream of tartar for “real” snickerdoodles? I’ve tried both ways—the pumpkin makes these soft even without it. But, if you want that classic tang, toss in 1/2 tsp and see what you think.
Just a Little Digression (Because Why Not?)
There’s something about baking with pumpkin that makes me feel like I’ve got my life together—even when there’s laundry on the sofa and I forgot to buy milk (again). If you ever want to geek out on pumpkin varieties, Serious Eats has a great rundown. Or if you want to go deep on snickerdoodles’ wild history, King Arthur Baking’s blog is a fun rabbit hole. Anyway, enough from me. Bake the cookies, pour yourself a cup of something hot, and let me know how it goes. Even if they turn out a bit wonky, you’ll still end up with a kitchen that smells like autumn—and really, that’s half the joy, isn’t it?

Ingredients
- 2 3/4 cups all-purpose flour
- 1/2 teaspoon baking soda
- 1/2 teaspoon cream of tartar
- 1 teaspoon ground cinnamon
- 1/2 teaspoon salt
- 1 cup unsalted butter, softened
- 1 cup granulated sugar
- 1/2 cup light brown sugar, packed
- 3/4 cup pumpkin puree
- 1 large egg
- 2 teaspoons vanilla extract
- 1/4 cup granulated sugar (for rolling)
- 1 tablespoon ground cinnamon (for rolling)
Instructions
-
1Preheat the oven to 350°F (175°C) and line two baking sheets with parchment paper.
-
2In a medium bowl, whisk together the flour, baking soda, cream of tartar, cinnamon, and salt.
-
3In a large bowl, beat the softened butter, granulated sugar, and brown sugar until light and fluffy. Add the pumpkin puree, egg, and vanilla extract, mixing until well combined.
-
4Gradually add the dry ingredients to the wet ingredients, mixing just until incorporated.
-
5In a small bowl, mix 1/4 cup granulated sugar with 1 tablespoon ground cinnamon. Scoop tablespoon-sized portions of dough, roll into balls, and coat in the cinnamon-sugar mixture.
-
6Place dough balls on prepared baking sheets, spacing them about 2 inches apart. Bake for 10-12 minutes, or until the edges are set. Cool on the baking sheet for 5 minutes before transferring to a wire rack.
Approximate Information for One Serving
Nutrition Disclaimers
Number of total servings shown is approximate. Actual number of servings will depend on your preferred portion sizes.
Nutritional values shown are general guidelines and reflect information for 1 serving using the ingredients listed, not including any optional ingredients. Actual macros may vary slightly depending on specific brands and types of ingredients used.
To determine the weight of one serving, prepare the recipe as instructed. Weigh the finished recipe, then divide the weight of the finished recipe (not including the weight of the container the food is in) by the desired number of servings. Result will be the weight of one serving.
Did you make this recipe?
Please consider Pinning it!!




