Let’s Talk Roasted Chicken (and That Irresistible Crispy Skin)
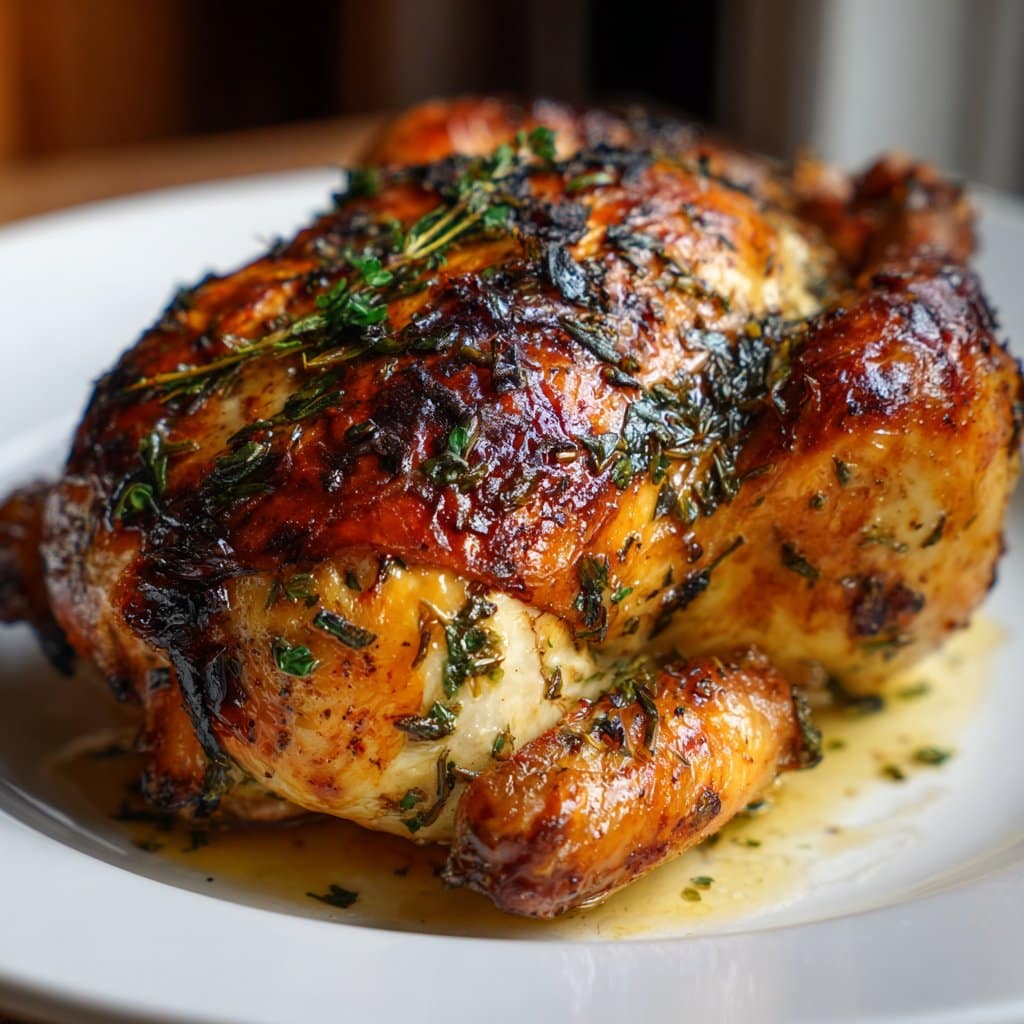
Alright, so pull up a chair. I want to tell you about the time I nearly set my smoke alarm off making this roasted chicken with crispy herb skin (not my proudest moment, but the chicken survived and, honestly, it was delicious). There’s just something about the smell of roasting chicken wafting through the house that makes everything feel a little bit better, don’t you think? My dad used to always say, “You know a house is a home by the smell of dinner,” and I guess that’s stuck with me, even if I’ve swapped his old-school roast for this slightly more herby version. Anyway, let’s get to it before I get all misty-eyed reminiscing about Sunday suppers gone by.
Why You’ll Love This (Or At Least Why My Family Does)
I make this when I want to feel like a kitchen wizard but don’t want any of the fuss — it looks fancy, but it’s honestly dead easy. My family goes absolutely nuts for this, especially the crispy skin (sometimes they fight over the wings; I’ve considered making two chickens just to avoid drama). And if you’ve ever tried to get golden, crunchy skin and ended up with something limp (been there, done that, ate the evidence), this method sorts it out. Oh, and if you’re anything like me, the herbs are an excuse to use up whatever’s lurking in that crisper drawer.
What You’ll Need (Substitutions? Of course!)
- 1 whole chicken (about 3-4 lbs; look, sometimes I grab a corn-fed bird if it’s on special, but honestly, any chicken will do)
- 3 tbsp olive oil (butter works too—my grandmother swore by it, but I like how olive oil crisps the skin)
- 1 big handful of mixed fresh herbs (I usually go for thyme, rosemary, parsley; sometimes I just use dried Italian seasoning if I’m in a rush)
- 4 garlic cloves, smashed (or honestly, two teaspoons of garlic powder if you forgot to shop)
- 1 lemon, halved (optional, but it gives a zing—sometimes I skip it if the lemon at the back of the fridge is suspicious)
- 2 tsp sea salt (Kosher salt is what I usually grab, but table salt’s fine)
- 1 tsp freshly cracked black pepper (or the pre-ground stuff if you’re feeling lazy)
How I Actually Make It (With Only Mild Chaos)
- First, preheat your oven to 425°F (220°C). I know it sounds hot, but the skin needs it. If your oven runs hot (like mine, which is basically unpredictable), maybe check on the chicken a bit earlier.
- Pat the chicken dry—seriously, use a wad of paper towels and pretend you’re giving it a spa day. Moisture is the enemy of crispiness.
- Mix olive oil, chopped herbs, smashed garlic, salt, and pepper together in a bowl. Sometimes I mix in a little lemon zest if I’m feeling extra (which is rare, if I’m honest).
- Rub the herb oil all over the chicken, getting under the skin if you can. This is where I get my hands messy (and where I usually forget to take off my watch—learn form my mistakes!).
- Tuck the lemon halves inside the chicken cavity. If you want, tie the legs together with kitchen twine, but I often skip this and just kind of squish them together. Chicken doesn’t mind.
- Roast on a rack in a roasting pan (or just in a sturdy oven-safe skillet, which I prefer because it means less washing up). Roast for 55-65 minutes, or until the skin is deeply golden and a thermometer reads 165°F (74°C) in the thickest part of the thigh.
- If the skin gets too brown before it’s cooked through, loosely tent with foil. But usually mine just turns a gorgeous color at exactly the right time—luck, or maybe the oven elves are on my side.
- Let it rest! At least 10 minutes, covered loosely with foil. This is the hardest part because everyone starts hovering, but trust me, it’s worth it. Actually, I find it works better if you let it rest closer to 20 minutes, but who’s counting?
Notes: The Things I Wish I’d Known Sooner
- Once, I tried to shortcut the drying step. The skin was rubbery. Never again.
- If you use dried herbs, cut the quantities by about a third (and don’t stress if you overdo it; it just tastes…herbier?).
- Lemons sometimes make the pan juices a bit tangy—my partner loves that, but my kids? Not so much.
Variations (Some Winners, Some Flops)
- I once swapped the herbs for za’atar and added sumac. Game changer! Highly recommend if you like a little Middle Eastern flair.
- Tried stuffing the cavity with apples and onions. Tasted fine, but honestly, the skin didn’t get as crispy. Lesson learned.
- Occasionally, I go wild and sprinkle smoked paprika on the skin. Looks dramatic, tastes great.
What If You Don’t Have a Roasting Rack?
Honestly, I just use my big old cast iron skillet most times. Or, prop the chicken up on thick slices of onion or carrot and call it a day (bonus: roasted veggies!). Roasting racks are nice, sure, but not essential in my book.
How Long Does This Keep? (Not That It Ever Lasts…)
I reckon you can keep leftovers in the fridge for up to 3 days, tightly wrapped. But in my house, leftovers are basically mythical—someone always nabs the last drumstick by midnight.
How I Like to Serve It (No Rules, Just Good Food)
We usually carve it up at the table, family style, with lots of roasted potatoes or bread to mop up the pan juices. Sometimes I throw together a quick green salad, but if it’s a Sunday, I’ll splurge and make some buttery mashed spuds (my aunt calls it ‘proper comfort food’ and I can’t disagree).
Lessons Learned: My Humble Pro Tips
- Don’t be tempted to open the oven every ten minutes. I used to, and the skin never crisped properly. Patience is a virtue—even if you’re hungry.
- Rushing the resting stage is a rookie move. I regretted it, because all the juices ran out and the chicken got dry. Learn form my impatience!
- If you forget to preheat the oven (guilty), just add 10 minutes to the cook time and hope for the best.
FAQ: Real Questions I’ve Been Asked (Some More Than Once)
- Can I use boneless chicken breasts instead?
- Technically, yes, but you’ll miss the crispy skin magic. It’s just not the same, mate.
- Do I have to use fresh herbs?
- Nope. Dried is fine (I do it all the time when the fridge is bare), just use less. For a proper herb hit, though, fresh is best.
- Can I make this ahead?
- You can roast it ahead and reheat, but honestly, I think it tastes better the next day. The skin won’t be quite as crisp, but the flavor’s deeper.
- What do you do with the pan juices?
- I pour them over the chicken, or sometimes—when I’m feeling fancy—I make a quick gravy. There’s a solid guide here if you want to give it a go.
- Any favorite resources for techniques?
- I’ve learned loads from this Bon Appétit guide—they’ve tested like, every method under the sun.
- Why is my chicken dry?
- Could be overcooked, or didn’t let it rest. Or maybe your oven runs hot—mine’s a bit temperamental, so I always check five minutes early. Also: don’t skip the oil, even if you’re tempted.
And on an unrelated note, did you know some people put mayonnaise under chicken skin before roasting? I tried it once—honestly, didn’t love it, but to each their own.

Ingredients
- 1 whole chicken (about 4 lbs)
- 2 tablespoons olive oil
- 1 tablespoon fresh rosemary, chopped
- 1 tablespoon fresh thyme, chopped
- 1 tablespoon fresh parsley, chopped
- 4 cloves garlic, minced
- 1 teaspoon salt
- 1/2 teaspoon black pepper
- 1 lemon, halved
Instructions
-
1Preheat the oven to 425°F (220°C). Pat the chicken dry with paper towels.
-
2In a small bowl, mix olive oil, rosemary, thyme, parsley, garlic, salt, and black pepper.
-
3Gently loosen the skin over the chicken breast and thighs. Rub the herb mixture under the skin and all over the outside of the chicken.
-
4Stuff the chicken cavity with lemon halves. Tie the legs together with kitchen twine.
-
5Place the chicken breast-side up on a rack in a roasting pan. Roast for 1 hour 20 minutes, or until the skin is golden and crispy and the internal temperature reaches 165°F (74°C).
-
6Let the chicken rest for 10 minutes before carving. Serve and enjoy.
Approximate Information for One Serving
Nutrition Disclaimers
Number of total servings shown is approximate. Actual number of servings will depend on your preferred portion sizes.
Nutritional values shown are general guidelines and reflect information for 1 serving using the ingredients listed, not including any optional ingredients. Actual macros may vary slightly depending on specific brands and types of ingredients used.
To determine the weight of one serving, prepare the recipe as instructed. Weigh the finished recipe, then divide the weight of the finished recipe (not including the weight of the container the food is in) by the desired number of servings. Result will be the weight of one serving.
Did you make this recipe?
Please consider Pinning it!!




