If You’ve Got Sourdough Discard, Make These Donuts
So, you know how every time you feed your sourdough starter, you end up with this mysterious little bowl of “discard” staring you down? Well, after my third batch of pancakes in a row (my kids were officially over it), I decided to go rogue—donuts. And you know what? Not the worst idea I’ve had at 7:30am. The first time around, I literally forgot to set a timer and nearly smoked out the kitchen, but the kids still devoured the less-charred ones. There’s just something about fresh donuts, especially when you can tell yourself it’s not waste—it’s breakfast ingenuity, right?

Why I Keep Coming Back to This Recipe
I make these when I want to feel a bit fancy but can’t face a grocery store run (plus, the guilt of tossing discard is real). My family goes absolutely nuts for these donuts—sometimes they even stick around to help with the glaze, if you can imagine that. These are way lighter than you’d think, especially for something using leftover starter and, honestly, the tangy little zip? Chef’s kiss. I used to get annoyed at the stickiness of the dough, but now I just embrace it (flour is your best mate here).
What You’ll Need (and a Few Smuggled-in Swaps)
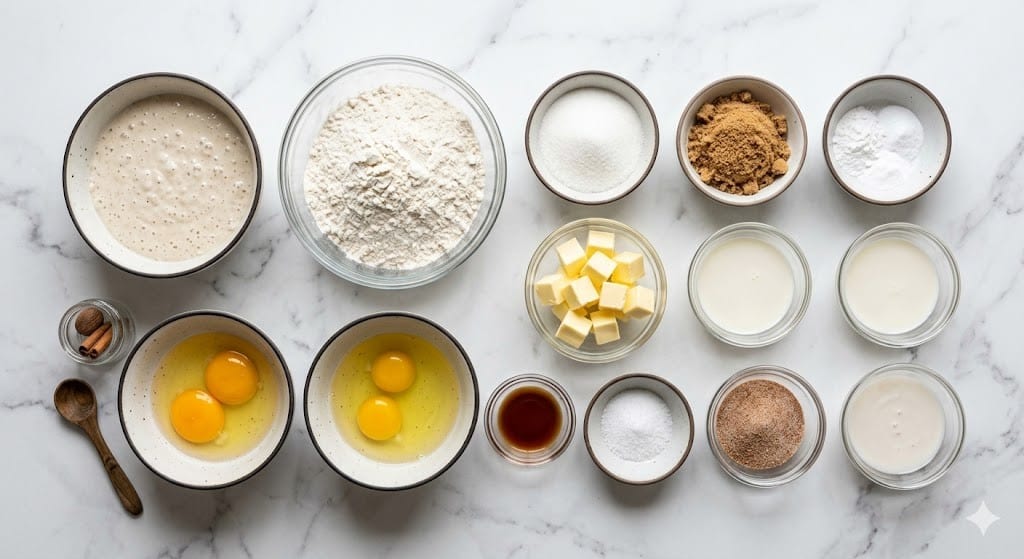
- 1 cup (about 240g) Sourdough Discard (unfed—direct form the fridge works fine)
- 2 cups all-purpose flour (sometimes I swap 1/2 cup for whole wheat if I’m feeling virtuous, but let’s be honest, not often)
- 1/2 cup granulated sugar (brown sugar is okay in a pinch, makes it a bit more caramelly)
- 2 teaspoons baking powder
- 1/2 teaspoon baking soda
- 1/2 teaspoon salt (my grandmother always insisted on kosher salt, but table’s totally fine)
- 2 large eggs
- 1/2 cup milk (dairy or, occasionally, oat milk when the fridge is suspiciously empty)
- 1/4 cup unsalted butter, melted (and cooled a smidge so the eggs don’t scramble—learned that the hard way)
- 1 teaspoon vanilla extract (I eyeball it, sue me)
- Oil for frying (I usually use canola or vegetable, but peanut oil is dreamy if you can swing it)
- Optional: coarse sugar or cinnamon sugar for dusting
- Optional glaze: 1 cup powdered sugar + 2 tablespoons milk (give or take)
Let’s Get Into It: How I Make Sourdough Discard Donuts
- In a big bowl, whisk together your flour, sugar, baking powder, baking soda, and salt—the “dry team.”
- In another bowl (or a big measuring jug, which I find easier), mix your eggs, milk, melted butter, vanilla, and that lively sourdough discard until it’s nice and smooth. It’ll look odd, probably a tiny bit lumpy, but that’s totally fine.
- Pour your wet team into the dry. Mix with a wooden spoon or spatula until just combined. Don’t overdo it—this is really where less is more (unless lumpy donut bricks are your thing). The dough will be sticky at this point—I dust my hands with flour and just embrace the mess.
- On a generously floured surface, gently tip out the dough. Pat or very lightly roll it to about 3/4″ thick. No need to go ruler-precise. If it sticks, sprinkle on a bit more flour—it always does for me.
- Cut out rings. If you don’t have a donut cutter, two different-sized glasses do the trick (or honestly, use anything round—one time I grabbed a cookie cutter and a bottle cap. Worked just fine).
- Heat about 2 inches of oil in a heavy-bottomed pot until it shimmers; 350°F if you’ve got a thermometer. If not, drop in a scrap of dough: if it bubbles and puffs right away, you’re good to go.
- Working in batches (don’t crowd them!), fry donuts for about 1–2 minutes per side, or until they’re golden brown and delicious looking. Flip with a slotted spoon; this is where I sometimes sneak a taste of those little donut holes.
- Remove donuts to a rack lined with paper towels so they don’t get soggy-bottomed. Let them cool just a minute—enough so you don’t burn your fingers.
- Toss warm donuts in sugar, cinnamon sugar, or dip in a simple glaze (powdered sugar + a splash of milk). Or just eat plain! No one in my house ever waited long enough for the glaze, anyway.
Notes That Saved Me Headaches
- My dough is always sticky, and I kind of like it that way—it makes for fluffier donuts after frying. Just keep flouring your hands if you get stuck.
- One time I left the dough too long before frying and it got a bit sad; fresher is better. But hey, still edible.
- If you’re nervous about frying, do a test donut hole. I never regret this, except for the fact that I eat the test every time.
If You Want to Switch Things Up…
- I tried tossing in lemon zest once—pretty tasty, a little like a morning bun if you squint.
- Chocolate chips seemed smart, but melted out into the oil. Maybe skip those.
- You can swap in buttermilk for regular milk for some extra tang. I liked that version more than anyone else did.

What You Need (Or What I Fudge)
- Medium and large mixing bowls. Or a measuring jug if the bowls are all dirty.
- Whisk, wooden spoon, or spatula. I’ve even used a fork in a pinch (not ideal, but you work with what you’ve got, eh?).
- Heavy pot or Dutch oven for frying. A deep pan works too—though you do want to have a bit of depth so the oil doesn’t bubble over.
- Slotted spoon or kitchen spider. If you’re feeling fancy, but I’ve totally used regular tongs before.
- Donut cutter or round biscuit cutters (see my confession above about bottle caps).
- Wire rack and paper towels. Or just newspaper on a tray—I grew up seeing that, and it still does the job.
- Thermometer if you’ve got one. But if not, the sight-sound-smell test does pretty well.
How to Store (If There’s Any Left)
Okay, these theoretically keep in an airtight container at room temp for 1–2 days. I also stuck a batch in the freezer once—took a few seconds in the microwave to revive. But honestly, in my house, they mysteriously disappear the first day and I’ve stopped asking questions.
Serving: My Favorite Part
We usually pile these up on a plate and let everyone grab their own. If I’m feeling like Mum of the Year, I set out bowls of glaze, jam, or Nutella (the kids think that’s the “restaurant way”). Some days, it’s just coffee and warm donuts for me and that’s happiness enough.
What Experience (and Minor Regret) Taught Me
- I once tried rolling the dough too thin—ended up with donut crisps. Not horrible, but not what you want.
- If you rush the frying and crank the heat too high (guilty as charged), the outsides brown way before the insides cook. Take it steady—patience pays off here.
- Cutting the donuts ahead and leaving them uncovered dries them out. I actually prefer to cut and fry batch by batch.
FAQs: Only Slightly Exaggerated for Effect
- Can I bake these instead of frying?
Well, you can, and I did try it once—let’s just say mine were more scone than donut. Still nice, but that real donut vibe comes from frying, I think. - Does the discard have to be unfed?
Yes, just use it straight from the fridge. Actually, I find it works better if it hasn’t been fed that day—more tang, less hassle. - Can I make the dough ahead?
Sort of! Mix it up and chill it for a bit (like an hour), but longer than that and it gets a little sluggish. On second thought, fresh is best for me. - What’s the best oil for frying?
I usually go with what’s cheapest at the shop, to be totally honest. But peanut or canola both work nicely and don’t add any odd flavors. - Mine puffed unevenly—what gives?
Oh, that happens! Sometimes the oil temp’s a bit off, or maybe the dough was a tad thick. Tastes great either way.
And that’s it—my unruly, delicious way to turn sourdough discard into something everyone actually wants to eat. Let me know if you tweak it—I’m always curious how it goes in someone else’s weird, wonderful kitchen.
Ingredients
- 1 cup (about 240g) sourdough discard (unfed—direct form the fridge works fine)
- 2 cups all-purpose flour (sometimes I swap 1/2 cup for whole wheat if I’m feeling virtuous, but let’s be honest, not often)
- 1/2 cup granulated sugar (brown sugar is okay in a pinch, makes it a bit more caramelly)
- 2 teaspoons baking powder
- 1/2 teaspoon baking soda
- 1/2 teaspoon salt (my grandmother always insisted on kosher salt, but table’s totally fine)
- 2 large eggs
- 1/2 cup milk (dairy or, occasionally, oat milk when the fridge is suspiciously empty)
- 1/4 cup unsalted butter, melted (and cooled a smidge so the eggs don’t scramble—learned that the hard way)
- 1 teaspoon vanilla extract (I eyeball it, sue me)
- Oil for frying (I usually use canola or vegetable, but peanut oil is dreamy if you can swing it)
- Optional: coarse sugar or cinnamon sugar for dusting
- Optional glaze: 1 cup powdered sugar + 2 tablespoons milk (give or take)
Instructions
-
1In a big bowl, whisk together your flour, sugar, baking powder, baking soda, and salt—the “dry team.”
-
2In another bowl (or a big measuring jug, which I find easier), mix your eggs, milk, melted butter, vanilla, and that lively sourdough discard until it’s nice and smooth. It’ll look odd, probably a tiny bit lumpy, but that’s totally fine.
-
3Pour your wet team into the dry. Mix with a wooden spoon or spatula until just combined. Don’t overdo it—this is really where less is more (unless lumpy donut bricks are your thing). The dough will be sticky at this point—I dust my hands with flour and just embrace the mess.
-
4On a generously floured surface, gently tip out the dough. Pat or very lightly roll it to about 3/4″ thick. No need to go ruler-precise. If it sticks, sprinkle on a bit more flour—it always does for me.
-
5Cut out rings. If you don’t have a donut cutter, two different-sized glasses do the trick (or honestly, use anything round—one time I grabbed a cookie cutter and a bottle cap. Worked just fine).
-
6Heat about 2 inches of oil in a heavy-bottomed pot until it shimmers; 350°F if you’ve got a thermometer. If not, drop in a scrap of dough: if it bubbles and puffs right away, you’re good to go.
-
7Working in batches (don’t crowd them!), fry donuts for about 1–2 minutes per side, or until they’re golden brown and delicious looking. Flip with a slotted spoon; this is where I sometimes sneak a taste of those little donut holes.
-
8Remove donuts to a rack lined with paper towels so they don’t get soggy-bottomed. Let them cool just a minute—enough so you don’t burn your fingers.
-
9Toss warm donuts in sugar, cinnamon sugar, or dip in a simple glaze (powdered sugar + a splash of milk). Or just eat plain! No one in my house ever waited long enough for the glaze, anyway.
Approximate Information for One Serving
Nutrition Disclaimers
Number of total servings shown is approximate. Actual number of servings will depend on your preferred portion sizes.
Nutritional values shown are general guidelines and reflect information for 1 serving using the ingredients listed, not including any optional ingredients. Actual macros may vary slightly depending on specific brands and types of ingredients used.
To determine the weight of one serving, prepare the recipe as instructed. Weigh the finished recipe, then divide the weight of the finished recipe (not including the weight of the container the food is in) by the desired number of servings. Result will be the weight of one serving.
Did you make this recipe?
Please consider Pinning it!




