So About These Baked Meatballs…
You know when you’re just done with fiddly dinners and you want something warm, hearty, and not a fuss? That’s when I pull out this baked meatballs recipe. Actually, my mum used to call these “lazy Sunday meatballs,” which is funny because we’d eat them on Tuesdays half the time. I remember the first time I tried making these solo—I accidentally used ground turkey instead of beef and was so flustered I forgot the breadcrumbs completely. The result? Well, I don’t recommend it, but my dog loved them. Anyway, since then, I’ve got it mostly sorted (key word: mostly). And if you’ve ever tried frying meatballs and ended up with oil splatters everywhere, you’re probably going to thank me for this baked version.
Why You’ll Love This (Or At Least, Why I Do)
I make these whenever I want to feel like I’ve really cooked without, you know, actually cooking all day. My family goes crazy for these because they’re crispy on the outside, juicy in the middle, and the oven does like 90% of the work (I mean, who’s got time to babysit a pan?). The other night my partner actually hid the last two meatballs in a Tupperware behind the oat milk—cheeky! (Oh, and I used to dread rolling meatballs, but honestly, it’s kind of soothing if you just embrace the mess.)
What You’ll Need: Ingredients
- 500g ground beef (sometimes I mix in pork, or do all turkey if I’m pretending to be healthy)
- 1/2 cup breadcrumbs (panko is nice, but I’ve totally blitzed up stale bread instead—my grandmother would approve)
- 1/4 cup milk (whole, but I’ve subbed in oat milk and nobody noticed)
- 1 small onion, finely chopped (or, honestly, onion powder works if you’re in a hurry)
- 2 garlic cloves, minced—though jarred garlic totally works
- 1 egg
- 1/4 cup grated Parmesan (or whatever hard cheese is lurking in the fridge)
- 2 tbsp fresh parsley, chopped (dried’s fine, promise)
- 1 tsp dried oregano
- Salt and pepper (I never measure, but probably 1 tsp salt and a few grinds of pepper)
- Olive oil, just a drizzle
How I Make Them (Don’t Stress If You Mess Up a Step)
- First up, preheat your oven to 200°C (about 400°F, but who’s counting). Line a big baking tray with foil or baking paper—saves you a washing-up headache later.
- In a little bowl, soak your breadcrumbs in the milk for a few minutes. This is the trick for super tender meatballs, apparently; I didn’t believe it either, but it works.
- Now, in a bigger bowl, throw in the beef, onion, garlic, egg, cheese, herbs, salt, pepper, and the breadcrumb-milk mush. I usually just mix this with my hands (rings off!), but a wooden spoon is fine if you’re squeamish.
- Roll the mixture into balls—somewhere between a golf ball and a ping pong ball? I get about 16, but who’s counting. Plonk them on your tray. If they’re not perfectly round, nobody cares.
- Drizzle a smidge of olive oil over the top. This is where I usually sneak a taste of the raw mix, but probably don’t do that. Actually, on second thought, wait till they’re cooked.
- Bake for 20-25 minutes. They’ll look weird halfway through (kinda pale and wobbly), but trust the process. Sometimes I flip them halfway, sometimes not. Depends how lazy I’m feeling.
- Let them sit a couple of minutes before serving. Or don’t. Impatience is real.
Notes I Wish Someone Had Told Me
- If you use turkey or chicken, they cook faster and might dry out, so shave a few minutes off the bake time.
- I always forget to grease my tray. Honestly, baking paper is your best friend here.
- The mixture is supposed to be sticky. If it’s soupy, add more breadcrumbs (but a little stickiness means juicier meatballs).
- They reheat beautifully. Actually, I think they taste better the next day, but not everyone agrees with me at home.
Variations I’ve Tried (And One I Don’t Recommend)
- I once added chopped spinach to the mix—pretty good, gets some green in the kids, if you care about that.
- I swapped the beef for lentils once for a veggie version. It sort of held together but tasted like a sad falafel. I’d stick to beans for vegetarian, honestly. Here’s a lentil meatball recipe that actually works.
- Sometimes I stir in a bit of chilli flakes if I’m feeling bold. It’s a gamble; half the family whines, half loves it.
What If I Don’t Have…?
I always say a good baking tray is essential… except last month I used a glass casserole dish when my tray was in the dishwasher. Worked just fine, clean-up was no worse. If you only have a toaster oven, just cook them in batches (or make smaller batches, if you’re not feeding a rugby team).

How to Store Them (Not That We Ever Have Leftovers)
In theory, these will keep in the fridge 3-4 days in an airtight container. In honest practice, they rarely last more than a day in our house, because someone always ‘samples’ them late at night. You can freeze them cooked—just pop them on a tray, freeze till solid, then chuck in a bag. To reheat, I just nuke them in the microwave or warm them in the oven at 160°C (that’s 320°F for anyone in the US). Here’s a nerdy storage guide if you want more info: how to freeze and reheat meatballs.
How I Love to Serve Them
Classic: Plop them on spaghetti with jarred tomato sauce (yes, sometimes I use jarred, sue me). Or, pile them on a crusty Italian roll with melty mozzarella for a meatball sub. My uncle used to dunk them in brown gravy instead of tomato sauce—no idea why, but it’s weirdly good. And if you’re feeling fancy, a little fresh basil and a sprinkle of extra cheese never hurt. Every now and then, we just pop them with toothpicks and call it dinner—no rules.
Stuff I’ve Learned the Hard Way
- Don’t rush the mixing step. I once tried to blitz everything in a food processor—ended up with meat paste. Hand-mixing is slower, but you’ll thank yourself later.
- If the oven’s not hot enough, they steam and turn pale. Ick. Preheat properly!
- I sometimes over-bake thinking they’ll get crispier, but really, they just dry out. Set a timer, trust the process.
People Ask Me All the Time… (FAQ)
- Can I make these ahead? Yep, honestly, they’re almost better as leftovers. Just reheat gently; otherwise, they go a bit rubbery.
- Do I have to use breadcrumbs? Not really! I’ve subbed in crushed crackers, oats, even cornflakes (the plain sort). Turns out fine.
- Is it ok to freeze raw meatballs? Sure, just freeze them on a tray, then bag them up. Bake straight from frozen, just add five-ish minutes.
- My meatballs fell apart, what happened? Usually not enough binder (egg, breadcrumbs, or milk). Or you mixed them too much. Honestly, it’s happened to me more times than I care to admit!
- Can I make these gluten free? Absolutely. Swap the breadcrumbs for gluten-free ones—works a treat. Here’s a reliable gluten-free recipe I like for inspo.
Oh, and random side note: If you ever find yourself with leftover meatballs and a rogue pita, my friend swears by meatball gyros—can’t say I’ve tried it, but it sounds wild.
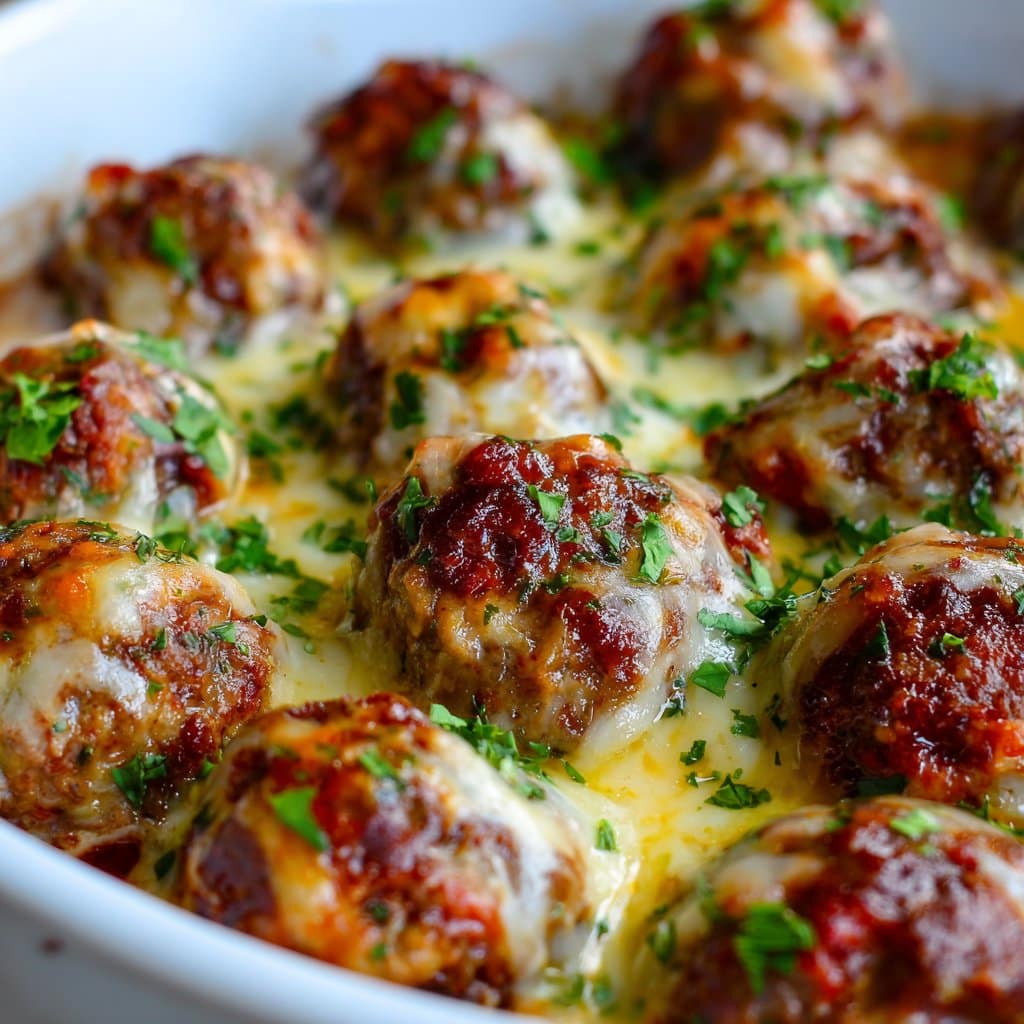
Ingredients
- 500g ground beef
- 1/2 cup breadcrumbs
- 1/4 cup grated Parmesan cheese
- 1 large egg
- 2 cloves garlic, minced
- 1/4 cup chopped fresh parsley
- 1 teaspoon dried oregano
- 1/2 teaspoon salt
- 1/4 teaspoon black pepper
- 1/2 cup milk
Instructions
-
1Preheat the oven to 400°F (200°C). Line a baking sheet with parchment paper or lightly grease it.
-
2In a large bowl, combine ground beef, breadcrumbs, Parmesan cheese, egg, garlic, parsley, oregano, salt, pepper, and milk.
-
3Mix the ingredients until just combined. Do not overmix.
-
4Shape the mixture into 1.5-inch meatballs and place them evenly on the prepared baking sheet.
-
5Bake for 20-25 minutes, or until the meatballs are cooked through and browned on the outside.
-
6Serve hot with your favorite sauce or over pasta.
Approximate Information for One Serving
Nutrition Disclaimers
Number of total servings shown is approximate. Actual number of servings will depend on your preferred portion sizes.
Nutritional values shown are general guidelines and reflect information for 1 serving using the ingredients listed, not including any optional ingredients. Actual macros may vary slightly depending on specific brands and types of ingredients used.
To determine the weight of one serving, prepare the recipe as instructed. Weigh the finished recipe, then divide the weight of the finished recipe (not including the weight of the container the food is in) by the desired number of servings. Result will be the weight of one serving.
Did you make this recipe?
Please consider Pinning it!!




