First Things First: Why I Keep Making These Butterfinger Caramel Crunch Bars
So, funny story – the first time I tried my hand at these bars, I actually meant to make some fancy layered fudge for a potluck, but then I discovered (with some mild horror) that I’d bought Butterfinger instead of peanut butter cups. And the rest is sweet, crunchy, sticky, oddly perfect history. We now call these crunchy bars “Mom’s accidental masterpiece” at our house, and honestly, I’m not even mad at that – they disappear faster than I can hide a spare bar in the back of the fridge. Like, is there a hidden portal in there the kids use? Never figured that out. Anyway, these bars are crunchy, gooey, chocolatey, and make my whole kitchen smell like happiness—if that’s a thing.
Why You’ll Love Making (and Eating) This
I usually break these out when we have last-minute company or I need a quick bribe for the kids to help me fold laundry. (I say “help,” but you know how that usually goes.) My family absolutely devours them—seriously, even my brother-in-law who allegedly “doesn’t like sweets” was asking for thirds. And here’s a hot take: they taste even better the next day if you can keep your clan from inhaling them all at once (which, for me, happens about as often as a blue moon). Sometimes caramel is a bit fussy, but don’t let that scare you off, because these are pretty forgiving. I’ve burned a batch or two, but then I sort of scraped off the too-caramelized part and everything was still fine (don’t tell).
What You’ll Need (Aka, the Ingredients List)
- 5 full-size Butterfinger bars (sometimes I use fun-size if that’s all I’ve got hidden in the pantry, about 10-12 minis, crush them up by hand – get the kids involved if you want chaos)
- 1 box (about 12 oz or 340g) Ritz crackers, crumbled – graham crackers work in a pinch (but I like the saltiness from Ritz more)
- 1 cup (225g) unsalted butter – I use salted if that’s all that’s left in the fridge and just skip the extra pinch of salt later
- 1 cup (200g) packed light brown sugar (granulated works, though the flavor is a bit different – my grandma swore by dark brown; it’s a deeper vibe)
- 1/2 cup (120ml) heavy cream (a splash of milk works in a pinch but honestly isn’t quite as creamy)
- 1 teaspoon vanilla extract (the real stuff is best, but I’ve reached for imitation in desperate times and frankly, nobody noticed)
- 1 1/2 cups (roughly 260g) milk chocolate chips – or just break up a couple of chocolate bars; I won’t tell anyone
- Optional: pinch of flaky sea salt for sprinkling (my sister rolls her eyes at this, but I stand by it for the crunch)
Let’s Make These Crunch Bars (My Not-So-Precise Method)
- Prepare your 9×13-inch pan by lining it with parchment paper. Or, if you’re me and realize too late you’ve used it all up on roast veggies, give it a good grease with butter or baking spray. Prepping now saves a lot of angry muttering when you try to get the bars out later.
- Start by crushing up the Ritz crackers. I toss mine in a zip-top bag and slam them with a rolling pin (or in one embarrassing moment, my kid’s water bottle), but honestly, you can just use your clean hands and squish until you’ve got almost-crumbs.
- Scatter two-thirds of the cracker bits thoughtfully (but not artfully – who needs the stress) into the lined pan, making an even base. Save the rest for later, trust me.
- Now for the caramel: in a medium saucepan, melt the butter over medium heat, then stir in the brown sugar and cream. Bring to a gentle boil while stirring—don’t wander off here; this is not a good “quick email check” step.
- Let the caramel boil for about 3 minutes (I once tried skimping, and the bars were more like taffy… live and learn). Then, take it off the heat and stir in your vanilla (carefully, it’ll bubble and grumble at you).
- Pour about half (eyeball it, that’s fine) over the cracker layer, then sprinkle on half your crushed Butterfinger pieces. It will look like a hot mess at this point. Don’t panic – that’s normal!
- Scatter over the rest of your crackers, pour the remaining caramel as evenly as you can, then finish with the rest of the Butterfinger bits.
- This is my favorite bit: melt your chocolate chips in the microwave in 30-second bursts (stir every time so you don’t get weird burnt bits). Or use a double boiler if you’re feeling fancy. Drizzle (or just plop and smooth) the chocolate all over the top.
- Optional: A little sprinkle of sea salt if you’re a salty-sweet person like me.
- Let the whole thing cool until the chocolate is set. The fridge is fastest, but if your fridge looks anything like mine after a grocery run, finding space is an adventure all on its own.
- Slice into bars—big squares if you’re feeling generous, or bite-sized chunks for sneaky treats.
Little Notes, From My Kitchen to Yours
- If you try to cut them while they’re still warm, you might end up with a caramel avalanche. But hey, isn’t a bit of a mess half the fun?
- Don’t stress too much about measurements – I’ve definitely thrown these together with “close enough” amounts, and they’ve always turned out edible (sometimes even better…)
Variations (A Few Successes and a Flop)
- Once I swapped out the Butterfingers for Reese’s Cups. Good, but not quite as epic.
- Cornflakes work instead of crackers if you’re feeling cereal vibes – gives an extra crispy crunch, which I love with morning coffee.
- Tried marshmallows once. Wouldn’t recommend. They kind of dissolve weird, so skip that unless you aim for a science experiment.
No Fancy Tools? No Biggie
If you don’t have a 9×13 pan, an 8×8 works—your bars just end up thicker, which, come to think of it, isn’t really a problem. If you’re pan-less, a baking sheet with higher sides, lined well, can be pressed into service (pun intended). I’ve even made a half batch in a bread pan once, so don’t sweat it.
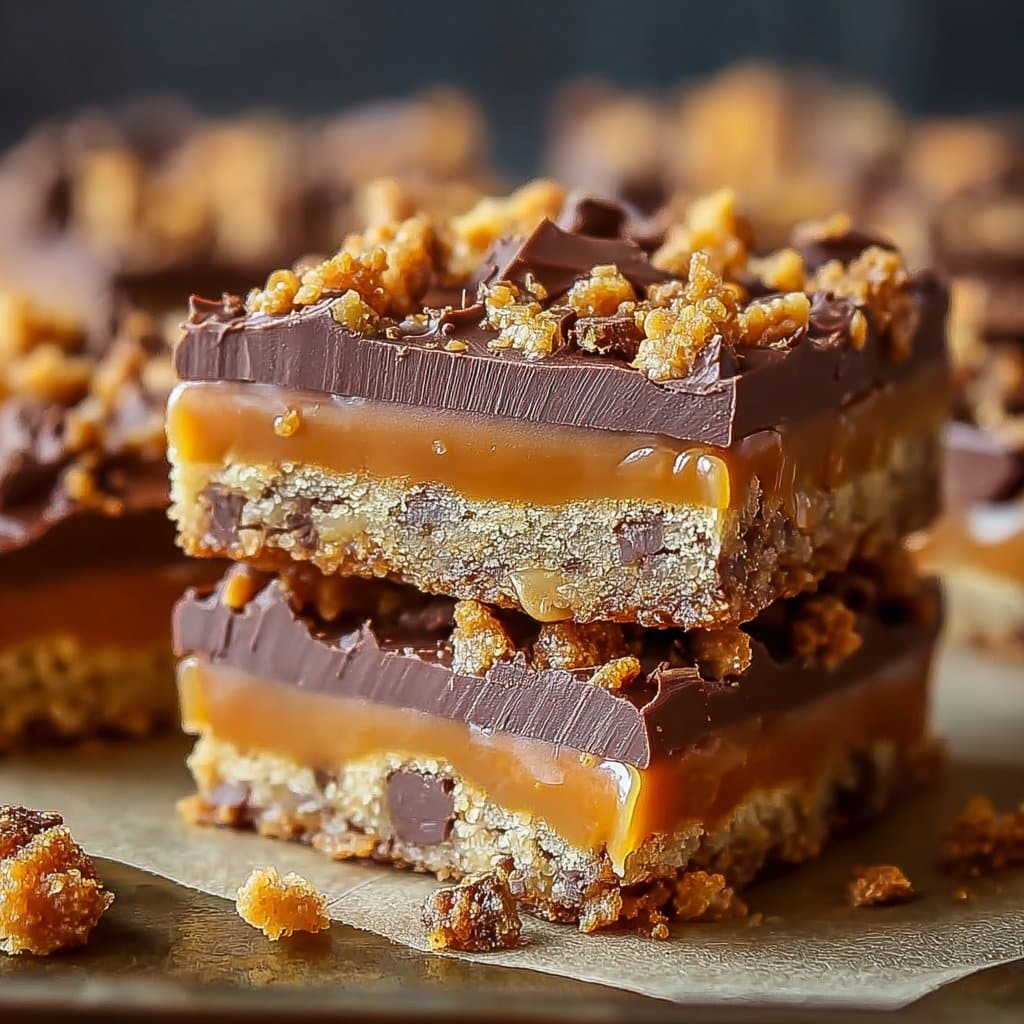
How to Store These Crunchy Beauties
You can store them in an airtight container at room temp for up to three days, or in the fridge if your house gets warm (I think they taste better cold, but that’s just me). Though honestly, in my house these bars are like socks in the dryer – they just vanish within 24 hours, no trace. If by some miracle you’ve got leftovers, freezing works fine too.
Here’s How I Like to Serve Them
Serve with a glass of milk or hot coffee. (If I’m feeling extra, I might do a scoop of vanilla ice cream on the side, but that’s only for special occasions.) My family tradition – or accidental habit, really – is to eat them straight over the sink so you don’t drop chocolate everywhere.
Stuff I Learned the Hard Way (Pro Tips)
- Never rush the caramel, unless you enjoy scraping burnt sugar off pans (yeah, I’ve done it… once was enough).
- Let the bars cool completely before cutting – impatience leads to sticky fingers and messy squares; if you must sneak a corner, I won’t judge, but you’ve been warned.
- Trying to use “just a smidge” less chocolate means the layers won’t quite set as richly – so don’t get stingy.
Wait, Do People Really Ask These? (FAQ That’s Actually Been Asked)
- Can I use low-fat substitutes? – Well, technically, yes, you could try light butter or reduced-fat Ritz, but I haven’t, and I kind of don’t want to know, if I’m honest. Let me know if you try!
- Can I double it? – Absolutely; just use two pans or make thicker bars. Double the fun, right?
- Do I have to use Butterfinger? – I get it, sometimes you gotta work with what you’ve got. Try crushed toffee or those crispy peanut butter candies. I just wouldn’t go fruity—once used Skittles by accident (don’t ask)—not great.
- How do I gift these? – They travel really well. I usually set them in cupcake liners in a cookie tin so they don’t stick. (Also, Martha Stewart has some cute packaging ideas at her site, if you want to go all out.)
- Got a shortcut for melting chocolate? – Totally! I sometimes just pour warm caramel on, then instantly sprinkle chopped chocolate over the top and cover the pan. Let it sit for a few minutes, spread, boom – done.
Since you’ve made it this far, if you like playing around with candy-bar bakes, check out Sally’s homemade Butterfinger recipe or browse pantry hacks at Serious Eats – that’s where I go when I want to procrastinate folding the laundry yet again.
Happy baking, and may your bars crunch, your caramel not burn, and your family leave you at least one piece for tomorrow. Cheers, pal!
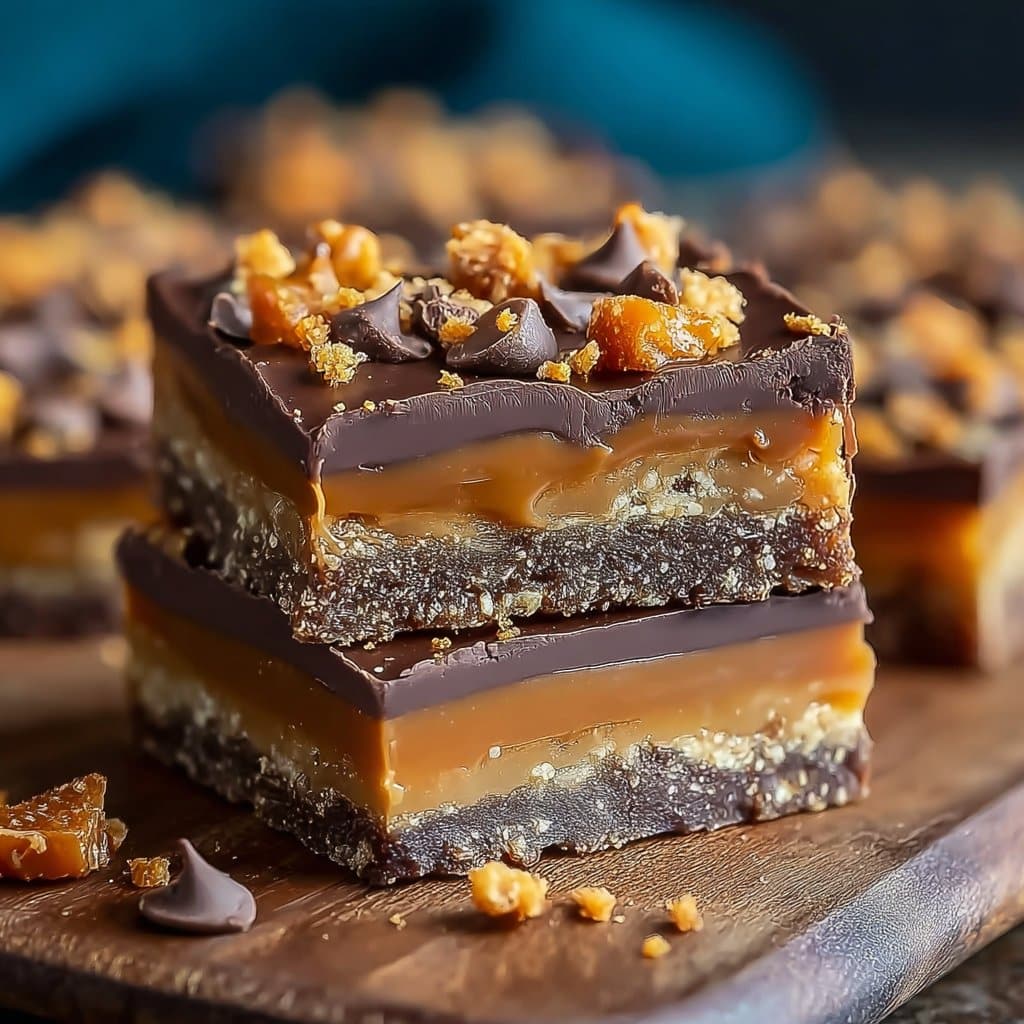
Ingredients
- 2 cups crushed graham crackers
- 1/2 cup unsalted butter, melted
- 1 cup caramel bits or soft caramels
- 2 tablespoons heavy cream
- 1 cup semi-sweet chocolate chips
- 1 1/2 cups chopped Butterfinger candy bars
- 1/3 cup chopped pecans (optional)
- 1/4 teaspoon sea salt
Instructions
-
1Preheat oven to 350°F (175°C). Line an 8×8-inch baking pan with parchment paper.
-
2In a medium bowl, combine crushed graham crackers and melted butter. Press the mixture firmly into the bottom of the lined pan to form a crust.
-
3Bake the crust for 8-10 minutes, then remove from oven and set aside.
-
4In a microwave-safe bowl, melt caramel bits and heavy cream together in 30-second intervals, stirring until smooth. Pour caramel evenly over the crust and sprinkle with sea salt.
-
5Sprinkle the chopped Butterfinger candy bars and pecans evenly over the caramel layer.
-
6Melt chocolate chips in the microwave until smooth, then drizzle over the bars. Refrigerate for at least 1 hour before slicing and serving.
Approximate Information for One Serving
Nutrition Disclaimers
Number of total servings shown is approximate. Actual number of servings will depend on your preferred portion sizes.
Nutritional values shown are general guidelines and reflect information for 1 serving using the ingredients listed, not including any optional ingredients. Actual macros may vary slightly depending on specific brands and types of ingredients used.
To determine the weight of one serving, prepare the recipe as instructed. Weigh the finished recipe, then divide the weight of the finished recipe (not including the weight of the container the food is in) by the desired number of servings. Result will be the weight of one serving.
Did you make this recipe?
Please consider Pinning it!!




